Working with Sites and Rooms
You can access both the Sites and the Rooms via the Dashboard under the scheduling tab, or by searching for them via the global navigation.
Site Record Details
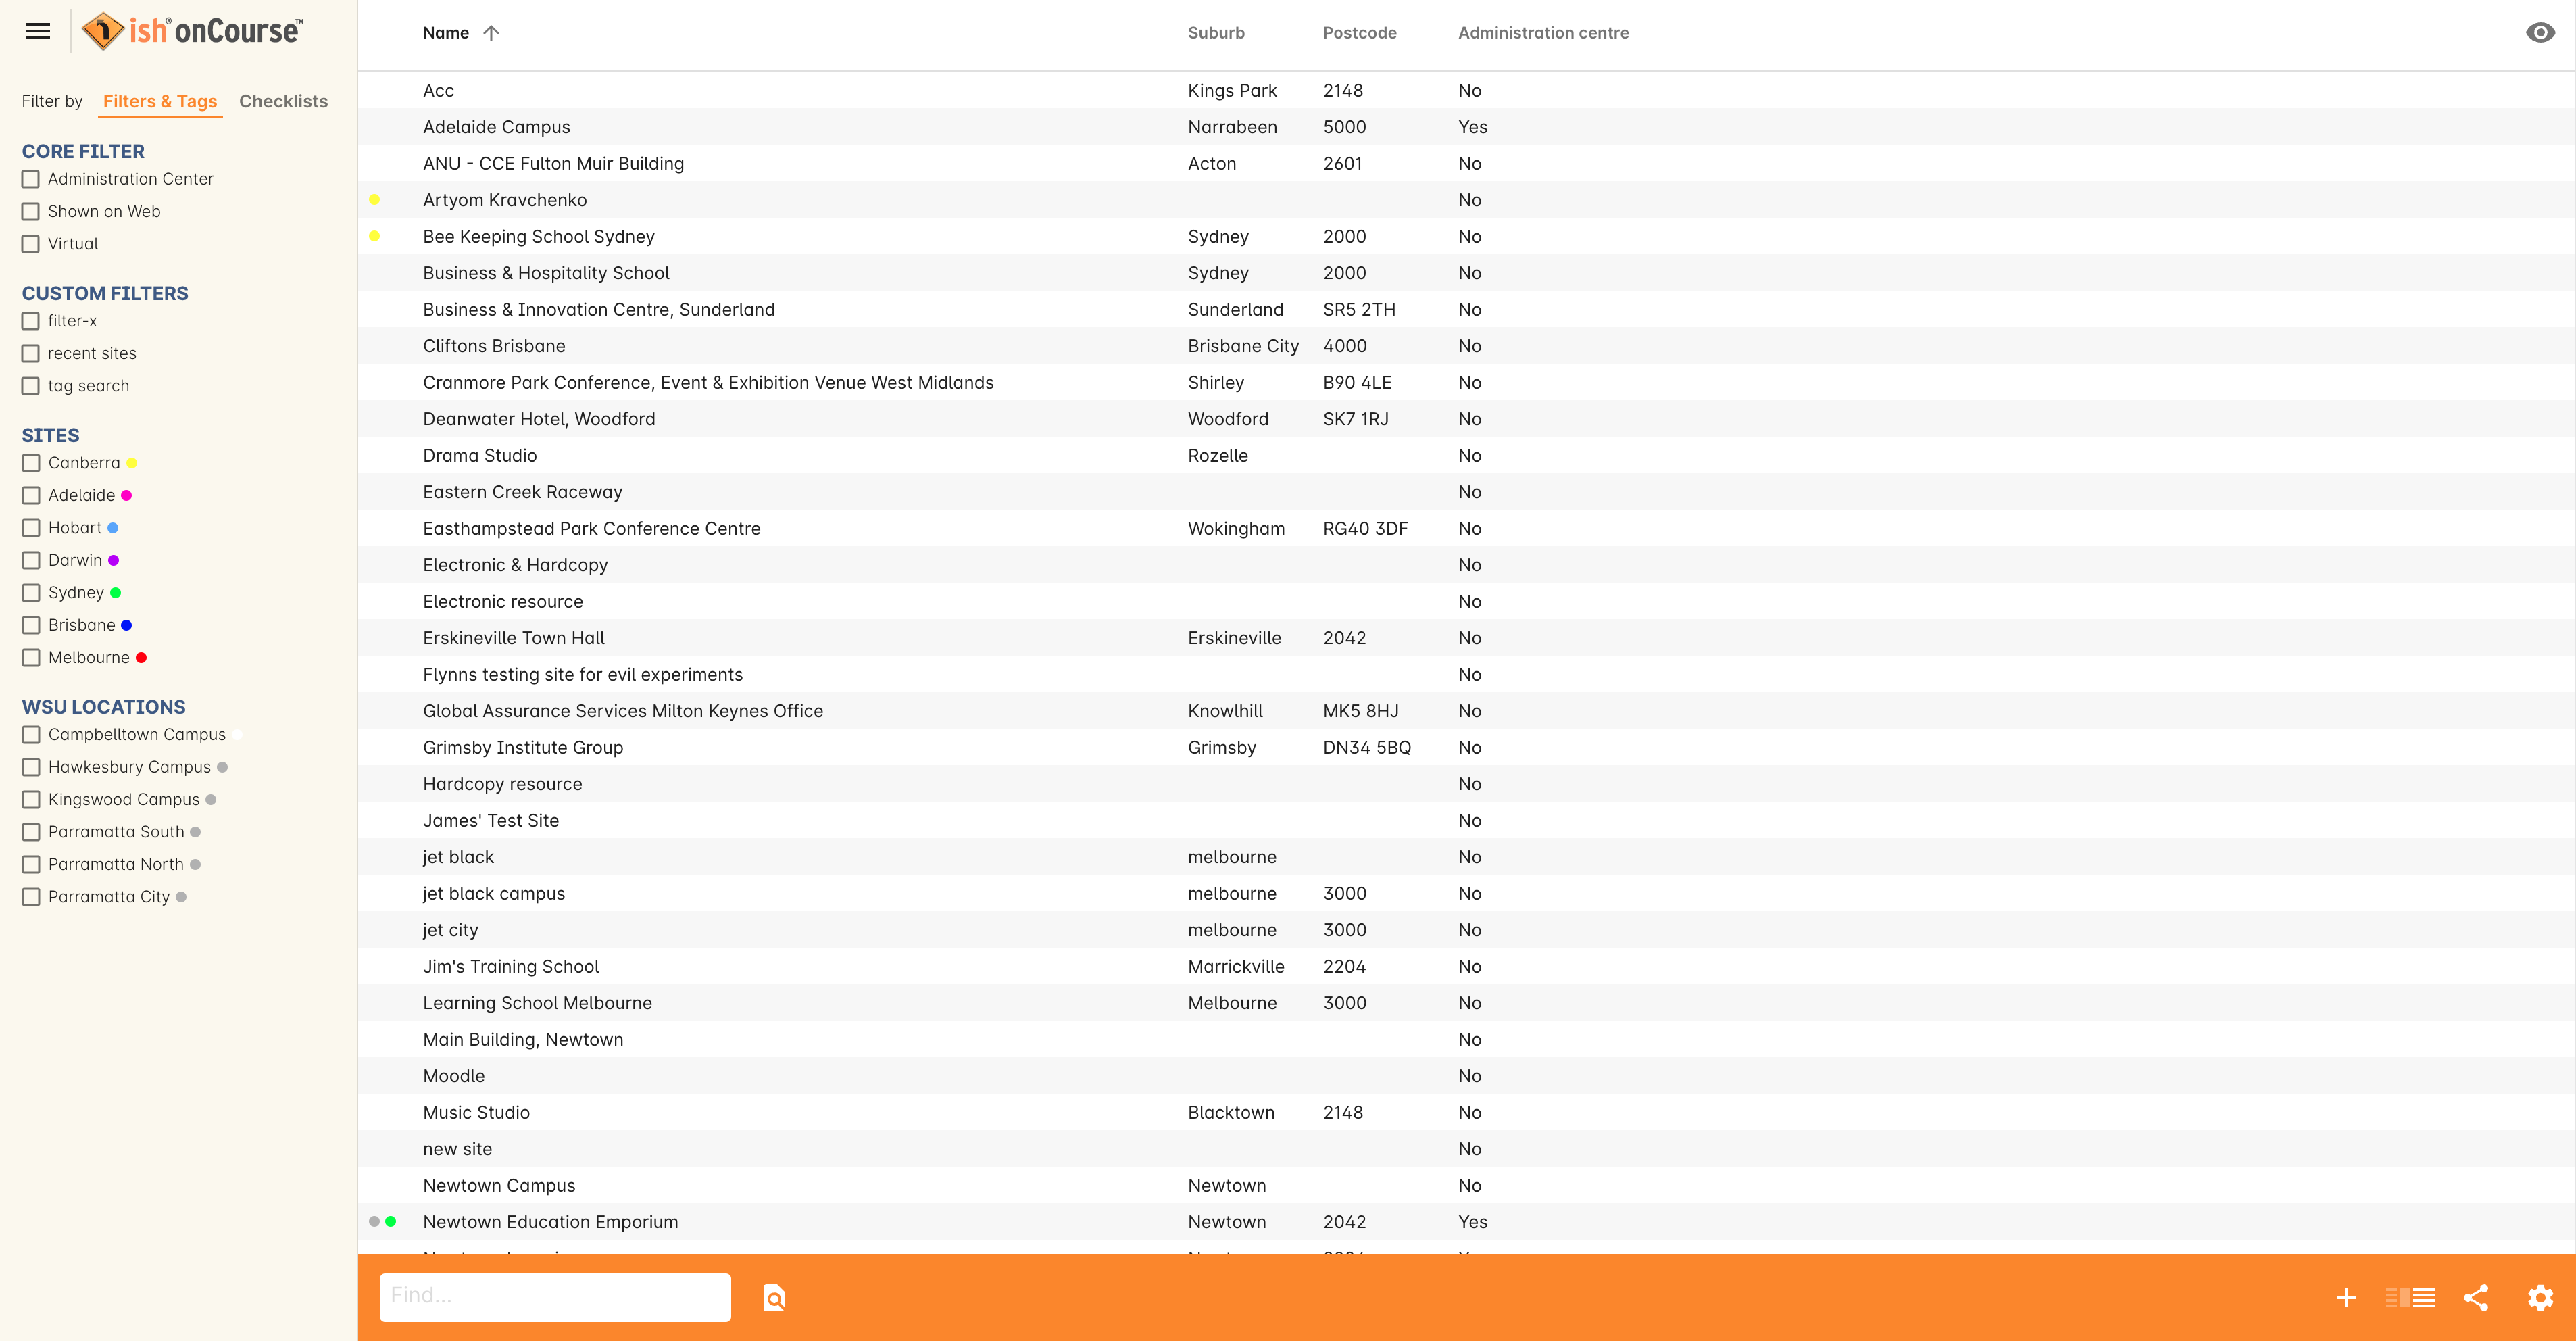
Double-click a record to open the Site details section.

Figure 70. The Sites window in list view mode
General
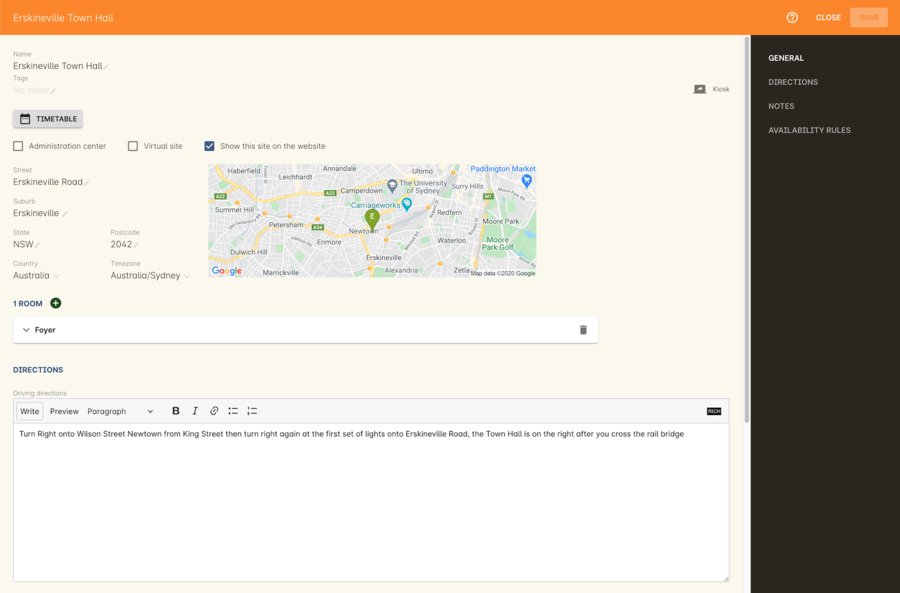
Here you can set the site name and address details. You can access this site’s Kiosk view by clicking the Kiosk button in the top right of the record. You can also access the site’s Timetable view by clicking the Timetable button. Learn more about Timetables here.
- Administration centre - allows you to set that site as an administration centre, a physical site where your staff work. Administration centres are the only sites that can have money banked against them. Sites flagged as an administration centre can be selected as a site to bank cash/cheques in Users and Banking and Reconciliation.
- Show this site on the website - enables you to show the site, and anything related to it on the website.
- Virtual Site - refer to related section on Virtual Sites.
The following additional features can be managed via the General tab of the Site record:
- By adding the street address, suburb, state and postcode, this information will automatically populate through to your onCourse website
- You can set the relevant time zone for a particular Site by selecting the relevant option from the drop down menu in the General section
If you are running an integrated onCourse website and have added the Google Maps API key, you will have access to full location searches and directions via Google maps. Just make sure you set the address details fully then the map will automatically generate.

Figure 71. View of General tab of a site record
Rooms
This small section within Sites is a quick view of the rooms detailed for this site. You can add new rooms here by clicking the + button, then adding a room name and the seating capacity. Clicking the More Options button will take you directly to the Room details window. See the Room Record Details section for more details.
Directions
This section allows you to display different types of directions for your students, if you input into any of the three text fields, it would be displayed on your website. The three types of text fields in the Directions tab are:
- Driving directions
- Public transport directions
- Special instructions - like where the room or cafeteria is
There is also an document section beneath, this will allow you to add attachments that relates to the Direction tab. To add an attachment you must click on the + sign beside the 'Document' title, to remove an attachment you will click on the bin icon on the document. There are three fields in the document window:
- Name - the file name of the attachment (mandatory)
- Tags - tags to easily identify the document (optional)
- Description - the description of the attachment (optional)
There are three optional toggle sections on the document window, all are toggled off by default:
- Skills onCourse - Shared in portal
- Shareable link - Shared by link
- When toggled off, the document can not be accessed by direct link
- Website - Shared with website visitors
Notes
This section is for internal notes about the site. It is not published on the site.
You can add a new note in the 'New note' field at the top of the tab. Below this will show you a list of previous notes created, these fields are not editable. Each of these entries has the date and time it was created, along with which user created it.
Availability Rules
Availability Rules will allow you to set when the site is not available. By clicking on the + sign, you can set when the busy period starts and ends as well as the option to select "all day", this is good for something like construction. You can also add a description for the unavailability e.g; "construction on this site on 2/2/11".
Virtual Sites
onCourse allows a College to flag a given Site as a Virtual Site. These sites can be used in either of the following scenarios:
- Class sessions that are delivered in an online space
- Self paced learning where there is no set timetable
When you create a new Site within onCourse and flag it as a Virtual Site, onCourse will automatically assign a Virtual Room to that site. The reason for this is that Class enrolments must be assigned to a Room, they cannot be assigned to just a Site. Virtual sites can also have rooms created for them.
You can also convert a standard site to a virtual site.
Virtual sites can also have their own timezones, separate from your college. Be sure to set the correct timezone the virtual room should be based in so that all of it’s scheduled class times appear correctly on the website.
Rooms in virtual sites can have the URL of a pre-prepared online meeting room or space added to the 'Virtual Site URL', and this will be made available on the SkillsonCourse Portal to students as a way of easily accessing their online sessions when the time is right.
Updated about 1 year ago
