How to create a discount
The Discount window can be found using the search function on the Dashboard. Opening the discount window will show a list view of all discounts created, whether it is active or inactive. You can choose to view only the 'active' or 'inactive' discounts by ticking the box beside it from the core filters on the left pane.
Single-clicking an item will let you edit the discount on the same window but on the right pane. If you are in the 3-column mode.
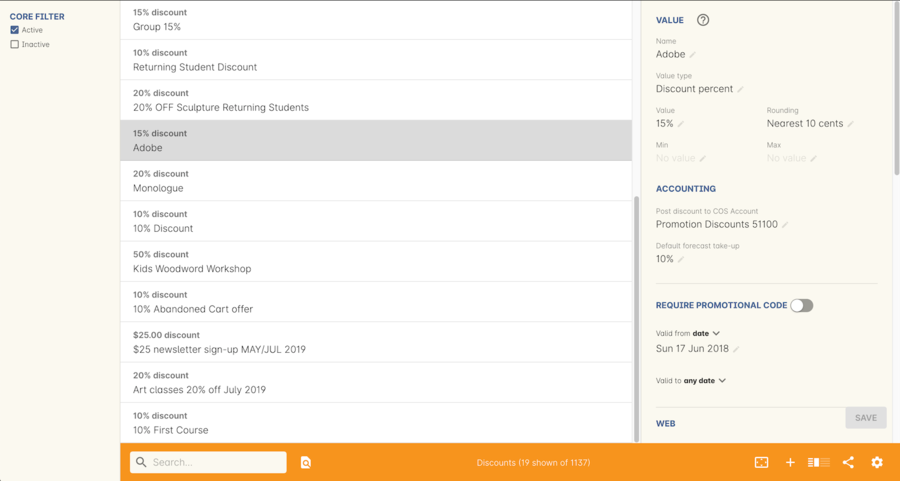
Figure 503. The Discounts list view in 3-column mode with edit pane on the right
Double-clicking on an item in the list will open the discount edit window.
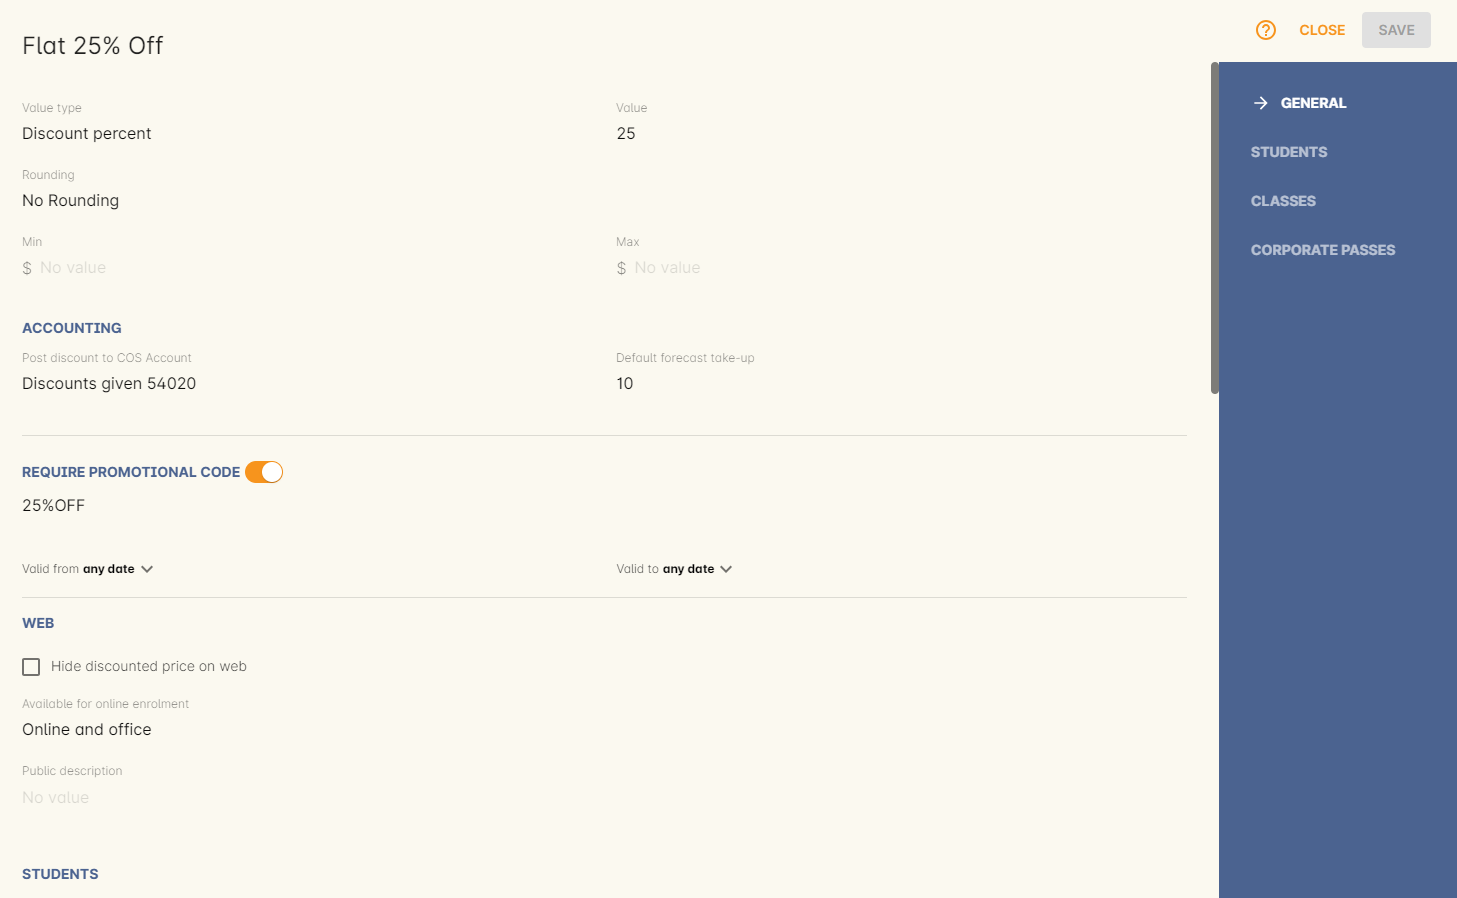
Figure 504. Discount view in an edit window
You can create a new discount by clicking on the + in the bottom-right corner in the discount window. You can delete a discount by highlighting it, clicking the cogwheel and then clicking 'delete record'.
Discounts which have been used by students cannot be deleted, but they can be made inactive by setting an end date in the past. This will not affect any discounts already processed.
Defining the discount value
The first section in the discount edit view is the value section. This is where you define the way the discount is calculated.
The name of the discount will appear on the website, on invoices and in finance reports making it important to choose a name that clearly identifies the discount.
Value types and value
A discount percent allows you to define a percentage amount that will be taken off the class enrolment fee. A discount dollar lets you fix a dollar amount that will be taken off the class enrolment fee (note, the classes attached to the discount may have a variety of fees, so a discount dollar will be better for some classes than others). Override fee lets you set a new fee for all the classes linked to the discount.
At this point, you can also select if the discount will have any minimum or maximum caps or rounding applied to the nearest dollar, 50 cents or 10 cents.
The discount value set here can optionally be overridden at the class level, to assign varying class fees sharing the same discount name, as well as in the checkout itself when the discount is applied. This option may be especially useful for funded programs like Smart & Skilled. For example, a number of courses and classes can share the discount ‘First Qualification rate' but each class can have its own discounted price. In the class record edit view, double-click on the discount in the class budget section to edit the value for that class.
Accounting
Discounts can be set to post to a COS (Cost of Sale) account, or not. If a discount posts to a COS account, this means the full class fee is sent to income, and a corresponding expense is charged for the discount value. This type of discount is best used for discounts that are promotional in nature, and need to be tracked as a business expense. The COS account can be selected from the drop down list. One default COS account exists in onCourse called 'Discounts Given', but you can create additional COS accounts in the Account settings if you wish to segment your COS options further.
Discounts which are not linked to a COS account reduce the income value posted to the general ledger. This is the preferred method for recording discount types which are about recognising different fee structures that may exist for different types of students, like overseas CRICOS students vs onshore students, and government funded students.
The default forecast take-up can be set here, or set individually in the classes you have linked the discount to. This is a prediction that will assist you in your income budgeting, based on the percentage of students you expect to utilise this discount for each class, and therefore the potential cost of providing this discount to your business.
Require Promotional Code
A discount which requires a promotional code needs the code defined here; activate the switch and then set a promotional code. This promotional code has to be entered, and any other restrictions you may have set for the discount has to be met, in order for it to apply. This can be used either online, in the office, or both.
Setting a valid to or from date is optional. Many types of discounts don’t require a date until you decide to retire the discount by editing it to set a date in the past. You can also set days here that are relative to the starting date of the class, allowing you to create a range of early bird discounts that automatically cut in and out based on how far out from commencement the class is.
Web
A discount that is set as 'Online only' will mean that only students enrolling using the onCourse website have access to this discount. Discounts can also be set to 'Online and office', this will allow the discount to be applied if a student is enrolling via the website or through the checkout. You may have chosen to stop a concession card type being added online, but can make the discount still available online for existing students with the concession type on record.
You can choose to hide/show the discounted price on the website by unticking/ticking the checkbox option 'Hide discounted price on web'. Ticking this would come as a 'surprise' during the checkout process.
How a discount displays on the web is based on if it is available to all students, in which case the normal fee is crossed out, and the new fee displayed, or to a subset of students, in which case the fee is displayed in brackets next to the primary fee.
Restricting a discount to a subset of students is done on the next tab 'Students'.
The public description field contains any additional information you wish to provide to potential students about who and how this discount can be accessed and is displayed on the website.
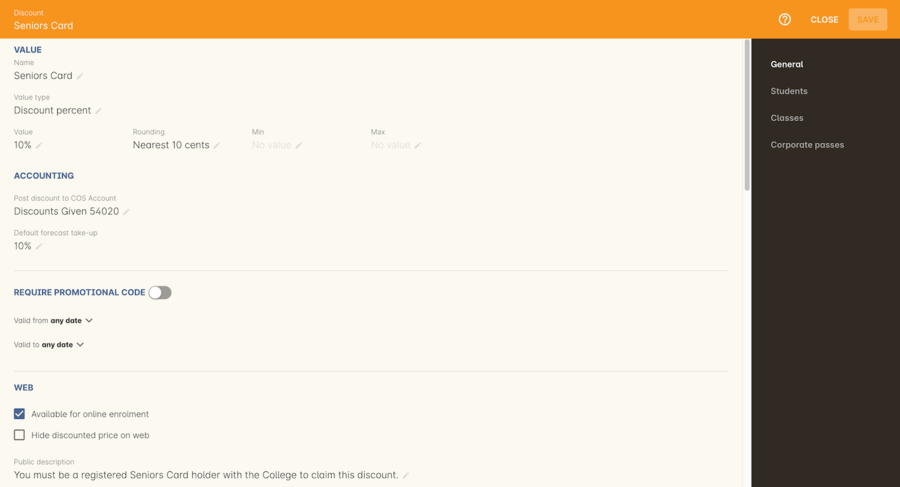
Figure 505. Example value settings of a discount for seniors
Defining the eligible students
The second section on the discount edit window allows you to define who can access the discount.
Some types of discount may be available to anyone, meaning any person who enrols will automatically have the discount applied. They may also have to supply a promotional code, or enrol within a fixed period depending on what you set in the first section.
More often, discounts are restricted to people who meet certain criteria. A discount may require the student to meet multiple criteria. For example, in the Senior’s Discount window below, the student needs to provide a Senior’s Card, but you may also include one that proves they must be over a certain age as well. For this to work effectively, you would need to ensure that the date of birth field was set to mandatory for website enrolments, otherwise clients just providing the details of their seniors card would not be sufficient to access the discount.
You can limit the discount to students who have previously enrolled in the same course or students with a certain membership status.
You can also limit the discount to students enrolling using a certain keyword term within their email address. You can also set an entire email domain, for example adding '@acme.com.au' without the quote marks will give the discount to anyone using an email address with @acme.com.au in it. IMPORTANT: when setting a keyword or an email domain in the field only look to see if the email contains that string. This means if you set something simple like 'au' in the field, then if the email address used to enrol contains the string 'au' within it, the discount will be applied.
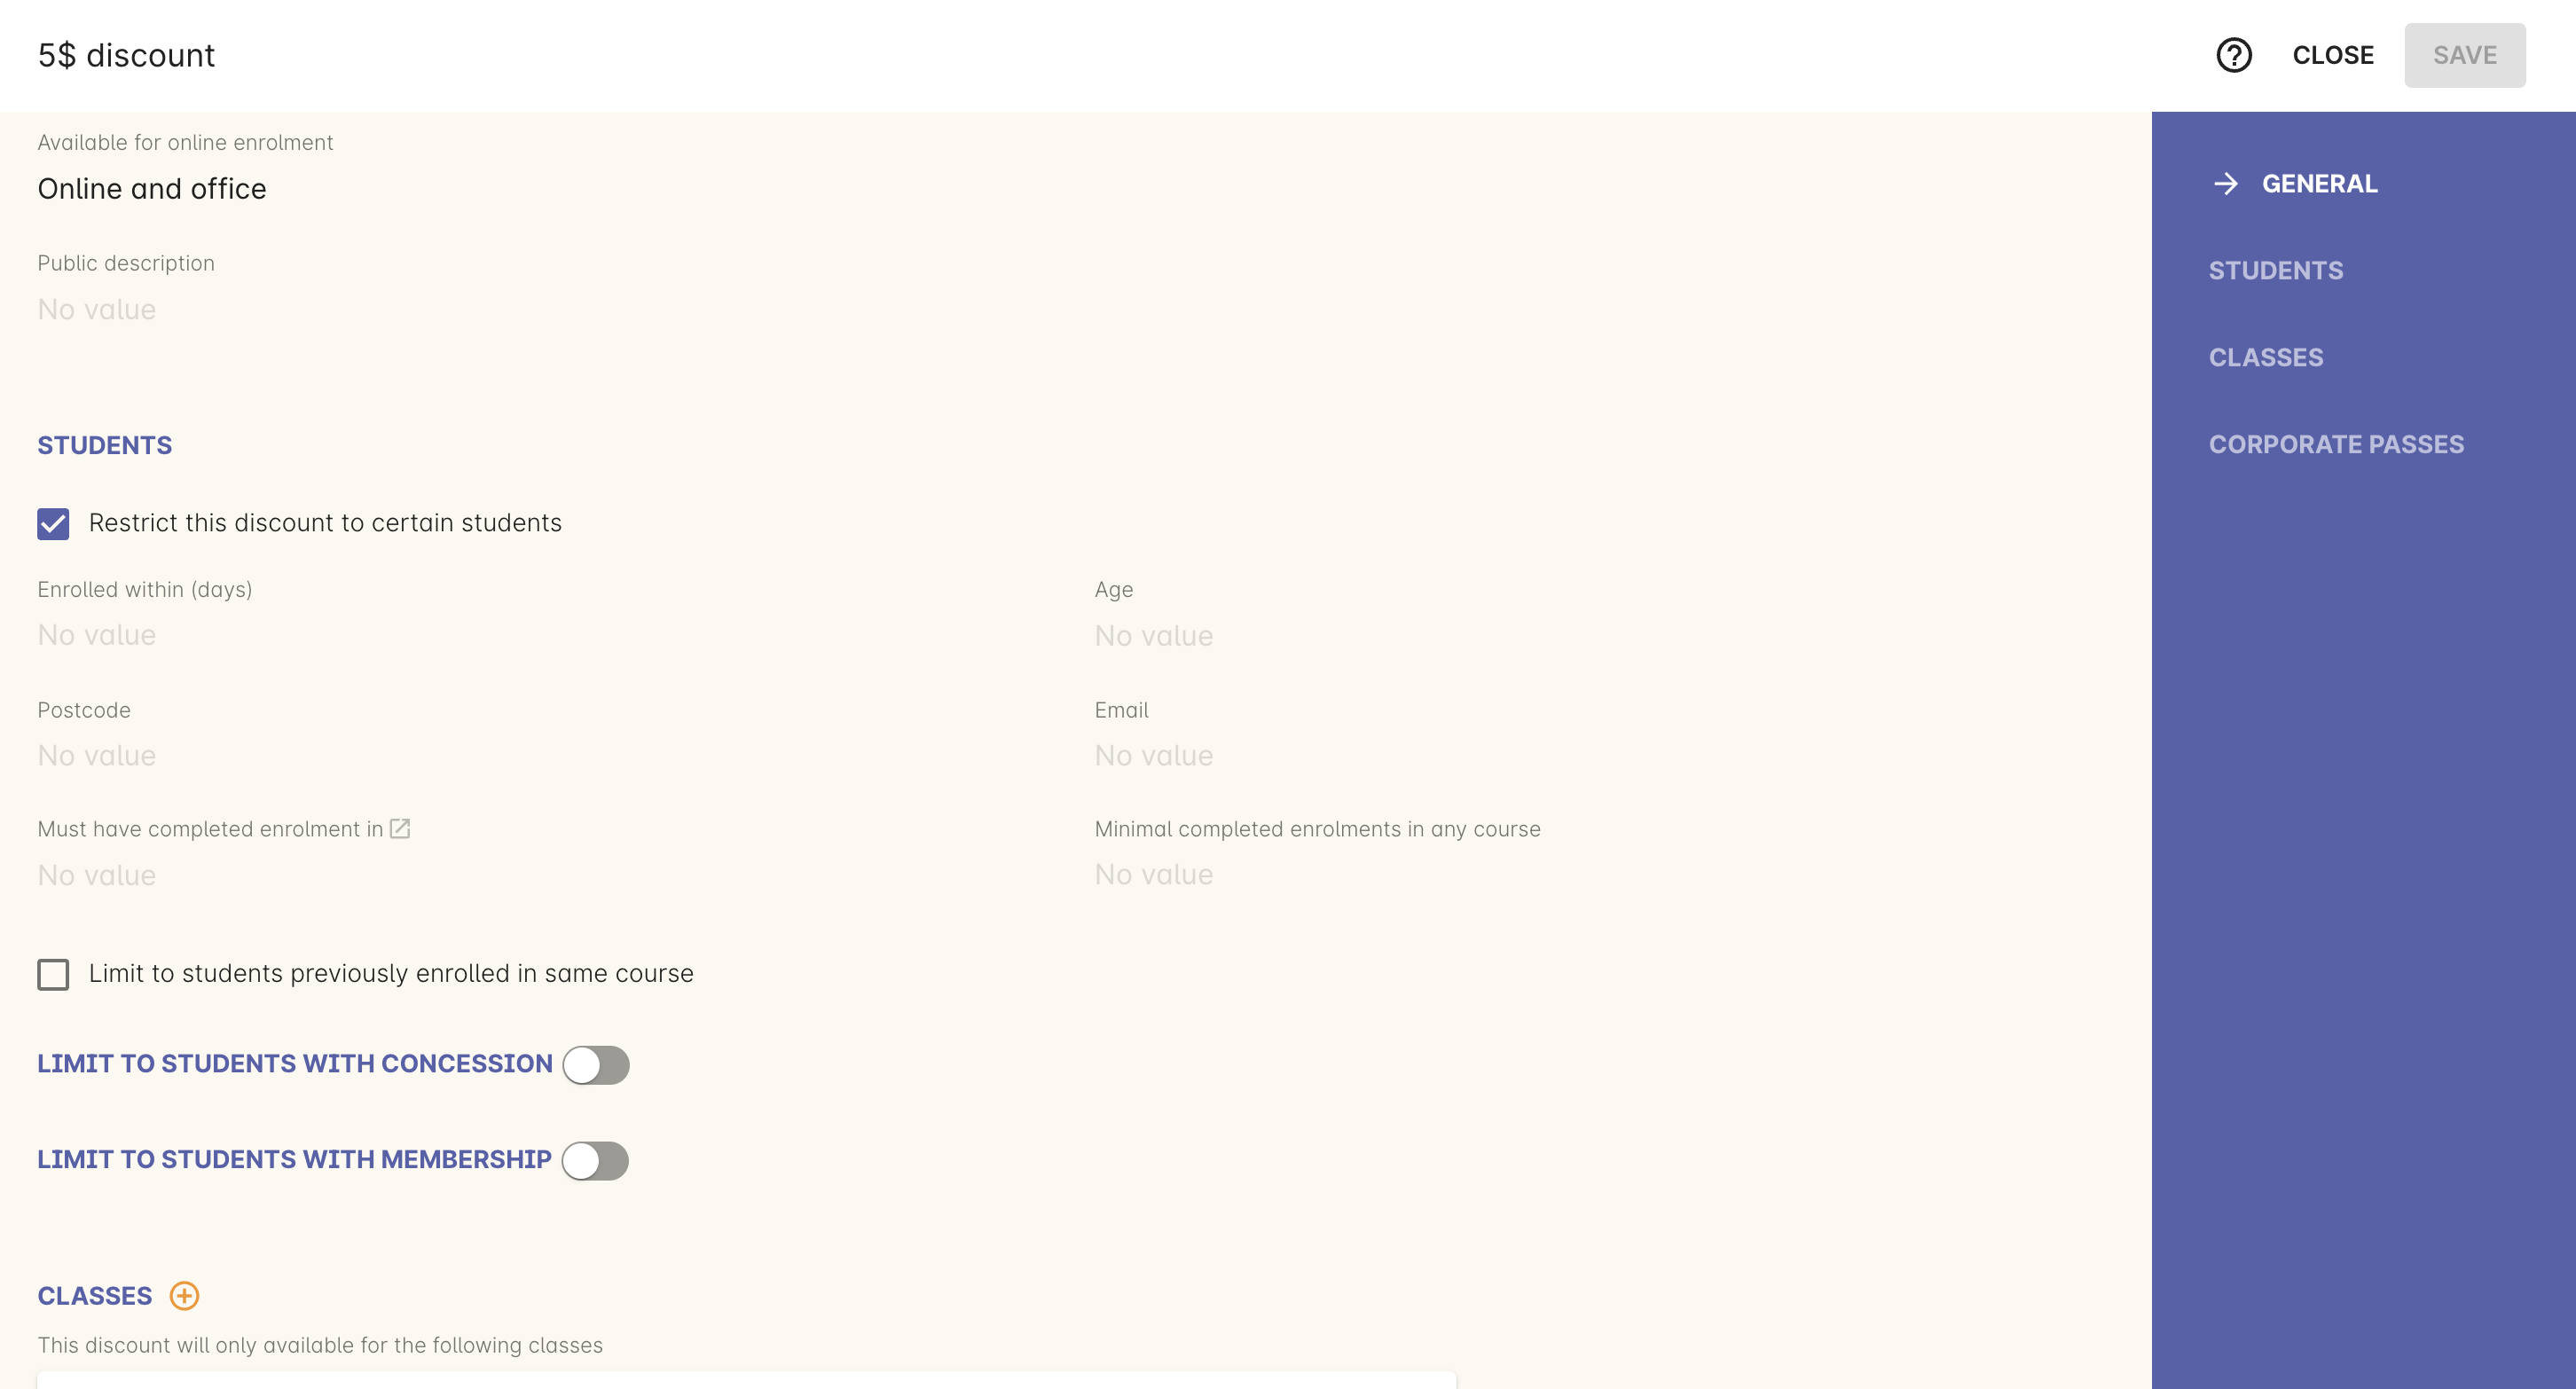
Checking the 'Restrict this discount...' box will display a number of fields you can apply restrictions to, including age, email, postcode and more.
To link concessions or memberships to the discount record, they need to already be set up in your onCourse records.
See the concessions and memberships chapter for more information about how to create a concession or membership.
Defining the eligible classes
The classes section of the discount window is where you define which classes can access this discount during enrolment.
To attach a discount to a class, click the + button next to the Classes heading.
You can search for class names, class codes, class tags by starting the search with a hashtag (#) or even use our advanced query language to add a particular selection of classes, or all classes (see the screen shot just below). You can read more about our advanced query language here.
For example, to add all your current classes you could use the following query, then click 'Add All':
isActive is true

Figure 507. To search for a tag start your search with the hashtag symbol #
Using the checkbox option 'Add this discount when creating or duplicating classes' will automatically add this discount to every new class you create from now on. This can be useful to select for a global discount that applies to all your classes.
Once you have added classes, you can also use the garbage icon to delete classes from the list. The icon is hidden until you hover your mouse over a class in this section. The delete option works on one class at a time.
At the bottom of this window are some additional enrolment requirements which relate to the multiple purchase style discounts, e.g. purchase two enrolments from the list above to activate this discount, or spend at least $1,000 in one transaction to access this discount. If you add multi purchase discount options, the discount will apply to each of the eligible classes in the list. These can be left empty if you don’t need them.
You can also add a discount to a class from within the class window, directly in the budget section. Just open the budget and click the + button next to the discounts header, type the name of the discount into the search field and click 'add' next to any results you want to add.
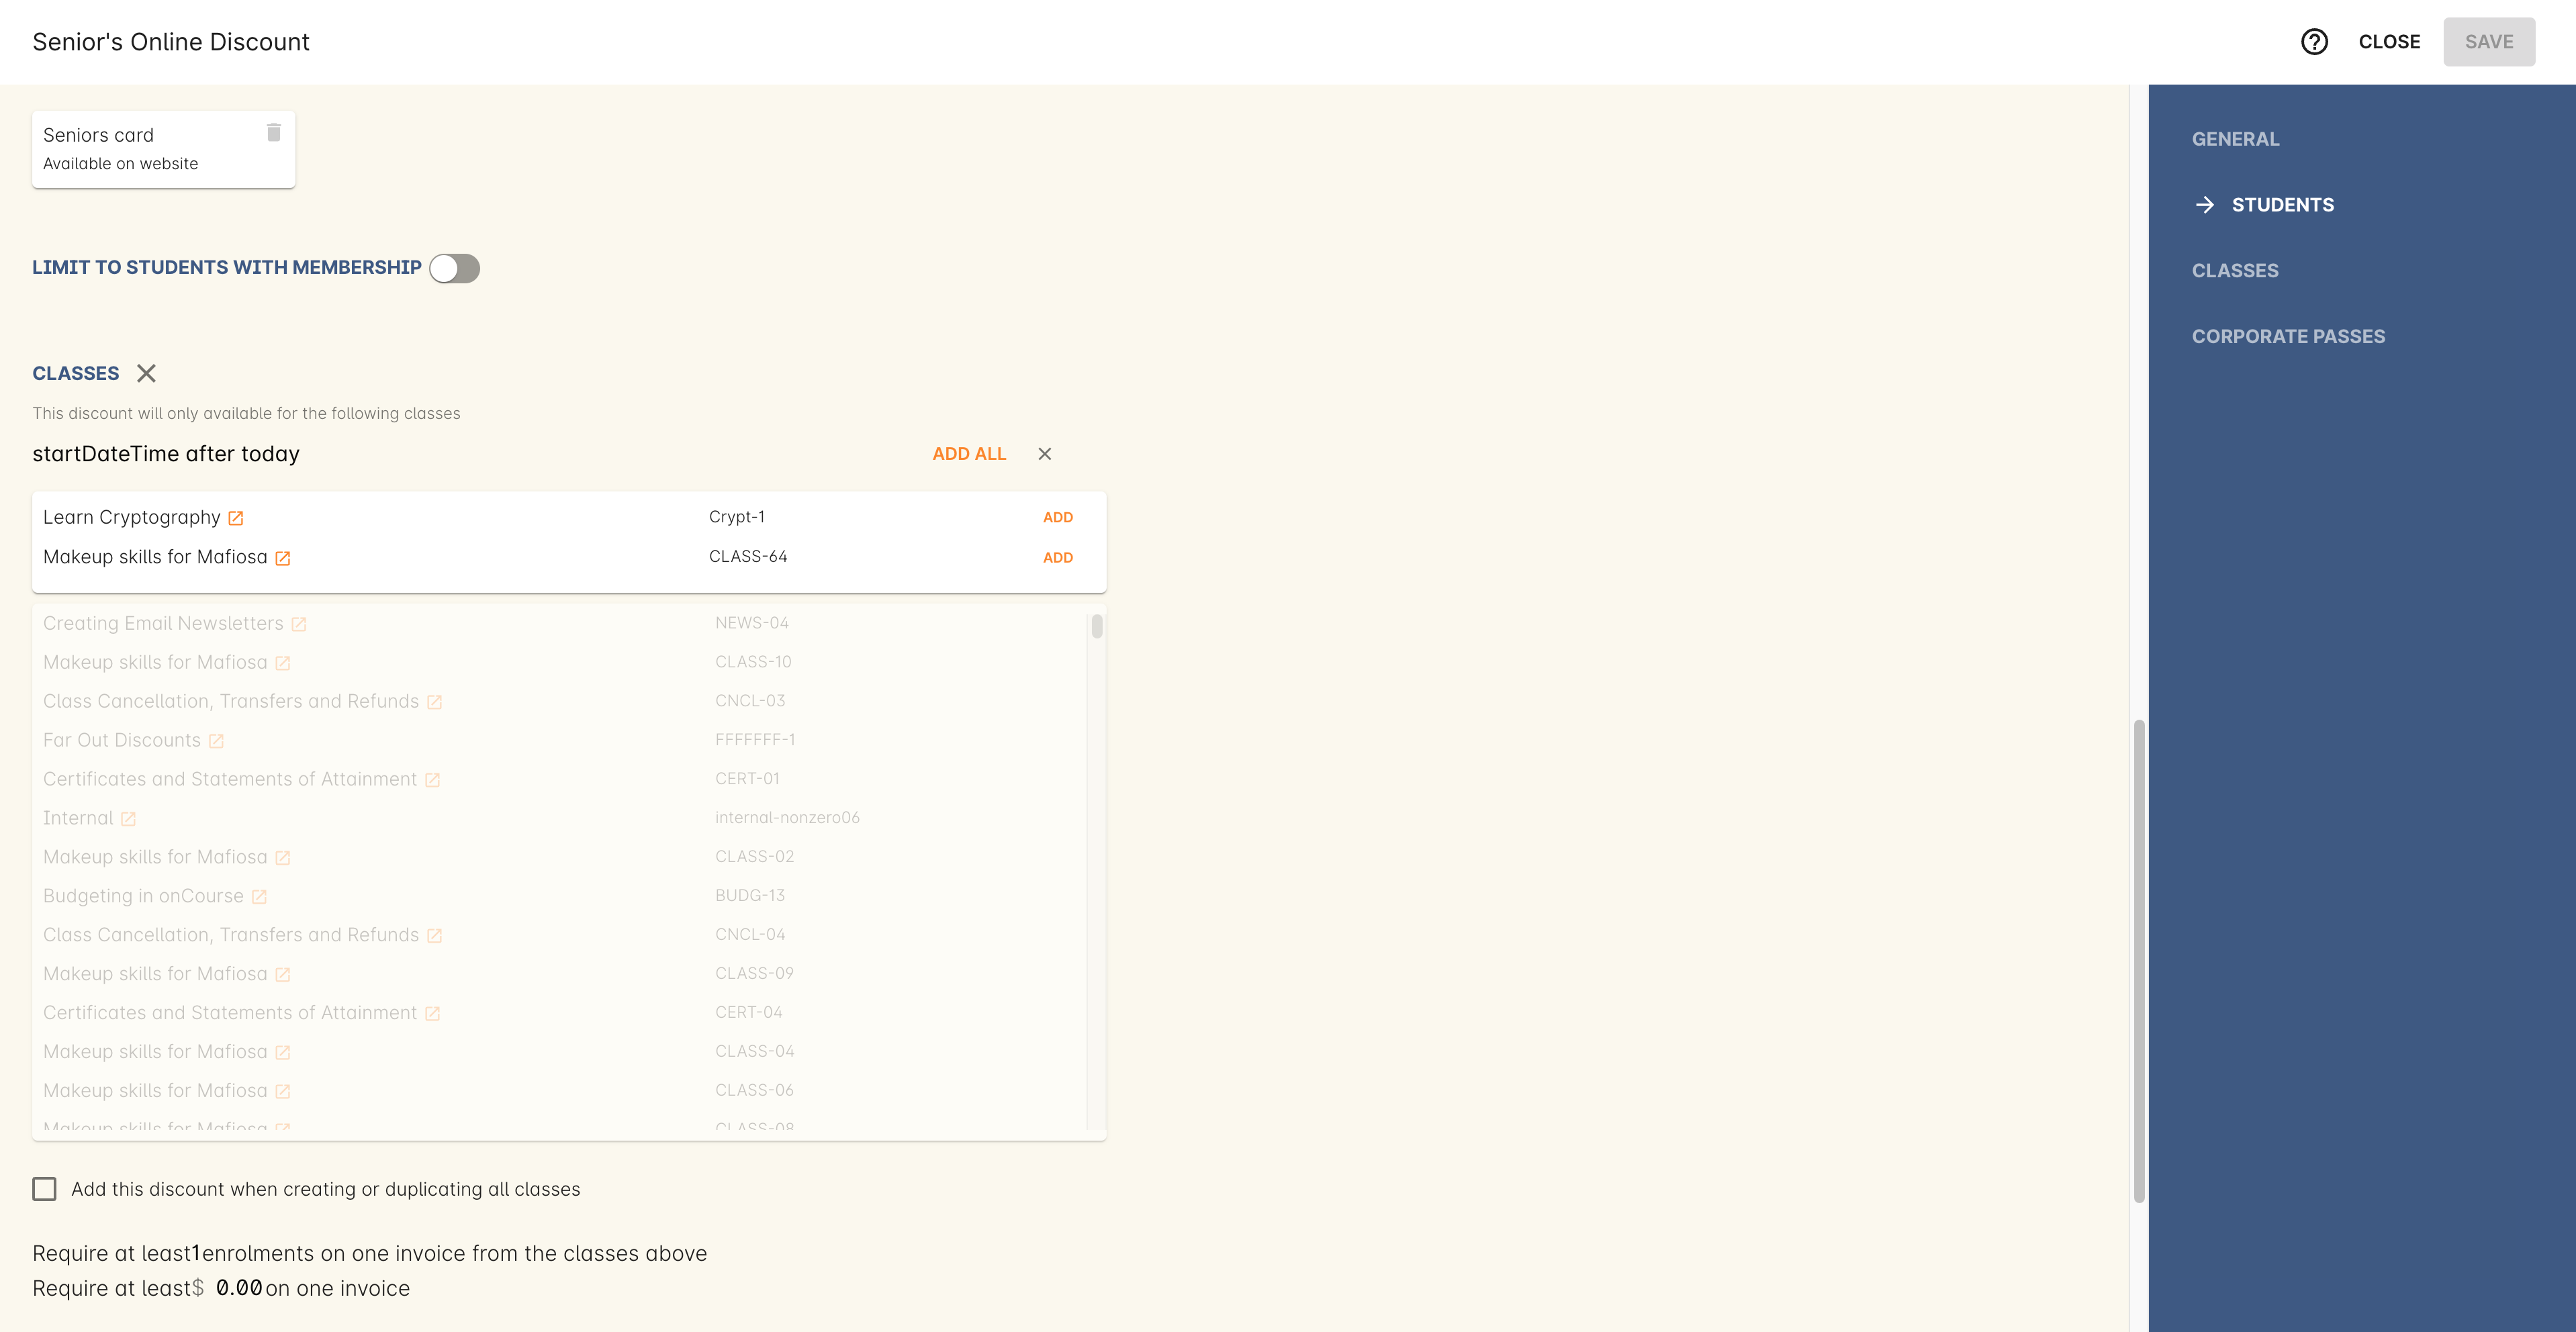
Figure 508. An example of how to add all classes starting after today using the advanced query language
Linking a Corporate Pass to a discount
To make a discount available to a certain Corporate Pass, switch on the Limit with Corporate Pass button, then type in the name of the Corporate Pass contact and click 'Add'.
A discount strategy may only apply when a Corporate Pass is used in the purchasing process. Corporate Pass can only be used during online transactions, so make sure this discount is available via online enrolment in the general section.
A Corporate Pass discount could be used to offer a special enrolment price to the employees of the companies you regularly work with.
Alternatively, a negative discount could be used for enrolments processed with some types of Corporate Passes to surcharge online enrolments processed via external agents or vendors.
During the online enrolment process, a surcharge style discount will always apply, even if there is a discount also available to the user. For example, if you surcharge Corporate Pass users 5%, but offer a 10% discount to people using the code TENFREE, the Corporate Pass holder surcharge will override the discount.

Figure 509. Linking a Corporate Pass to a discount
Updated 8 months ago
