Tags in onCourse
Tagging in onCourse is a powerful tool that allows you to add additional hierarchical information to records in a way that can be easily used for searching and grouping records. When specifically related to Course records, tags are flexible ways for you to categorise your data and organise the navigation of your website.
Tag groups applied to record types other than courses and classes and can be used for internal navigation and grouping, but will not affect the website.
Tags can be created and edited by navigating to the Tags window. This will bring up a list of Tag groups. By default, onCourse will have a special tag group called Subjects that exists in your new database, whose name cannot be changed. Tags are assigned colours that display alongside each tag throughout onCourse, to help identify them quickly.
Tags names can use almost any characters except the following: @ # _ , or "
However you can use any of the following: ! % ( ) = & ^ + [ ] { } / . < > : or ;

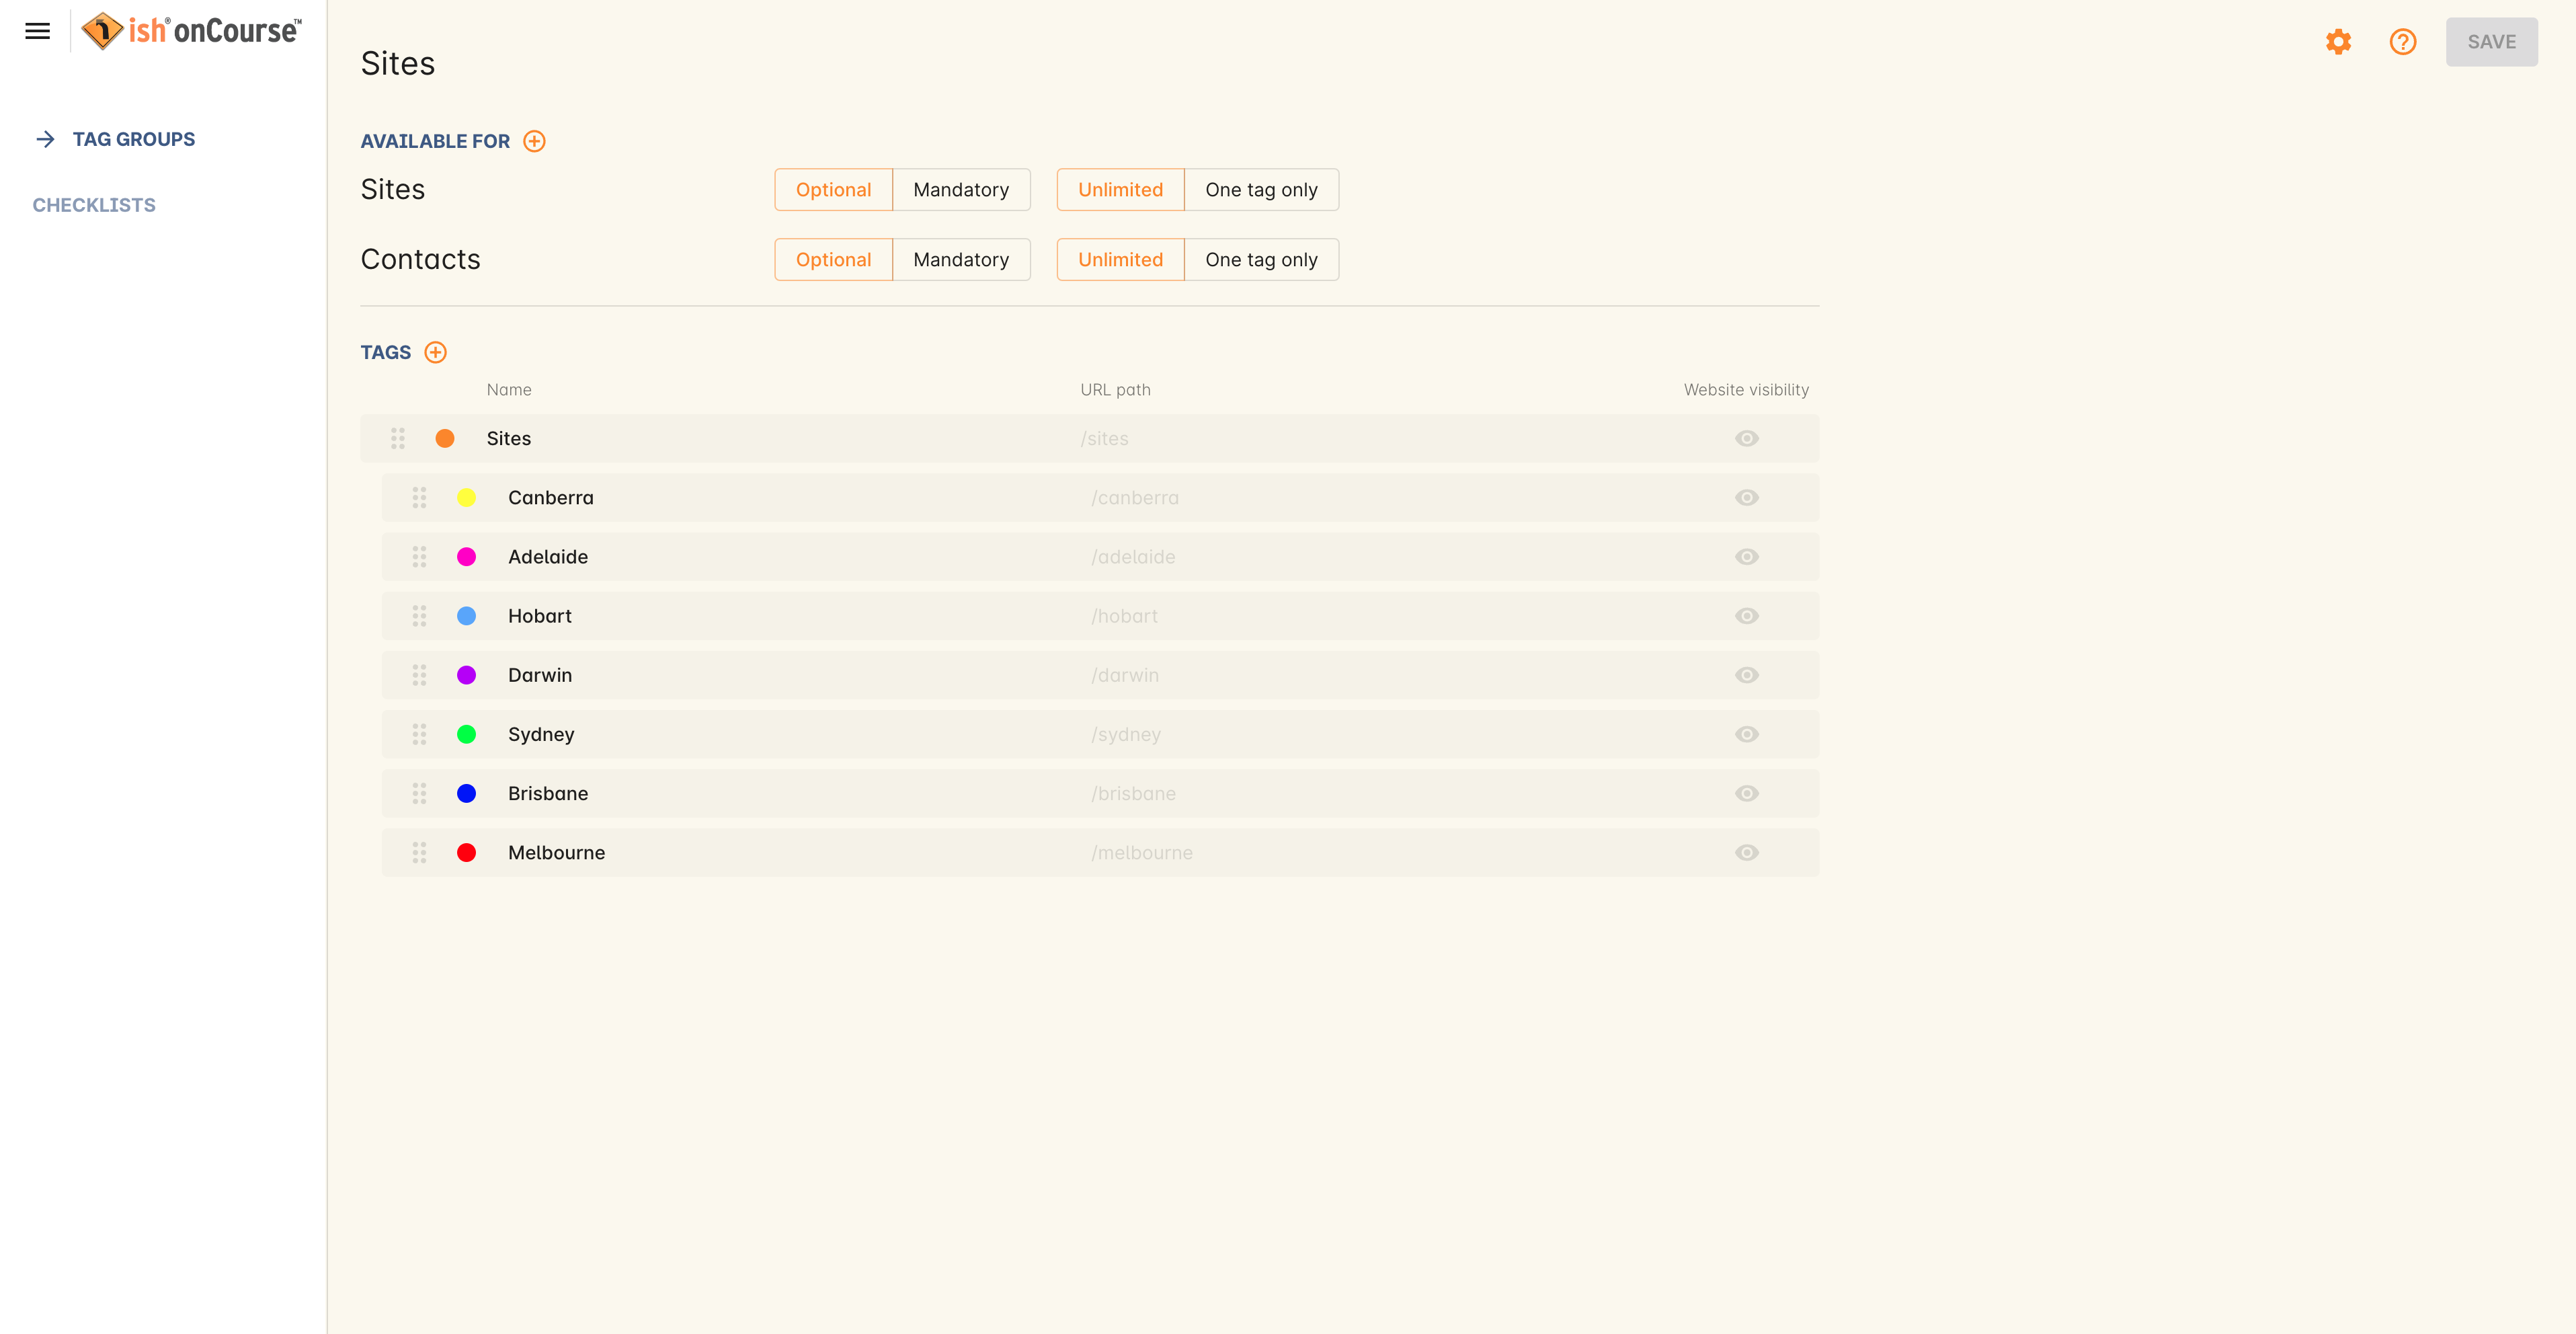
Figure 131. Adjusting the tag weighting via tag group edit view
The Subjects tag group
The main tag group, used to drive your website and in the export of courses and classes for print production and many standard reports, is the "Subjects" tag group. You can create the categories that are appropriate for your organisation, and any sub categories that are needed.
You can search for individual tag groups or tags by typing their name in to the Filter items search at the top of the left-hand column.
Tag data is hierarchical so for example, under the category 'Computers' you might find tags with names like 'Microsoft Office', 'Adobe Creative Suite', 'Tablets & Smart phones'. There are no limit to the number of levels of hierarchy you can create, but from a user and navigational perspective, it is generally reccomended that three levels are more than sufficient to represent the range of data you are tagging.
Any course tagged with a sub tag like 'Microsoft Office' would also be visible if you clicked on the parent tag 'Computers'.
As a general rule of thumb, a website visible tag should apply to a minimum 3 to 5 course records, and a maximum of 10 to 15 to give the website visitor a useful and workable group of courses to browse.
For each tag group, you can decide if applying a tag from the group is mandatory or optional. A mandatory tag may make sense if you want to ensure your staff always tag every course in your database with a website navigation tag. You can also choose whether the tag can be applied an unlimited number of times, or only once. A pop up will display when changing any tag group between Mandatory or Limit to One, as each setting has implications on the records they’re attached to.
You can also decide if records can have more than one tag from the tag group. Giving courses multiple subject tags mean they can be listed in multiple places on your website. For example, an MYOB course could be tagged with both 'Accounting' and 'Computers'.
You can add any number of tags by clicking on the + icon next to the Tags header. To add a subcategory tag, use the same + button to create the tag, then drag and drop it by clicking and holding on the six dots icon (the left side of the tag record) and then dragging it into the sub-category you want it placed in.
By default, tag groups will be sorted by alphabetical order, and tags in the order that they are created. You can also apply your own sort order to the tags by dragging and dropping it on the window in the order you want it displayed.
This tag display order will also be mimicked on your onCourse website for tags under the "Subjects" tag group.
Understanding tag hierarchies and relationships
When setting up your subject tags, it is advisable to only apply these subject tags to Courses and not to classes or other types of records. The reason for this relates back to the hierarchical nature of the database the information that is connected back to a course.
For example, a Course within the database will have classes, and within a class tutor(s) will be assigned, room(s) allocated and students enrolled. From a filtering perspective, by applying a subject tag to a Course, when you select the subject tag filter within any window, e.g. contact, the related information such as student enrolled in a class from a course with the tag, or tutor teaching a class from the course with the tag, will be displayed.
If you apply the tag directly to contact records as well as Courses, the meaning of the filter will change to also include the meaning above "AND show me all the contacts tagged with" which can lead to a returned results list that doesn’t make much sense to the user.
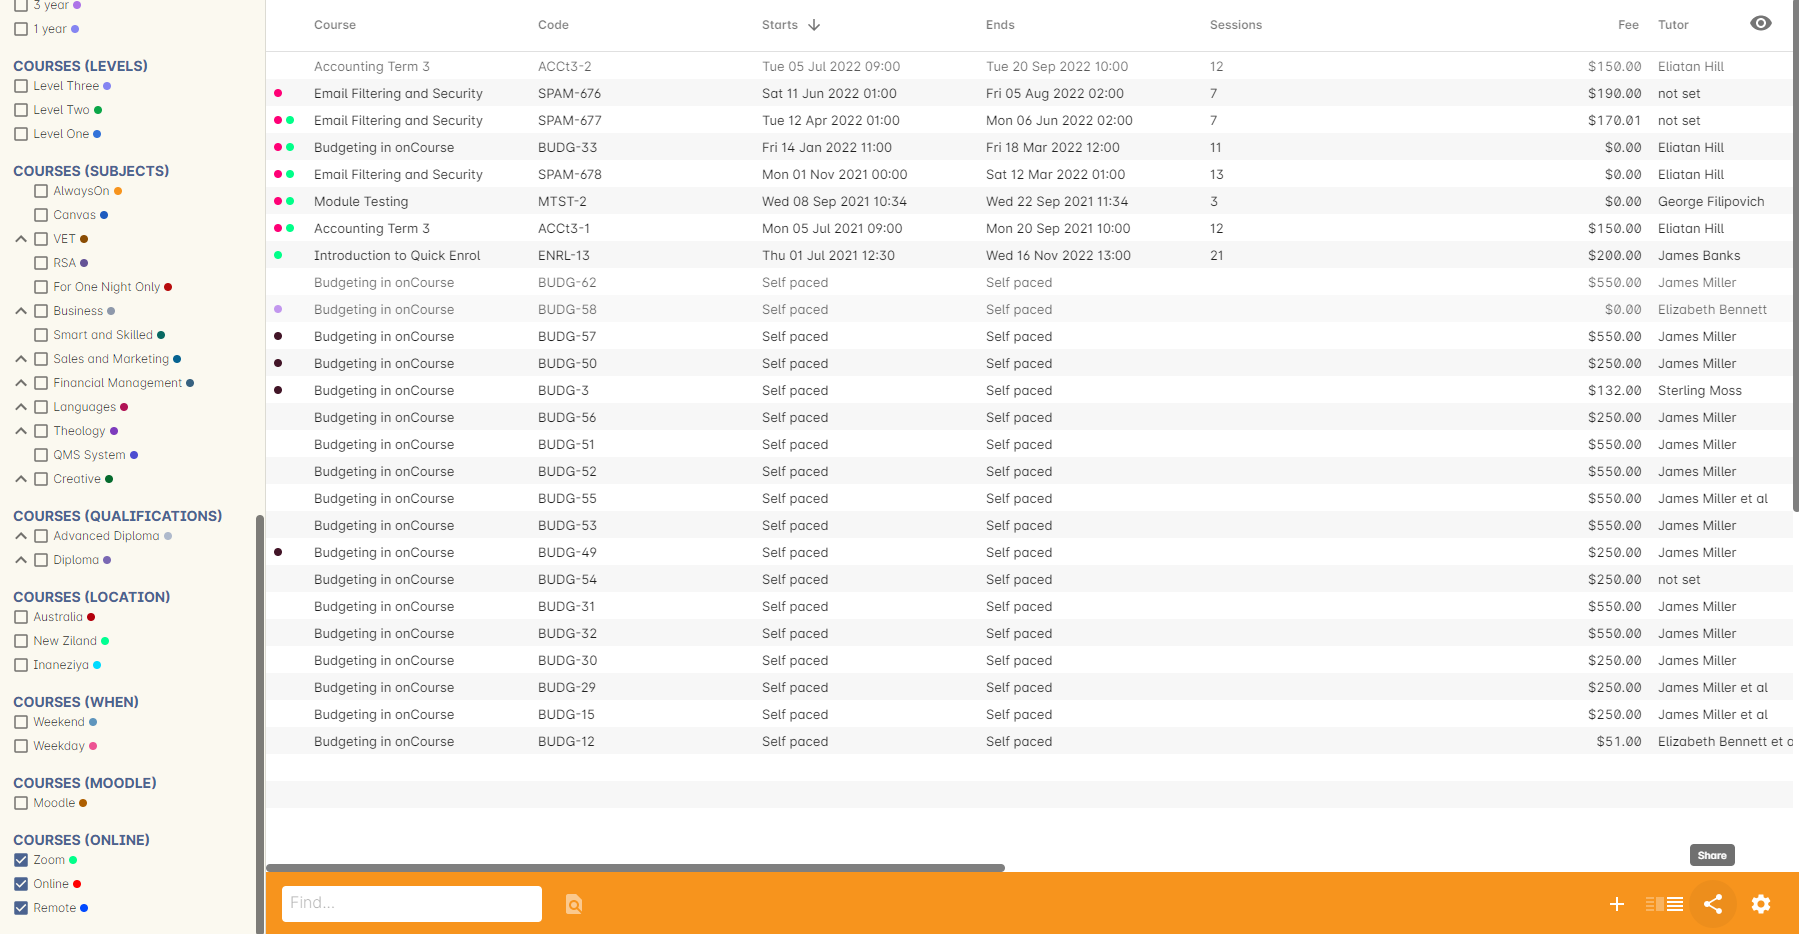
In the following image you can see the class window where the information has been filtered by the "Zoom", "Online" and "Remote" course tags. Even though the classes listed are not all tagged with the one of these tags, they relate to a course that has one of these tags, hence they display.

Figure 132. 'A Courses filter called "Online" being viewed in Classes. Notice some records do not have a dot? They still display here because the parent course has one of the selected tags applied.
Tag Colours
Tags will have a colour applied to them when created, and this coloured tag will be visible in both list views, tag filters and when editing records in order to help identify each tag and its associated data quickly.

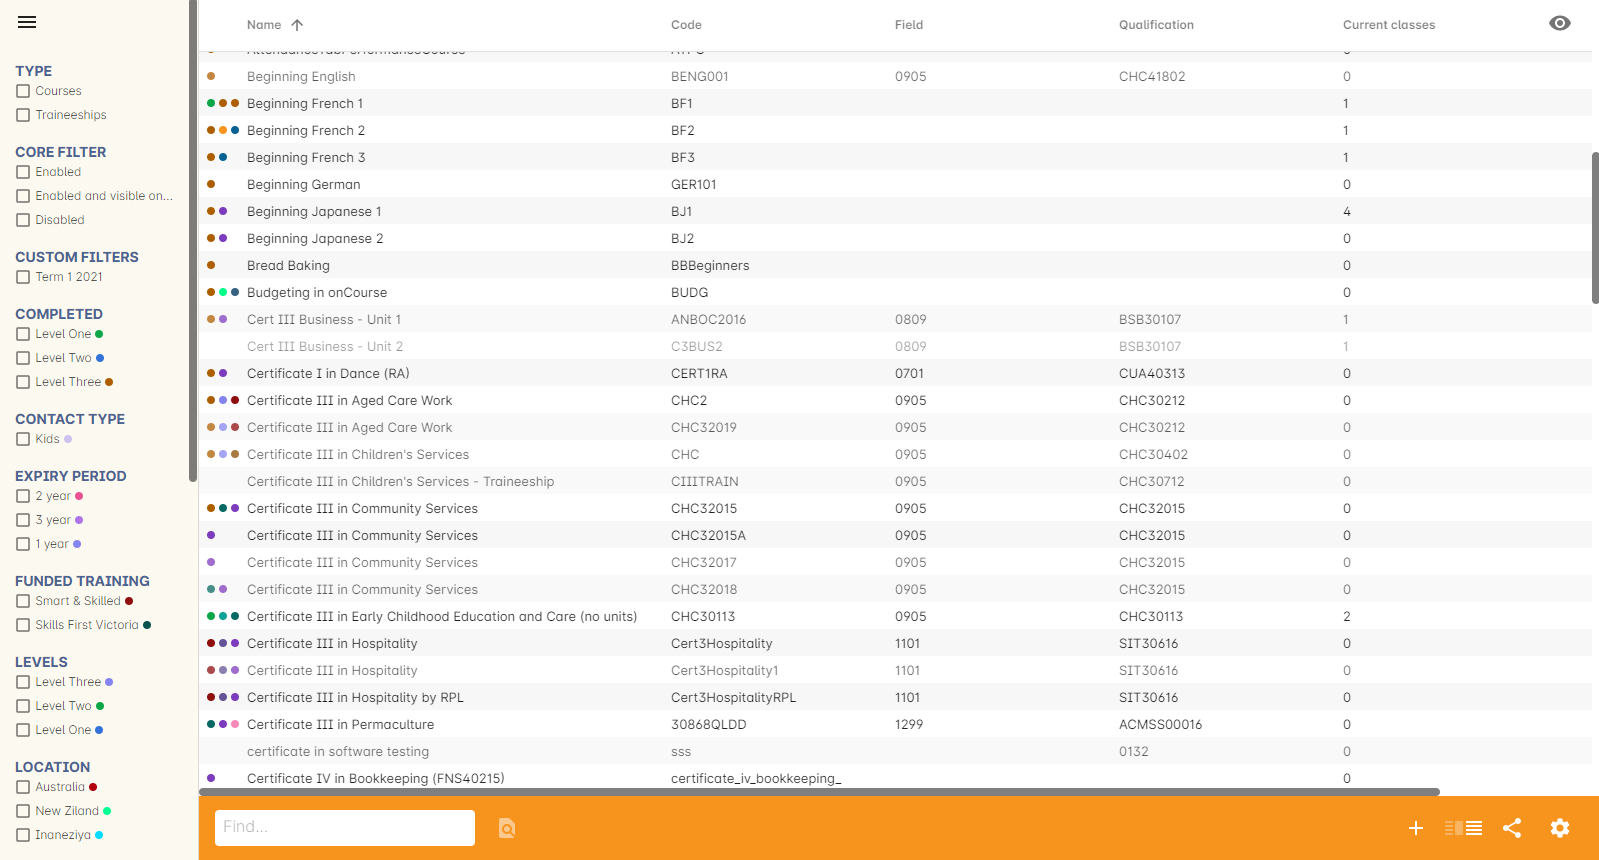
Figure 133. Tag colours shown in the tag filters and the "selected" column in the Courses list view
Tag colours in the list view appear in the 'record selected' column. There is only space for three colours to show, and they are shown in the order they sit in the tag filter column, so you can control which tags display here by re-ordering those tag filters.
Re-order the tag filters by clicking and dragging the group heading and moving it up or down the column, then dropping it in the position you want.
Updated over 1 year ago
