Print Backgrounds
onCourse printed reports can be set up with a defined background. These backgrounds must be created as a PDF document that is then imported into onCourse via the PDF Backgrounds section of the Automation window.
Generally, you will have a standard 'letterhead' style background, available in both portrait and landscape modes that can be used as the print background to common reports like invoices, enrolment confirmations and class rolls. You might also have some special backgrounds for certificates and other formal documents. Put all your graphic elements on these backgrounds such as signatures, logos, compliance icons and watermarks. It is easier to add these elements to the background than to the report itself.
Creating a backgrounds
Use your favourite page layout tool. Indesign, Quark, Word, Pages or any other tool which can create high quality PDF output will do fine. Make sure you set up the page size and orientation to match your report.
If you create a single page PDF, that background will be used for all the pages of your report. If you create a two page PDF, the first page of the PDF will be used as the background for the first page of the report and the second page of the PDF will be used for all subsequent pages. It is common to create a two page PDF with letterhead on the first page and a blank page for the follow-on.
Many of the built-in reports have 30mm header space. If you can keep your header within that area, you’ll not have to adjust the standard reports to fit.
Adding a background to onCourse
Once you have created the print backgrounds for your reports, you can now import those PDF backgrounds into onCourse and attach them to their relevant reports. You only need to import each report background once.
Report Backgrounds are managed within the Automation window, under PDF Backgrounds:
-
In onCourse, from the Dashboard, search for 'Automation' then click it open the window.
-
Scroll the left-hand column until you see 'PDF Backgrounds'.
-
Click the + button next to the header, this will create a new background record that you can upload your background PDF to.
-
Name your new background, then click the 'Upload New Version' button.
-
Find where you saved your PDF file, click to highlight it, then click Open.
-
You will now see the filename appear just below the button. Click Save.

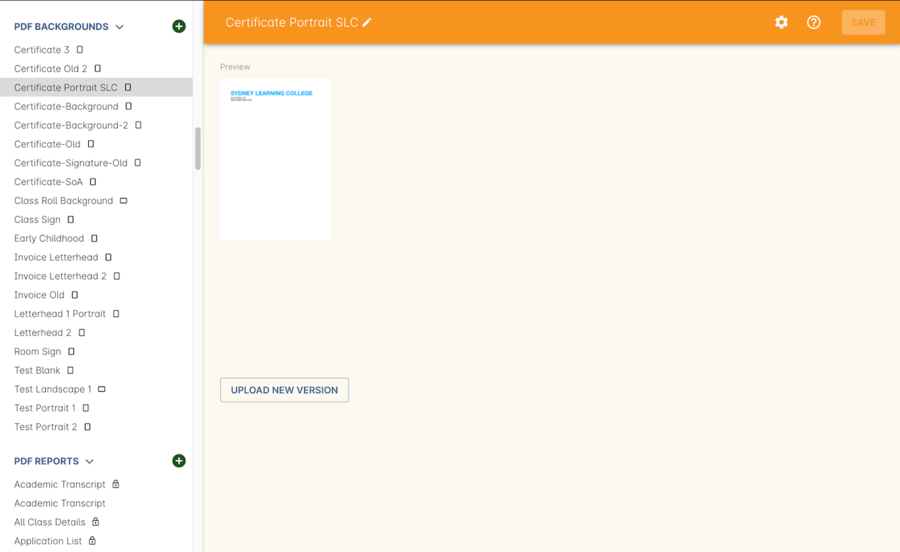
Figure 295. A newly uploaded PDF background showing its preview view
If you click back into your record, you will now see that it shows a preview of the background PDF (as shown above).
When printing, the report will default to the last background you used for that report.
Choosing a Print Background
You can choose a print background in one of two places:
- You can set it globally as a default background within a PDF report record itself, or
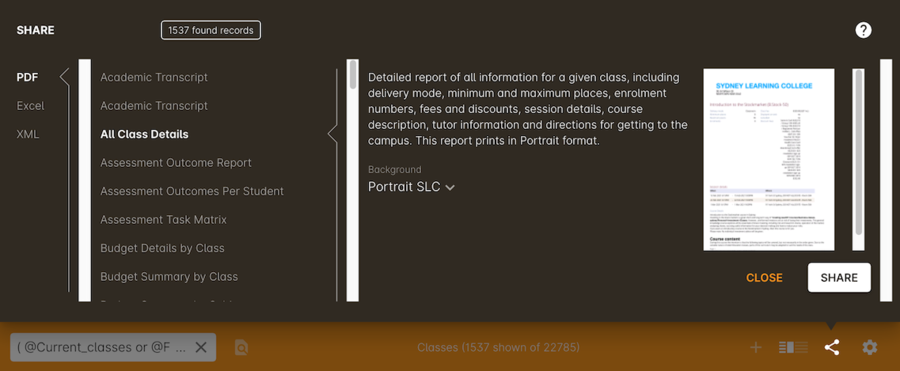
- You can set it at the time you print a report from within onCourse. This is simple as setting the background on the print view screen from the PDF Background drop down box.
To set a global default background for a report:
- Go to the Automation window and scroll the left-hand column until you see PDF Reports
- Click into the PDF report you wish to set a background for
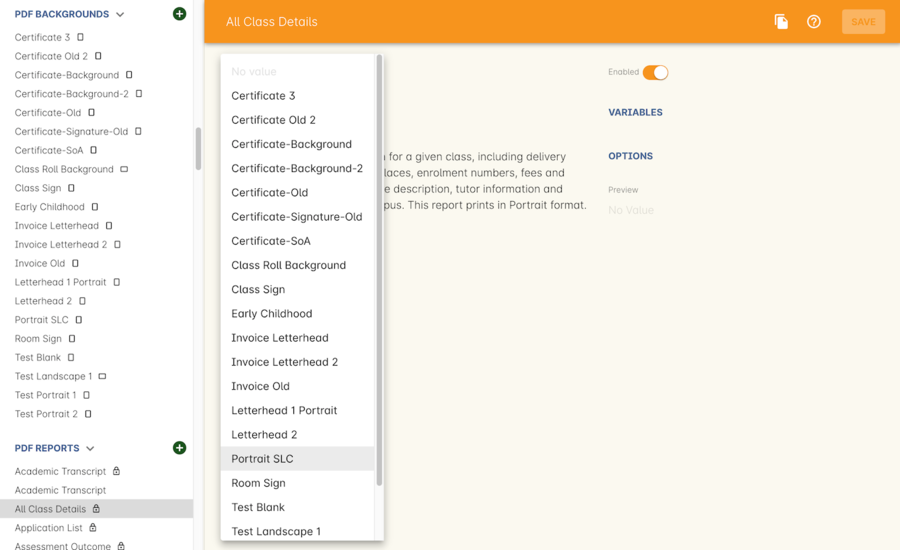
- In the record that opens, make a selection from the PDF Background drop down box, then click Save

Figure 296. Manage backgrounds via Reports window
Background Previews
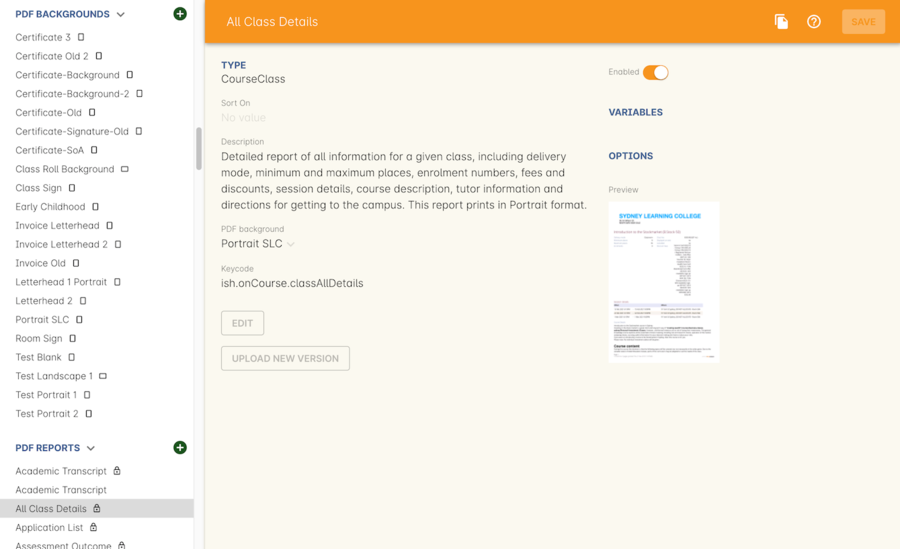
You may notice the Preview sections within the PDF Reports and PDF Backgrounds records. The preview window shows you a preview of how the current PDF Report will come out with the background that’s currently selected.
Previews will only generate after a report has been printed at least once, and the 'create preview' tickbox was checked.
To ensure you create a preview:
- When preparing to print any report, ensure the correct background is selected
- Ensure the 'Create Preview' tick box is ticked.
- Check this the next time you print by making sure the preview box has an image in it.

Figure 297. Preview in the print view

Figure 298. Preview in the PDF Report view
Updated over 1 year ago
