Non-VET Certificates of Attendance
Certificates of Attendance can be created manually and printed to paper for distribution, or automatically created when the class is finished and distributed via PDF upload to the skillsOnCourse portal, with automatic email notifications to students.
By default, the automated script is disabled in new onCourse databases, but you are free to enable or disable this script as your require.
Manually creating Certificates of Attendance for non-VET courses
Sometimes colleges run non-VET courses that are not eligible to receive official Qualifications or Statements of Attainment, however the students would still like to receive some recognition that they completed the course. In this case, you may wish to supply the student with a Certificate of Attendance. Please refer to the latest AQF Certification Guidelines regarding the issuing of non-VET certifications.
- Open the class window and select the class(es) you wish to create certificates for.
- Select Share > PDF > Certificate-Attendance, then click 'Share'.
- The certificates will be created on in a PDF file within the browser, which you can then print or save and send to the student electronically. When printing from the Class record, the whole class’s certificates are created in the one PDF file. If you only want to print a certificate for one student, locate it in the PDF and use your print functions to print the specific page.
- Alternatively you can print a Certificate of Attendance for a single student by going to the enrolment window, highlighting the student’s enrolment and selecting Share > PDF > Certificate-Attendance
- You can re-create these certificates at any time. There are no records created in the certificate window as they are not VET certifications.
Manually creating a Certificate of Attendance for a VET class student
On occasion, a student may attend a VET course but choose not to be assessed. If they have met your attendance requirements, you may choose to issue them a Certificate of Attendance.
You can do this by going to the enrolment window, highlighting the student’s enrolment and selecting the Share icon > PDF > Certificate-Attendance, then click 'Share'.
Please note that if you have named the course the official title of the Qualification or Unit of Competency (e.g. Certificate IV in Frontline Management) their Certificate of Attendance will include that wording.
No certificate record is created in the certificate table for the printing of a Certificate of Attendance. This is just a printed report.

Figure 440. Certificate of Attendance printed for a VET student who chose not to be assessed
Automatically create and issue Certificates of Attendance
The onCourse script "send certificate created notification" is an automated process that will:
- Checks at 6am daily for all non-VET classes that had their last session the day before
- Optionally check for 80% or other minimum attendance requirement before creating the certificate
- Print to PDF a Certificate of Attendance using the background template "certificate_attendance_backgound.pdf"
- Attach the PDF to the student’s enrolment record and upload it to the skillsOnCourse portal
- Send the student and email notification with a no-login link to complete a short survey and download their certificate
Before you enable this script, there are some tasks you need to undertake to ensure the script and associated message templates are configured to meet your requirements.
Decide if you want to check attendance before issuing Certificates of Attendance
The standard script includes a commented out option to check the attendance of students before issuing them with a Certificate of Attendance.
To enable this requirement you will need edit rights to adjust the script. We suggest you copy the script into an editor such as Sublime Text to make these changes, then copy your changes back into the script body when it is complete.
There are instructions inside the script to show you how to adjust the requirement to 80%. For example, below is an adjusted script to only issue Certificates of Attendance to students who had met a 75% attendance requirement.

Figure 441. Changes made to the default script rules to check for a 75% attendance before issuing the certificate
Create and test a certificate background
The script calls on a PDF background in onCourse named 'certificate_attendance_backgound.pdf' to merge with the report inside onCourse called 'Certificate-Attendance', called by the script through its keycode "ish.oncourse.nonVetCertificate"
If you have a custom Certificate of Attendance report with a different keycode, and/or a background report with a different name, you can change the references under the Options heading within the script record.
If you do not want to edit the script, and use the standard 'Certificate-Attendance' report as is, you will need to make sure you have uploaded a background with the exact name 'certificate_attendance_backgound.pdf'. Note that the file name is all in lower case and uses underscores, not hyphens, to separate each word. Create, edit and save the background document on your local computer, and then upload it to onCourse for testing.
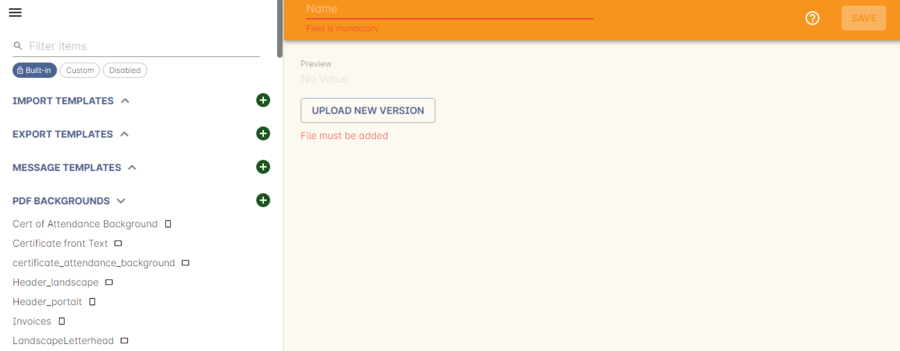
You can do this in the Automation window under the PDF Backgrounds. You can then either select the background from the Share menu when printing, or set the background as the default for that report by clicking on the report in the PDF Reports section, and then selecting the background from the drop down box of the default background field.

Figure 442. Selecting and printing a Certificate of Attendance with the specified background for this script
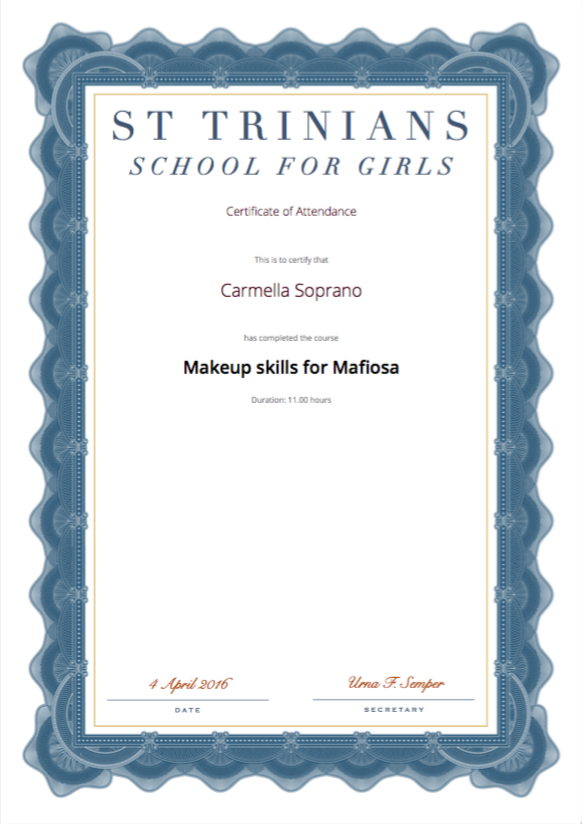
Print and test your report layout, and if it is successful it will look something like this:

Figure 443. A sample Certificate of Attendance printed with a custom background
If you need to adjust your background document layout after testing, return to the original file on your computer and make the necessary changes. Ensure the file is saved with the same name on your computer.
Before you try testing the background in onCourse again, delete the first copy of the background by going to the Automation window, finding the background under the PDF Backgrounds heading, highlighting it, then clicking the cogwheel and selecting the delete icon.
Repeat the earlier process of printing, uploading and testing the background layout and alignment with the embedded report elements until you are satisfied with the result.
Customise your email template
The onCourse message template 'certificate available' contains a time based link to allow the recipient to access their class via the skillsOnCourse portal, complete the satisfaction survey, and download their certificate as a PDF all without logging in.
The link is valid from 7 days after the email is sent. If the user clicks on the link after 7 days, they will be redirected to the login screen to supply their name, email address and password before they can access their certificate.
By default, the link in the email template is to ${enrolment.student.getPortalLink(enrolment)}, which takes the student to their class page and presents them with the survey.
If you do not wish to use this feature, you can instead replace the link in the template with ${enrolment.student.getPortalLink(certificate)} to direct the student directly to their certificate. You will also want to adjust the wording of the template depending on which link you use. Be sure to make your changes to both the plain text and HTML versions of the email.
You can test your emails by ensuring an enrolled student has your email address in their contact record and using the 'send message' function in the enrolment window cogwheel.

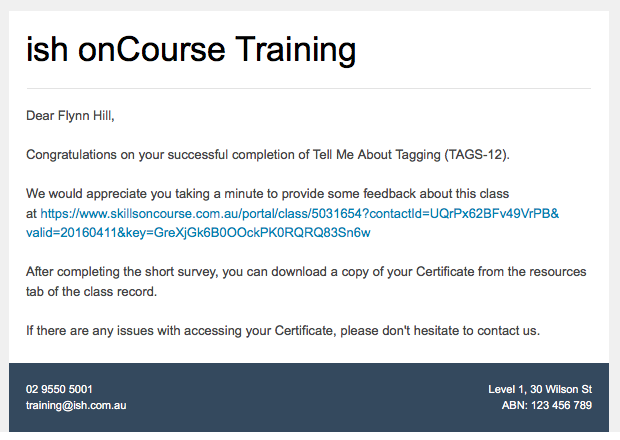
Figure 444. A sample email advising the student their certificate is available after completing the survey
Updated over 1 year ago
