Creating an enrolment with Checkout
The most important thing to remember about Checkout is that all enrolments processed in a single onCourse Checkout process generate one invoice to a single payer. This could be for one student enrolling and paying for themselves in one or more classes, or another contact enrolling and paying for one or more students to enrol in one or more classes. If two friends are enrolling in a class together and paying separately, you would process their enrolments as two separate Checkout processes.
-
Open
Checkout -
In the "Enter contact..." field, type in a name, email address or an exact phone number of the contact you are trying to enrol. If the correct contact populates on the right-hand window, select them and they will be added to the cart. If the person you need is not in the system, you can create their profile by clicking on the 'Create New Student' button on the right hand side on the window. Fill out their contact details, then click Save.

Figure 225. Use the auto complete to locate and select the student
-
After the contact is selected, click on the "Find course or item" field on the left-hand side.
-
Here you enter the items you’re selling; either a course, product, membership or voucher. You can type the name or the code of any product and it will appear in the search results to the right.
-
If searching for a course, once the course is located then selected, a list of the upcoming classes for this course will be shown, click a date to add it to the cart. By default, only current and future classes will be shown however you can also show and select old classes by clicking the 'Show Finished Classes' link at the top of the window. Similarly, if you want add an old class to the cart, you can do so by clicking it.
-
If adding a MEMBERSHIP, VOUCHER, or PRODUCT, search for a name or SKU code, and then click on the choice to add it to the cart. Repeat this as many times as you need to until everything is added. You’ll set Product quantity in the next steps.
-
Once the cart has all the contacts and items added, next we need to review the invoice, so click Summary in the left column.
-
If you have either a voucher or promotion code you can input this into the 'Find promotions' field under the Discounts header. Enter the promo code, it will validate automatically. If nothing appears, the code was incorrect. If the code is correct, a discount will appear underneath the Discounts header. You can click the discount to review the record.
-
Click 'This Invoice' to see the details of the current transaction being performed. Here you can set the payer, set who’s being enrolled in what course, and set the quantity of any products that were added to the cart. Review everything here before moving on to the final step by clicking 'Payment'. If 'Payment' doesn’t appear below the Summary, then you haven’t assigned all cart items to contacts and will need to do so before advancing.
-
The Payment window is the final step in the checkout. Here you can finalise the payment, including whether or not to apply any previous credits or debts to the current transaction.
To review any credits on the payers account, click the 'Apply previous credit' checkbox, and then select any credit note you’d like to apply to the current transaction from the section on the right. Similarly, to apply any additionally owed invoices to the current transaction, click 'Pay previous owing' checkbox and select the invoices from the list that appears on the right. This will all be collated in the payment plan. -
The Payment Plan appears below the previous credit/owing sections. Pay Now is the amount expected to be paid in this current transaction, with any additional credits or invoices applied. If you aren’t accepting full payment straight away, you can edit the amount in this field and it will add a second field with a date and the remaining amount. You can change this date and amount and add as many additional payments as you like, until the invoice is paid in full. Anything listed under Pay Later is an amount owing in the future that does yet require payment.
-
Lastly, select your payment type. Credit Card will open the credit card payment portal in the section to the right.
Enter the details and click Finalise Checkout. Any other payment method will simply show the amount to be paid, and a Finalise Checkout button. Complete your transaction and then click the Finalise Checkout button. -
You will see a Transaction Successful screen along with a snapshot of the invoice just paid. You can now close the tab.
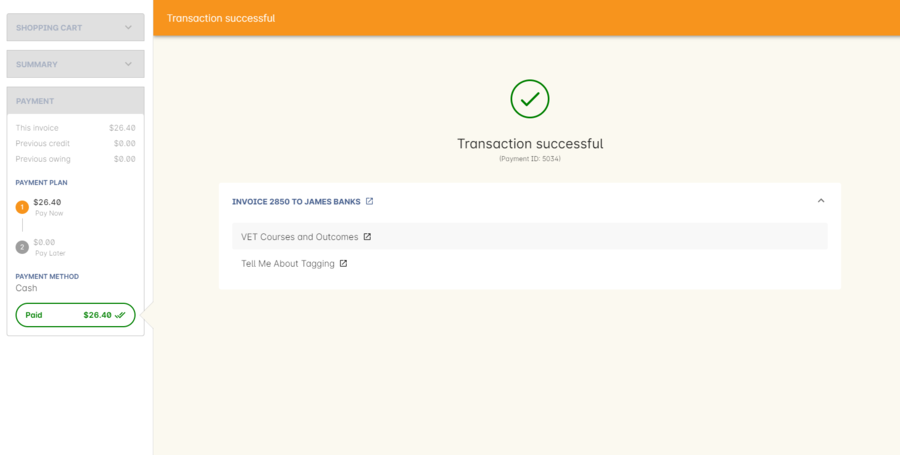
Figure 226. The transaction successful screen
Reviewing the invoice in the Summary
To review the tax invoice, you must click on the Summary section below the cart. Here you can set who is being enrolled into what, who is paying for what, and who is getting what.
If you have more than one contact added, you can choose who the payer is by hovering the mouse over their name and clicking the 'Set as Payer' button. The payer is identified by the 'Payer' label next to their name.
Any enrolments or products you have already added to this Checkout will be itemised automatically on the invoice, with any discount or tax applied. You can review this by clicking the invoice line to expand it. You can set the quanitity of any product in this screen, and set who will receive confirmation emails.
Discounting the enrolment fee
When processing an enrolment through Checkout, you can discount course fees by using a pre-created discount. When a discount is applied to a class, it can be automatically offered to people who meet pre-defined criteria, e.g. seniors, people who hold a certain membership, students re-enrolling within a defined time period or students enrolling in a defined date range. You can also apply one manually by checking the Discount drop down box within the class invoice line of the Summary.
More about concessions and promotions can be found in the Concessions and Memberships chapter.
If an automatic discount has been created, the student meets the requirements of the discount and the class they are enrolling in has been set to allow that type of discount, then it will automatically be applied at checkout when they enrol.
If a student is automatically eligible for more than one type of discount, the higher discount will be applied.
You can also manually switch to a lower, eligible discount or override the discount amount applied in the Payment section of Checkout.

Figure 227. Enrolment with an automatic discount applied for one class
Manually adjusting the price of an enrolment using discounts
Sometimes you need to manually adjust the price of an enrolment for one reason or another - perhaps you cancelled a class that was sold using a discount that’s no longer valid and you want to offer that discount to those re-enrolling.
To do this, the class needs to have a valid and eligible discount attached to it.
If it does, you can manually adjust the discounted amount within the Summary section of the checkout.
In the summary, click on the enrolment and check there is a discount available.
If there is, you’ll be able to click the padlock next to the price and enter a new price.
The breakdown of the new enrolment fee will be displayed and this will be updated within that class’s budget.
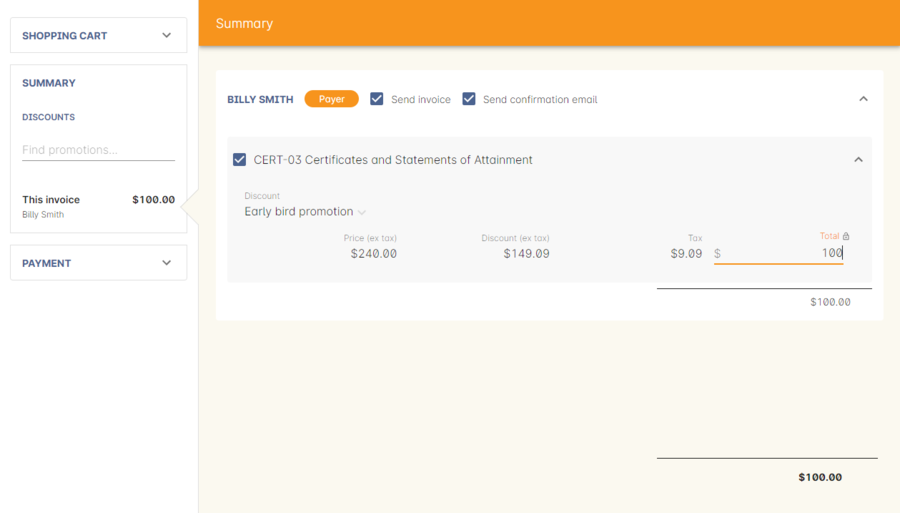
Figure 228. This enrolment has the "early bird discount" applied, and is having its price manually edited to $100
Adding a promotional code
Promotional codes can be used by students enrolling over the web and by administration staff via onCourse Checkout. In both instances, the code word must be supplied for the student to gain access to the discount.
When processing an enrolment, enter the code in the 'Enter voucher or promotion...' field, and press the + button next to the field in Checkout. This will then discount the eligible classes as appropriate.
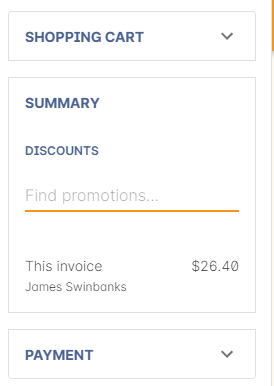
Figure 229. The Checkout promotional code field before entering the code
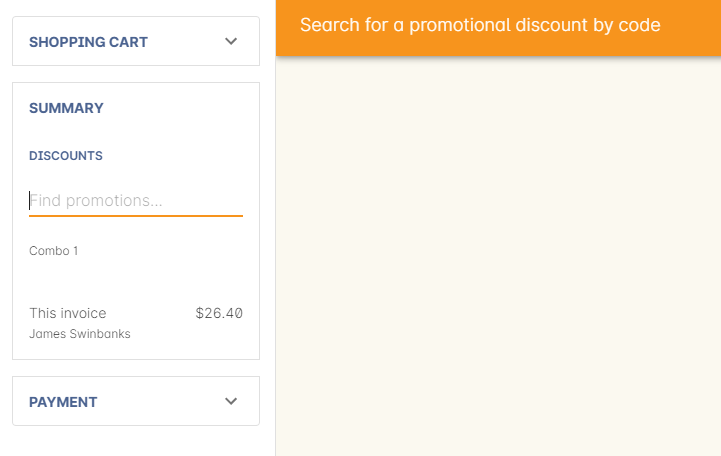
Figure 230. After entering the code, the system will automatically apply any discount matching the code and add it to the Summary. Here the promotion was called Combo 1
Adding a 3rd party payer
To add a 3rd party payer to a transaction:
- Add the student contact to the cart
- If the third party is already related in onCourse to the student you have added, you can find them quickly by clicking Find contact field after already adding the related contact - they will appear already in the right without any searching required. Read more about relations in onCourse here
- If the contact is not currently related to the student, add them as a contact in the same way as you added the student to Checkout. You do not need to enrol them in any classes, however, if they are a friend or family member they may be both enrolling and paying.
- Set the classes for the student(s) as per the usual process, then go to the Summary section
- In the Summary, hover your mouse over the payer’s contact name and click 'Set as Payer'. That will set this contact as the payer for this invoice.
- When finalised, the invoice will only go to the payer. The enrolment confirmation will go to the student(s) enrolling.
Enrolling multiple students in multiple classes
Checkout can be used to enrol many students in many classes, provided they are all being paid for by a single payer.
In this example, two students from the same company are each enrolling in two classes. Both students are attending one class together, and then they are each attending another, different class.
-
Add the students and their related company to Checkout
-
Add the classes that each student will attend, even if both aren’t attending all the added classes, you can assign them in the later step.
When you’re done, go to Summary.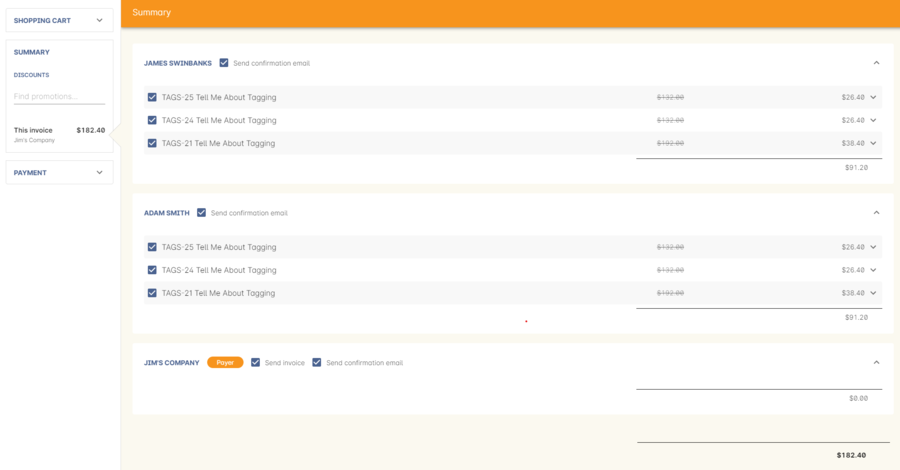
Figure 231. Both students are selected to attend these classes, with the company selected as Payer
-
In Summary, each class added to the cart will be shown under each student. Make sure there’s a checkmark next to each class the student will be enrolled into.
-
Hover your mouse over the name of the company. You’ll see a 'Set as Payer' button appear, click it to set the company as the payer.
-
When everything is set, move on to Payments. You can accept payment as you normally would. The invoice will go to the company contact, while the confirmation emails will go to the students.
Updated over 1 year ago
