Log in to Google services
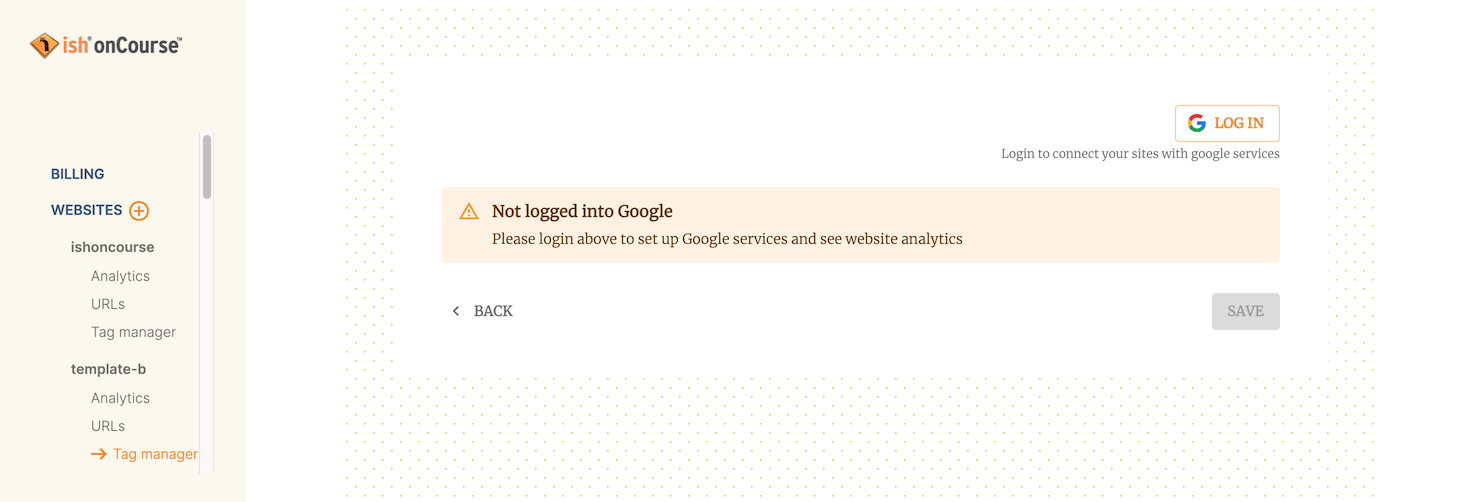
The first thing you’ll do here is log in and connect with Google services. This will allow you to access things like analytics directly from within onCourse. Click the 'Log in' button and accept the permissions to set up your services.

The view when not logged in to Google services
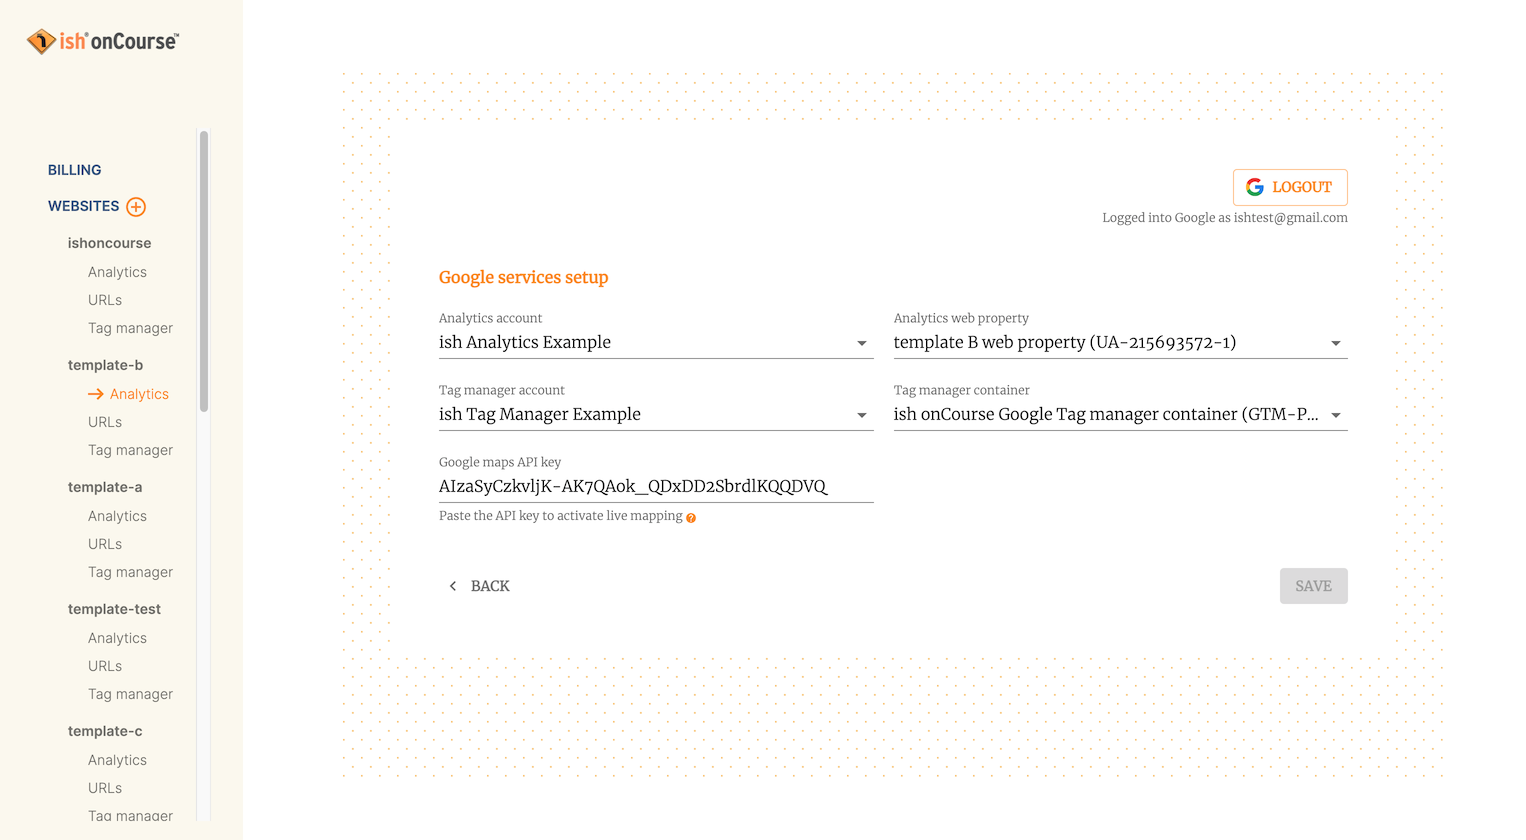
The first step is to set up your Analytics, and then your Google Tag Manager, and then add your Google Maps API key. If you have not created an account for either Analytics or Tag Manager, you will need to do so before you can complete these steps.
Analytics - https://analytics.google.com/
Tag Manager - https://tagmanager.google.com/
Once you have selected your analytics account from the list, you can select the Analytics web property. This is the specific code used to track events and users on your site. If you leave this empty, onCourse will attempt to create one for you at the point you hit 'Save'.
Simiarly with the Google Tag Manager account, select this from the drop-down list, and then select the appropriate container from the drop-down box.
If you don’t have the right permissions to use or view a tag manager container or analytics web property, you won’t be able to see them in the lists. In these cases just leave these fields empty and onCourse will create them for you automatically when you Save.
Google Maps API
You also apply your Google Maps API key on the Google Services set up screen. It’s a bit of a process to get set up for Google Maps, so follow the instructions below:
-
Go to https://console.cloud.google.com/projectselector2/google/maps-apis/credentials
-
Create a new project by clicking 'Create Project'
-
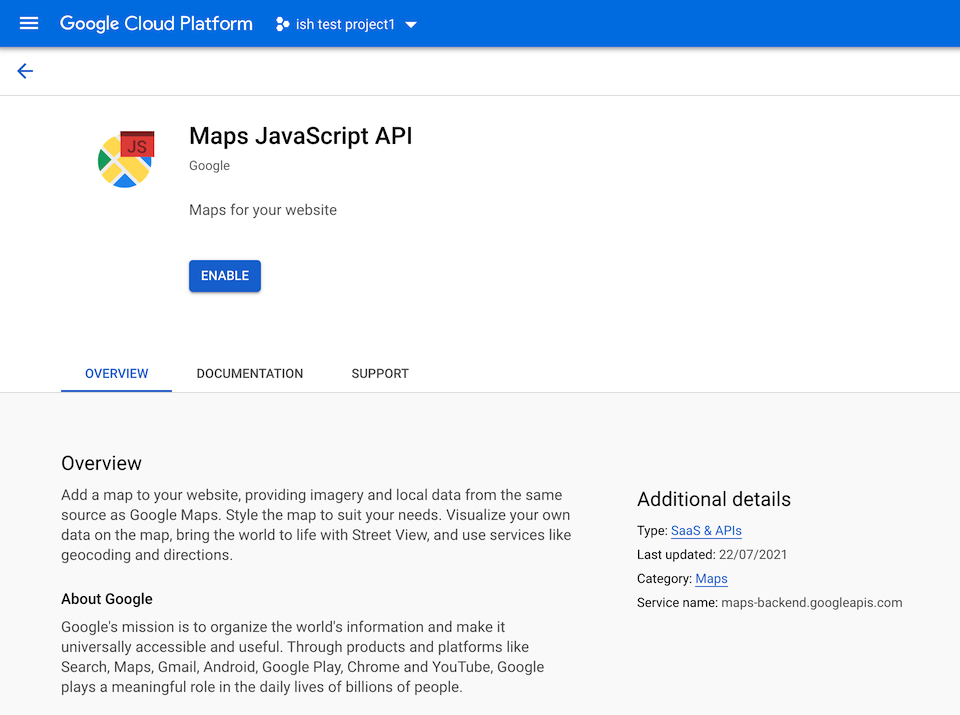
Choose 'Maps Javascript API', and then select 'Enable'

click Enable to turn on the API
-
Click 'Credentials', then '+ Create Credentials' in the top bar, then click 'API Key', then click 'Restrict API key'
-
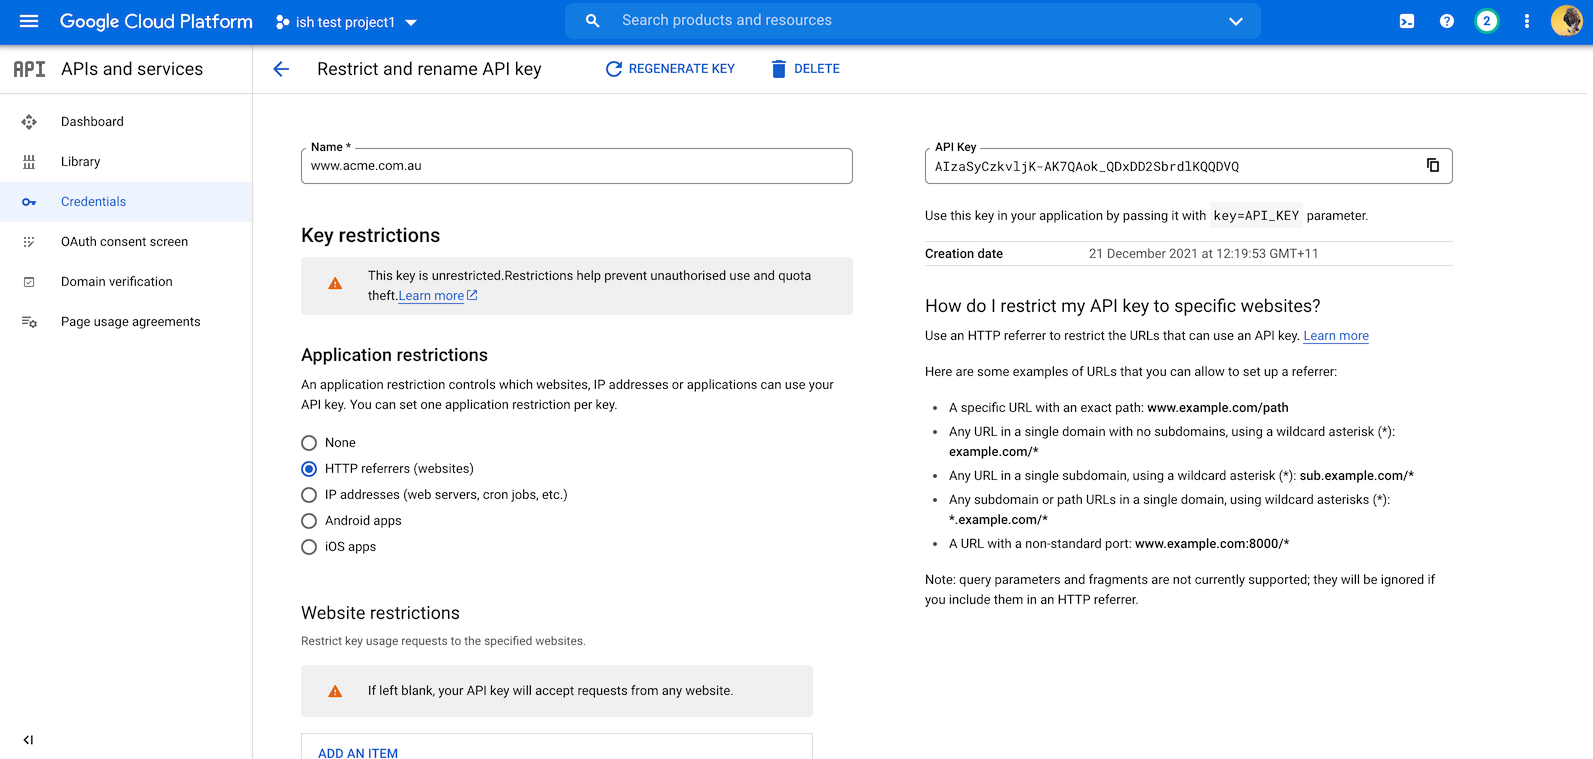
In the next window, rename your API key to something relevant
-
Under 'Application restrictions', select 'HTTP referrers (websites)'
-
IMPORTANT - DO NOT SKIP THIS STEP - Under Website restrictions, click 'Add an item'. You’ll want to add at least two items - the first will be your onCourse website URL eg acme.oncourse.cc/ with a on the end. The second will be your custom domain URL, again with a star on the end after the slash eg www.acme.com.au/*. THIS IS VERY IMPORTANT FOR SECURITY
-
Lastly, go into billing section of the Google Cloud Platform and attach your credit card details, otherwise your api call quota will be very small. You’re given $100 worth of credit every month, but without adding your credit card there’s a very good chance this will stop working until you next top it up. The map functionality will simply not work if you choose not to do this.

Where to retrieve your Google Maps API key
Analytics

Adding your Google Analytics details in onCourse
To plug your Google Analytics account into your website and view simple analytics from this section in onCourse, click the Analytics section under the website you wish to set up or view, then simply log in to Google Services and select your Analytics account from the drop-down box. You’ll need to have this set up in Google Analytics before it will show in onCourse. If you have yet to set your Google Analytics, you can get started by clicking 'Open Analytics' while logged in to Google Services.
Once this is set up and analytics are flowing into your system, you’ll be able to view the number of website sessions from the past 4 weeks from here. In Google Analytics, 'Sessions' refers to the number of individual sessions initiated by all the users of your website.
URLs

The website URLs page is where you can set your custom domains
Here you can see the domain names in use for this website, if you have a custom one, as well as the default onCourse domain for your site.
You can change the page title by editing the current entry in the Website page title prefix field, then hitting Save. Your site location is the default URL, and is fixed and cannot be edited.
If your onCourse plan allows for them, you can also add any custom site domains to your website here. After you’ve entered the domain name URL make sure you also set the primary hostname from the drop-down box that appears, then hit Save.
Tag manager

Check your Tag Manager settings
This screen will show you which container from your Tag Manager setup you’ve applied to the site. If you want to change this, click 'Configure' to be taken to the Analytics section where this is set. Alternatively, clicking 'Open Tag Manager' will take you to the Google Tag Manager dashboard, external to onCourse.
Your Tag Manager needs to be set up separately from onCourse in order for this to be available to use, so ensure it is ready to go before attempting to link Google Services to your onCourse website.
Updated over 1 year ago
