Adding a new contact in Checkout
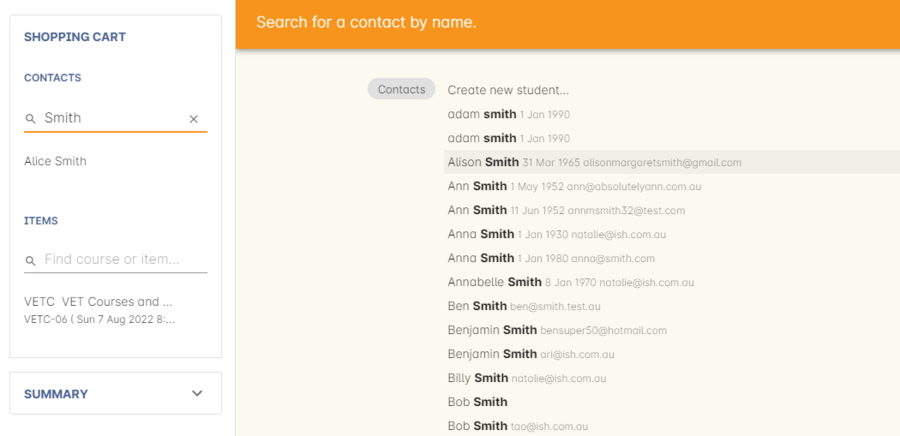
When you look up a student name during the enrolment process, and the name cannot be found (the student is not an existing student) you are given the option to select 'New' from the drop down list.
Selecting new begins the process of creating a new contact record, as part of the enrolment process.
Just like creating a new contact from the list view, you have the opportunity here to collect all the contact details, answer the AVETMISS questions and set their marketing contact preferences. By default, all new contacts created during the checkout process are set to be 'students'. You can also add the tutor option to the contact record where relevant.
Please note that if you do not complete the enrolment process and save the record, the new student you were creating will not be saved either.
If you need to add another contact to the checkout process, you can simply just type in the additional contacts name in the 'Enter contact…' field on the left side of the window. This will allow you to look up another existing contact, or to add another 'new' contact to the enrolment. In the example below I have started typing 'Smith' in the 'Enter contact…' field. Additionally, if the added contact has an existing relationship with a related record, those records will appear automatically in the contact list upon clicking on the field for easy adding.

Figure 76. Adding another contact to the enrolment process
Updated over 1 year ago
