Class Record View
General
This is a summary section where you can edit the Class Code, apply tags and control any restrictions around the age limits for enrolment, whether the class is visible online and controlling whether enrolment is even allowed or disabled. Disabled classes do not appear available for enrolment.
You can click any of the heading in the right-hand column to be taken to that section of the record instantly.
You have the following options:
Restrictions
You can set the minimum and maximum ages for enrolment on a per class basis here.
Enrolments Allowed
If turned on, enrolments will be enabled for this class within onCourse.
Visible Online
When turned on, enrolments can be taken for this class on your website.
Message for operator
Any text put here will display as a red box warning in the Checkout when this record is attached to it. This is a good way to let other users in your organisation learn any must-know details for this contact.
Custom fields
Any custom fields you create for Classes will be displayed in General. You enter the data for these fields here.
Restrictions apply only for enrolment in this particular instance of the class, and will prevent students without a date of birth from enrolling in this class, as well as preventing students who don’t meet the age requirements from enrolling.
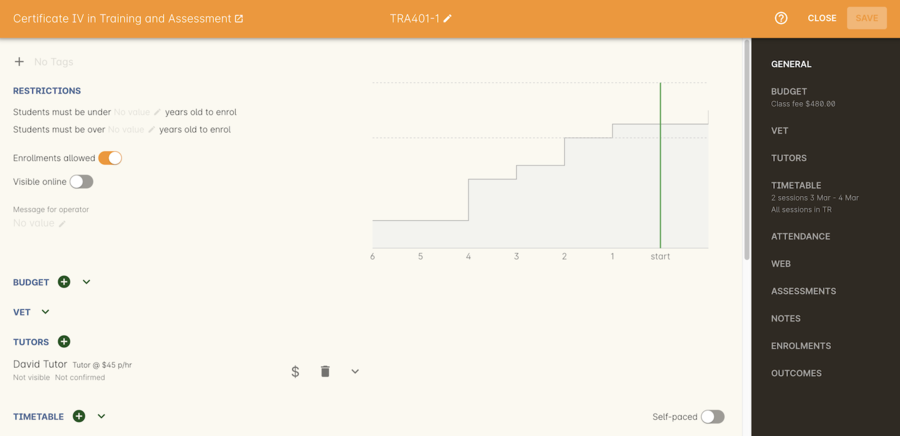
Figure 113. Example of content within the Class/General section
Web
You can add class specific web information to this section to appear on the public website, and in the student and tutor portals for this class.
Most advertising information will come from the course record’s marketing section. Content added to the class web section will appear in the class display box with the heading: Important information. It is recommended that you only use this field for limited content, like 'Funding available for existing workers' or 'This class is assessment only for RPL/RCC candidates'.
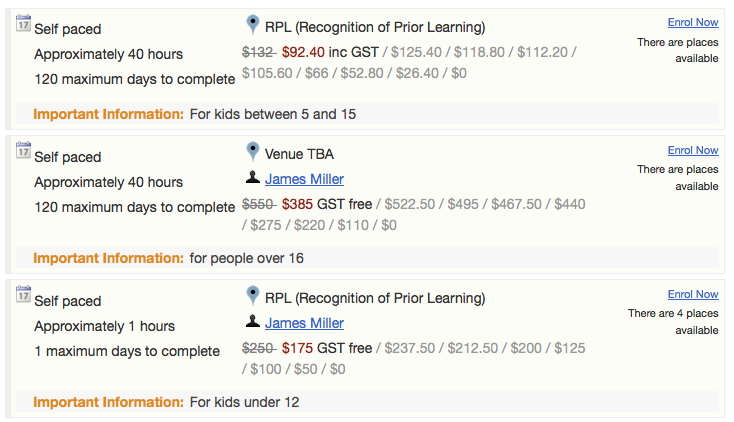
Figure 114. Example of content in the class Web section displayed within the class summary
VET & Training Plan
This section relates to RTOs. Default data for AVETMISS reporting and VET Fee Help funding source information can be set here for the whole class group, and modified on a student by student basis via their enrolment or outcome records as needed. You can also suppress all data related to this class, including its enrolments and outcomes from reporting by choosing the 'Do not report for AVETMISS' switch.
Please note some of these reporting fields are state specific. This is indicated in the field label. The default values of the 'Delivery mode' and 'Funding source national' can be set in the general preferences AVETMISS section.
The Qualification and nominal hours shown here are based on the values set for the qualification and units attached to the parent course. A summary of the classroom hours (from the timetabled sessions) and student contact hours (nominal hours multiplied by the number of students enrolled) is also displayed.
You can override the hours reported for this class by editing the reportable hours field. It will default to reporting the nominal hours, or the classroom hours if no nominal hours have been supplied. The reportable hours field allows you to enter numbers with decimal places, but this value will be rounded to the nearest whole number during the AVETMISS export process, as per the requirements of the standard.
You can also set the class as eligible for VET Student Loans by ticking the checkbox. Learn more about VET Student Loan handling in onCourse in our VET Student Loans & FEEHELP chapter.
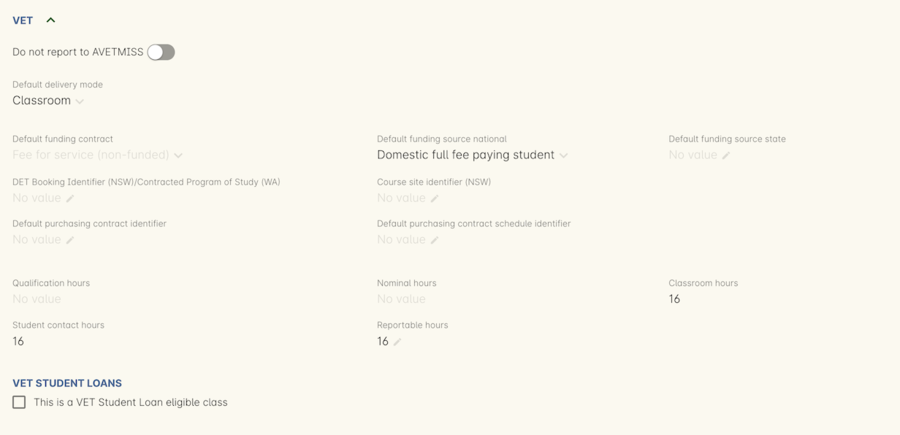
Figure 115. The class vet section,with the VET Fee Help fields displayed
Training Plan
If the parent course of your class is linked to multiple units of competency you can use the class attendance to create a training plan. By default, all outcomes will be set to be delivered on all sessions of the class, meaning the start and end date of each student outcome will default to the start and end date of the class.
The training plan looks the same as attendance, except instead of marking students or tutors, you’re marking which outcomes you’re planning to teach in each lesson. This is what forms the basis for your student training plan, setting start and end dates for each outcome as per how you plan it in this section.
More information about creating training plans is available in our RTO chapter.
Tutor
This section allows you to add one or more current tutors to the class.
Tutors roles must be selected, tutors can be confirmed and tutor pay rates are set by clicking 'Add Pay' when adding a new tutor, or 'Edit Pay' if they’re already added. You can also choose if the tutor is to be published as part of the class promotional material online by checking the 'Make tutor visible on web site' checkbox.
If the tutor has an employment end date in the past (set in the Tutor section of their contact record), they will not appear in the search results list. You will need to go to their contact and remove the end date before you can add them to a class.
If you show you tutors in your onCourse website, this also allows their associated profile picture, resume/bio and links to other classes they are teaching to be displayed.
Tutor roles are defined in the onCourse Preferences window, under Tutor roles. This is where you can name the roles specific to your organisation and set the default pay rates that apply to a tutor of this role type. More information about this feature can be found in payroll. You can override the pay rate that applies for this particular instance of the class where needed, while keeping the relationship to the original tutor role name.
Tutors can use their skillsOnCourse portal to confirm their availability to teach the class, or you can manually set the date they confirm in their tutor record.
Tutors must be set per session; you can have multiple tutors assigned to a class and have them teach alternating sessions, or have two or more for an individual session, for example if you have a guest speaker. You do this in the Timetable section.

Figure 116. Edit view of Tutor window to allow a Tutor to be assigned and tutor role to be set
Budget
Class budgets allow users to add additional income, expense and wages lines to assist your program coordinators to determine the profitability of a class. In addition to the income collected from your current enrolments, you can predict the income and expenses you will incur for any projected number of enrolments. You can also set available discounts in the budget.
Click the + button next to the Budgets heading to add a new income, expense or tutor pay line. Click the + button next to discounts (within the budget) to add a discount.
You can also hover your mouse over the Budget section to be shown a rundown of the totals. This works when viewing the record in full screen, or when viewing it in three-column mode.
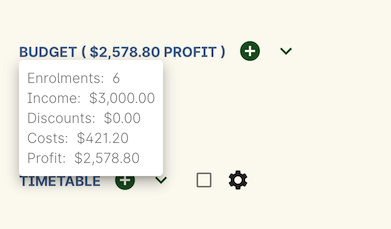
Figure 117. Hover your mouse over the Budget header to see this brief rundown
For more information about the budget section, and tracking expenditure and income for classes, visit the Budgets chapter.
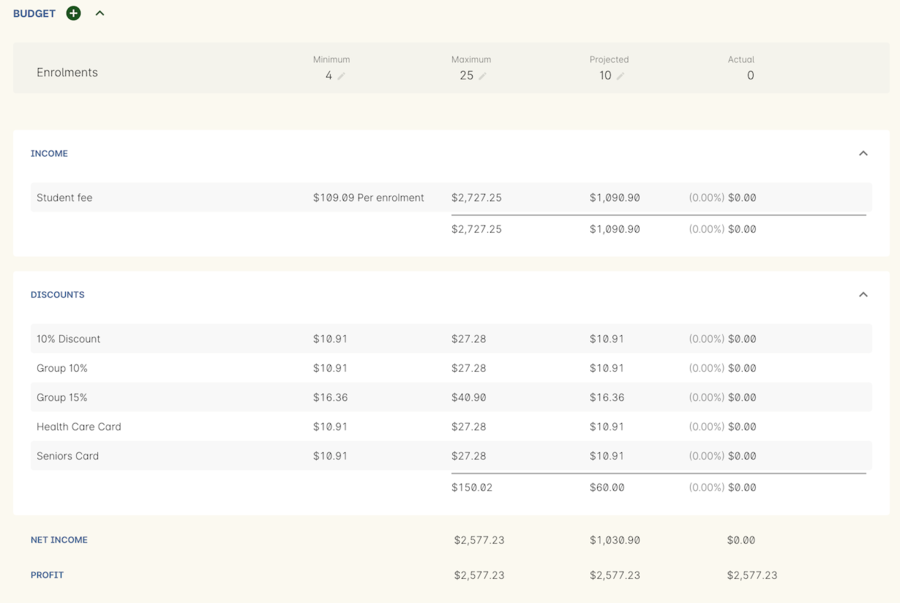
Figure 118. The budget section outlines all costs associated with a class,as well as income and profit margins
Assessments
The Assessments section allows you to set assessment records to the class, including the day of release, the due date and the tutors who are assessing them. To learn more about assessments in onCourse visit our Assessments chapter.
Timetable
For more information on the class timetable visit our Class Timetable chapter.
Attendance
For each session created, and each student enrolled or tutor attached to the class, an attendance record will be created. Both students and tutors can be marked, and you can also add notes to the attendance record. The percentage attendance will be calculated and displayed next to the student name. Tutor attendance is used for payroll calculations.
Click the cross-section of the date and student you want to mark attendance for and the icon will change. You can select only three of the five options using method; Attended (green tick), Absent without reason (a red x) and Not Marked (a grey circle). To mark a single session as partial attendance or absent with reason, you must hover your mouse over the icon, then select the notes icon that appears next to it. From here, you can select any of the five following icons, as well as add a note for the reason. Attendance records with notes will show this icon at all times.
- Attended - accompanied by a green tick
- Absent with reason - accompanied by a grey cross
- Absent without reason - accompanied by a red cross
- Partial attendance- accompanied by a clear tick
- Not marked - accompanied by little icon of person
You can edit a student’s or tutor’s attendance in bulk by clicking their name in the attendance list. This will show you a dropdown list of options you can select. You will also see a calculation of the percentage the class the student has attended, to monitor the student’s attendance requirements.
Sessions that are marked as attended, partially attended (minutes of attendance) or absent with reason will contribute to the student’s positive attendance percentage calculation. Sessions that are marked as partially attended (minutes of non-attendance) and absent without reason will contribute to the student’s negative attendance calculation. Sessions not yet marked do not contribute to the overall calculation of attendance, nor do sessions marked in advanced (attendance marking for days after today).
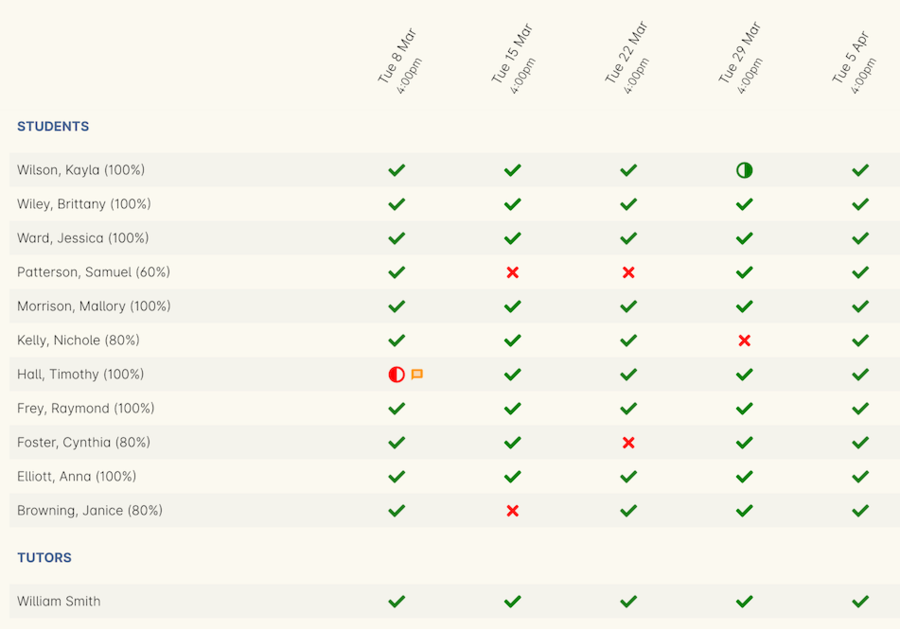
Figure 119. Students showing different attendance statuses and percentages
Documents
Class specific documents and attachments can be uploaded and cloud-stored in this section to be displayed either publicly, in the student portal or privately hosted for internal use. Drag-and-drop your file into the main window and it will upload for you. Then name it and save it.
If you’ve already uploaded the document to onCourse, click the + button next to the Documents heading and type in the name you gave the file when you uploaded it, then select it from the drop down list of selections. If you can’t find your file, you likely named it differently and should try something else, or it’s been set as 'Deleted' and you’ll need to reinstate it.
Once the upload is complete, the window will allow you to enter a name for the file, set its access level, apply any tags, write a description and a checkbox that sets whether the document is allowed to be attached to multiple records at the same time. Once finished, click Add and the document will be added to the class.
Access levels can be set as public, private, tutors and enrolled students only and tutors only. You can read more about the specifics of each access level documentManagement-accessRights section of our manual.
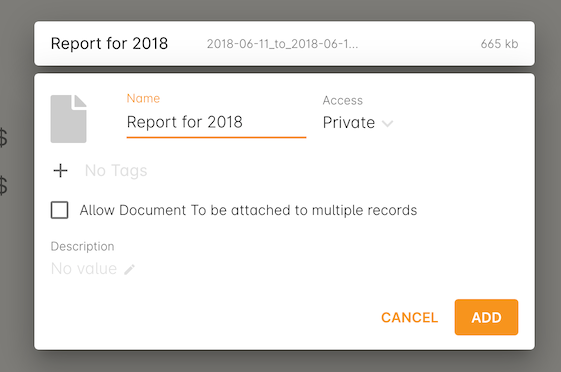
Figure 120. A new document being added,with access rights set to Private
Notes
This section allows you to make your own internal notes regarding the class. These are not published to the website.
You can add a new note by clicking the + button next to the Notes heading. Below this will show you a list of previous notes created. Notes are only editable if you have the correct access rights set for your user. Notes will always contain the date and time it was created, along with which user created it.
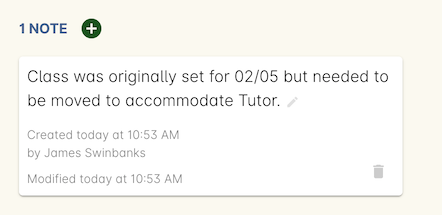
Figure 121. A note in the Notes section
Enrolments
The Enrolments section displays a 'Successful and Queued' button that links to the Enrolments window, and also shows the number of successful or completed enrolments. Click the button to be taken to the Enrolments window, where the results should filter out to display successful and completed enrolments for the class. It also shows other buttons that will show you enrolments with other statuses, like Cancelled or Credited enrolments.
You can also create a new enrolment by hitting the + button next to the section heading. This will open up Checkout.
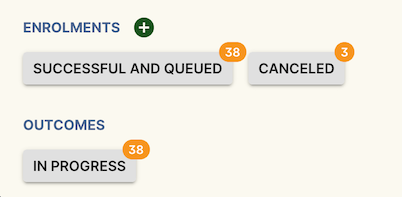
Figure 122. The buttons under Enrolments and Outcomes point to associated records with that status
Outcomes
This is a section relevant to RTOs that displays the number of outcomes with any given status associated with this class. Click any of the buttons to open the Outcomes window displaying a list of all outcomes associated with this class, with that status. You can double-click any record to open it at the detail level. For classes in progress, this button will generally read 'In Progress'.
For each unit of competency set in the parent course, the students enrolled will have an outcome record. Outcomes can be set and modified by clicking one of the buttons udner the Outcomes heading, then opening a record by double-clicking.
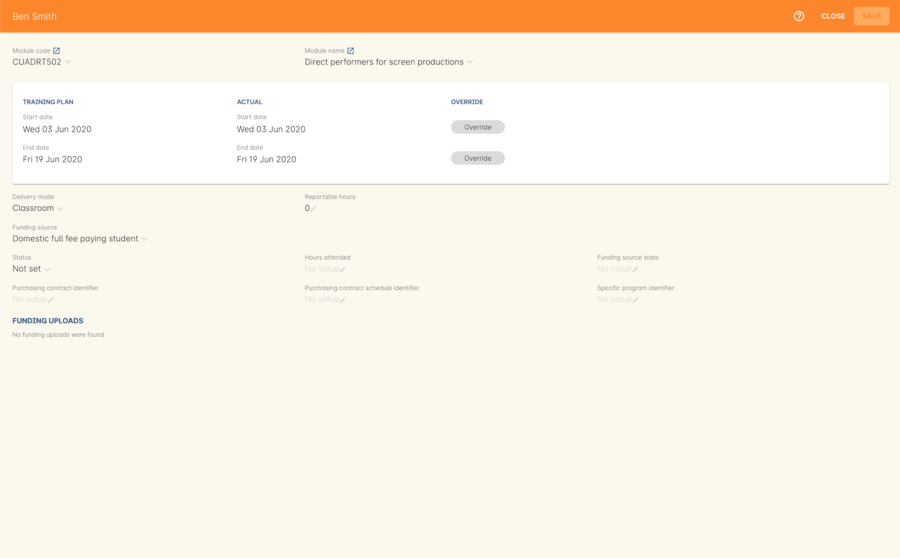
Figure 123. An outcome record. This record is set to Satisfactorily completed (81)
To learn more about outcomes in onCourse, go to our Outcomes chapter.
Rules for adding outcomes to existing records
There are some validation rules that dictate when an outcome can be added to a particular record.
These rules include:
- You can add non-VET outcomes to an enrolment
- Cannot be created without a related enrolment or prior-learning
- Cannot mix VET and non-VET outcomes in one enrolment
- Cannot remove the last outcome from an enrolment
- Cannot remove an outcome with a related certificate record
- Cannot change an outcome module or status for an outcome with a related certificate
- Can add any VET outcome (with a module) to an enrolment with other VET outcomes
Marking Outcomes in bulk
You can mark outcomes individually, but it’s much easier and faster to update them in bulk.
To update a classes outcomes in bulk, open the class record by double-clicking it, then scroll to the Outcomes section. Click 'In Progress' to open the Outcomes window and show you all the outcomes that do not currently have a set status. Highlight each record you want to edit — you can highlight multiple records by holding down the shift key while selecting records in the list view — then click the cogwheel icon and select bulk edit.
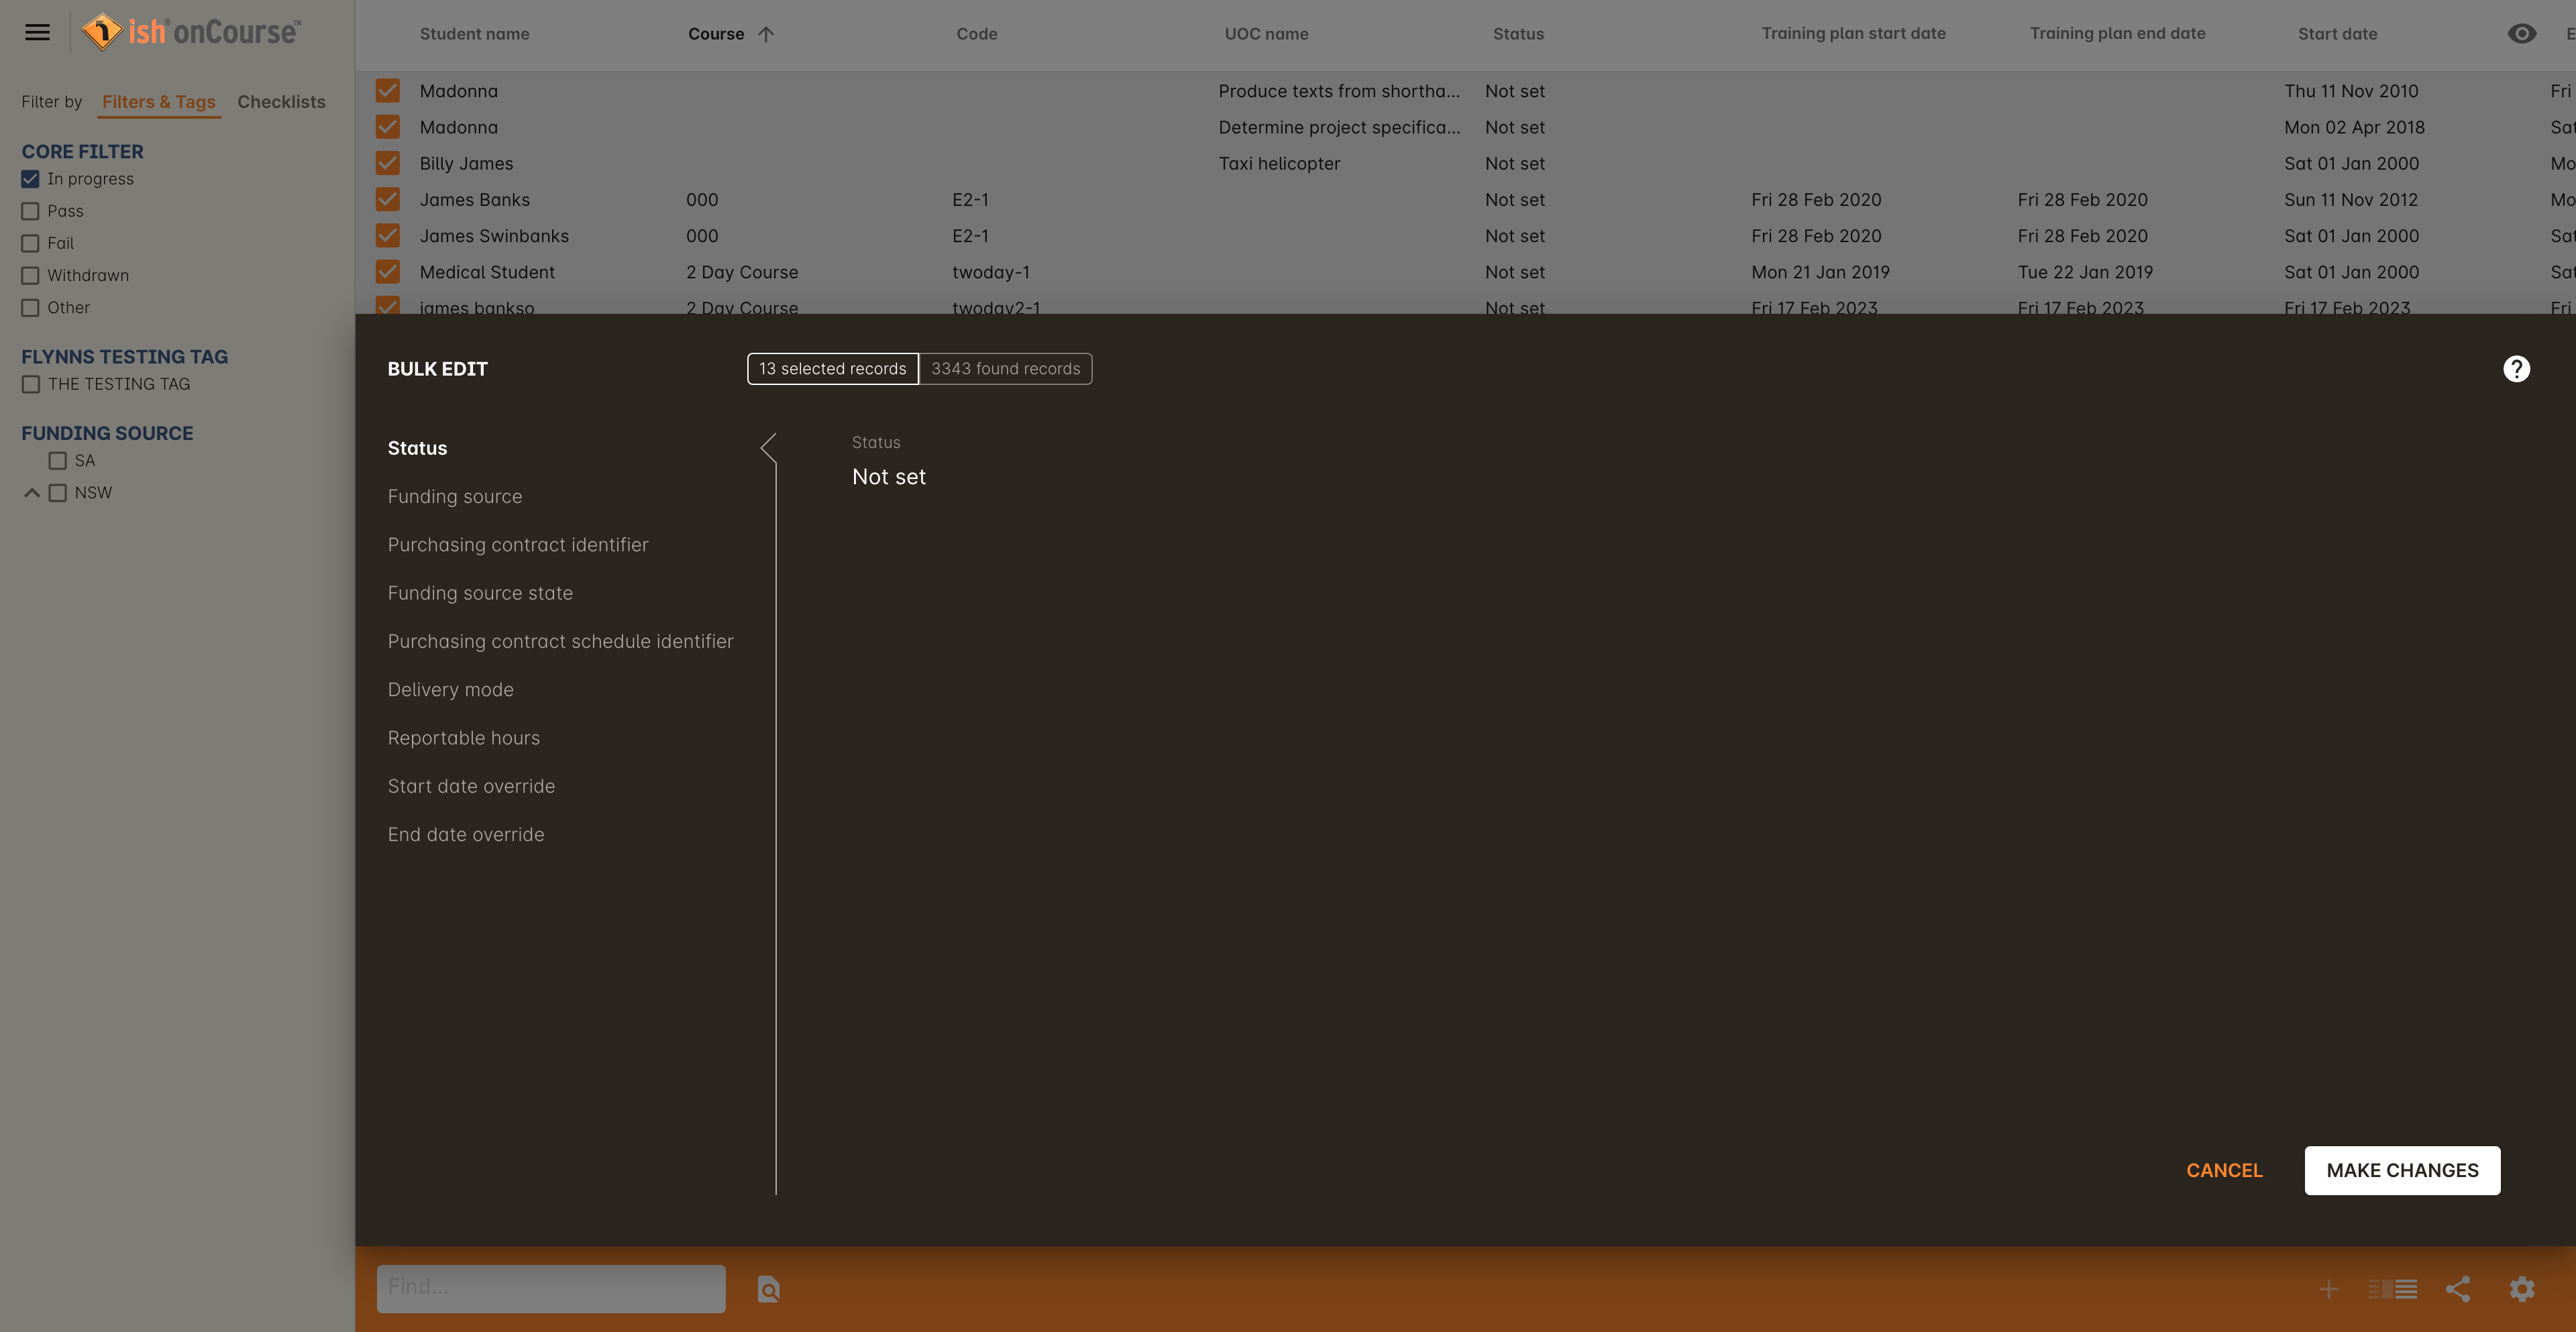
Figure 124. The bulk edit view uses the same style view as sharing does. Select the status to update each record too then click Save
In the view that pops up, select the Status you want to edit each outcome to from the drop down box and then select Save. Each outcome that was highlighted should now display the new status.
Updated over 1 year ago
