Creating an Assessment task
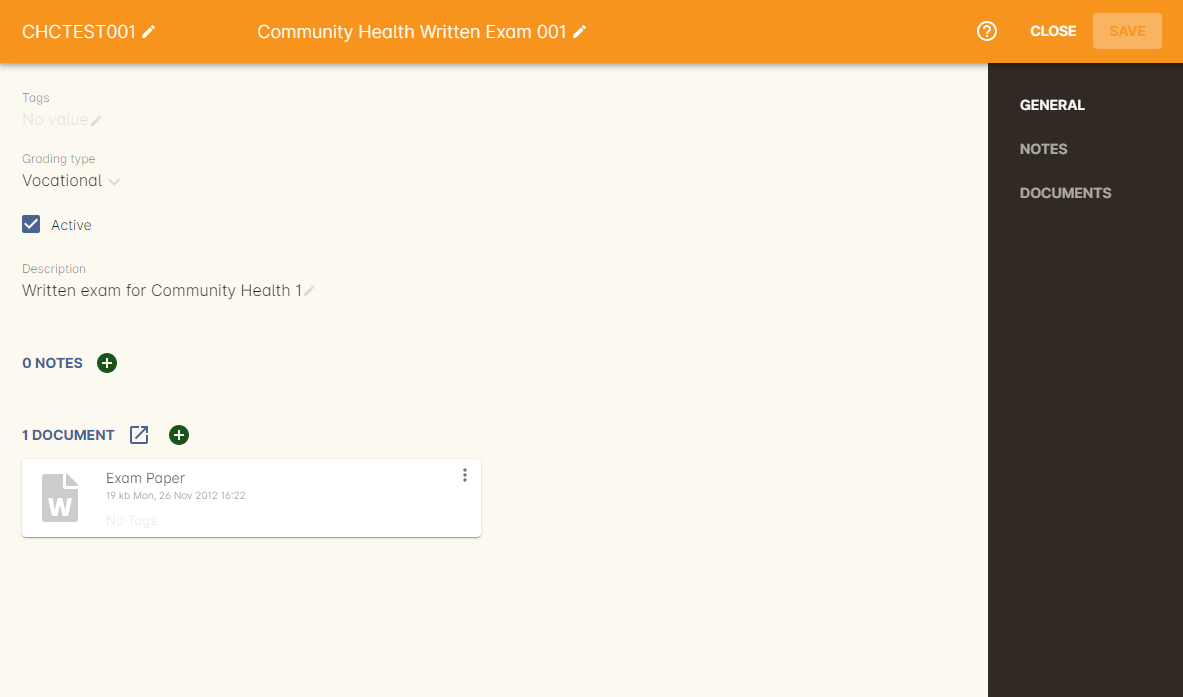
Assessments can be set as 'active' or 'not active'. Only active assessments can be assigned to classes.
-
In the bottom right-hand corner of the assessment tasks window, click the + button to create a new assessment task
-
Give your assessment task a code and name you will remember. This is how you will look up the task later.
-
Add a description to the description field that describes the overall assessment task and its requirements. This will be visible to candidates and assessors in their web portal. The description field allows for rich text entry, so you can format your text with headings and other elements to make the content easy to read.

Figure 409. The general tab of an assessment task
Any content added to the notes tab is internal data and will not be visible to candidates or assessors.
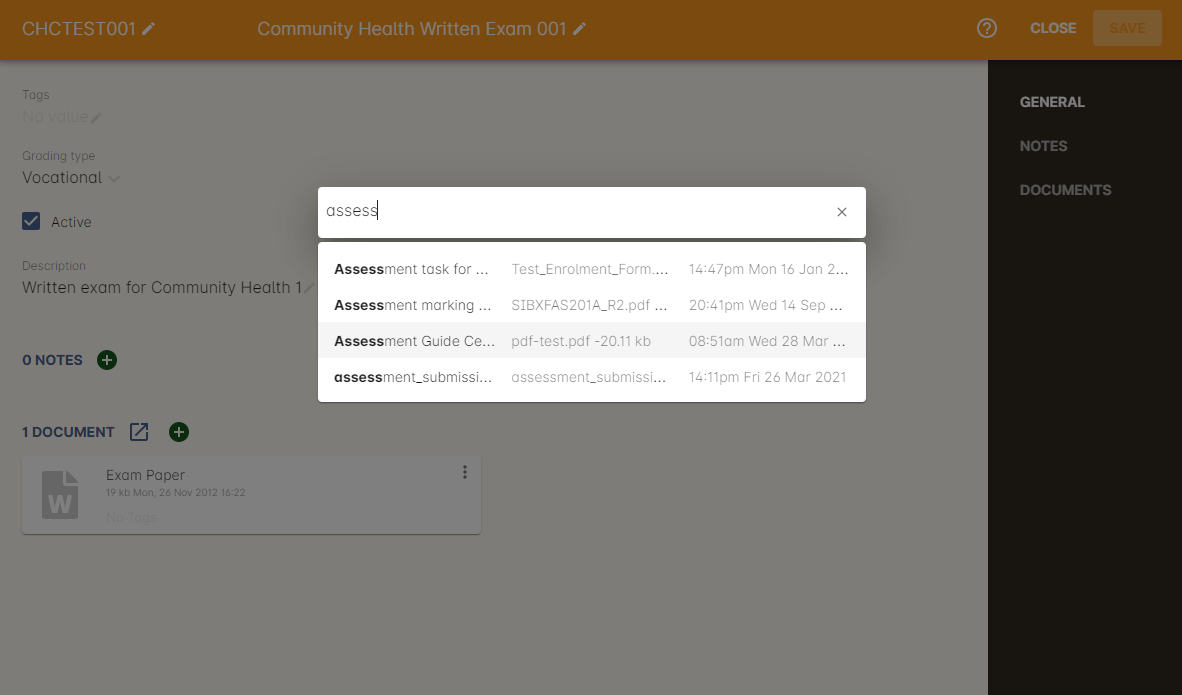
To add a document to the assessment, click the + button to the right of the Documents heading, type the name you gave the document in onCourse, or drag and drop the document into the window from your desktop.
Add any assessment documents to distribute to the candidates or assessors. Be sure to set the appropriate permission for each document attached.

Figure 410. Adding an Assessment Guide pdf to the assement task record
When you’re done, save and close the assessment task. By default, it will be set as 'Active', so you can add it to classes.
Updated over 1 year ago
