Linked to specific pages
If you attach a document to a course and mark it as 'public' that attachment will be shown on the course description page. This makes it very simple to add pictures or perhaps a PDF with further course information. Remember that Google and other search engines will not do a good job with indexing content in Word, PDF or other formats. So if you want the best exposure online and the best search engine results, put your course descriptions as text directly into the course description.
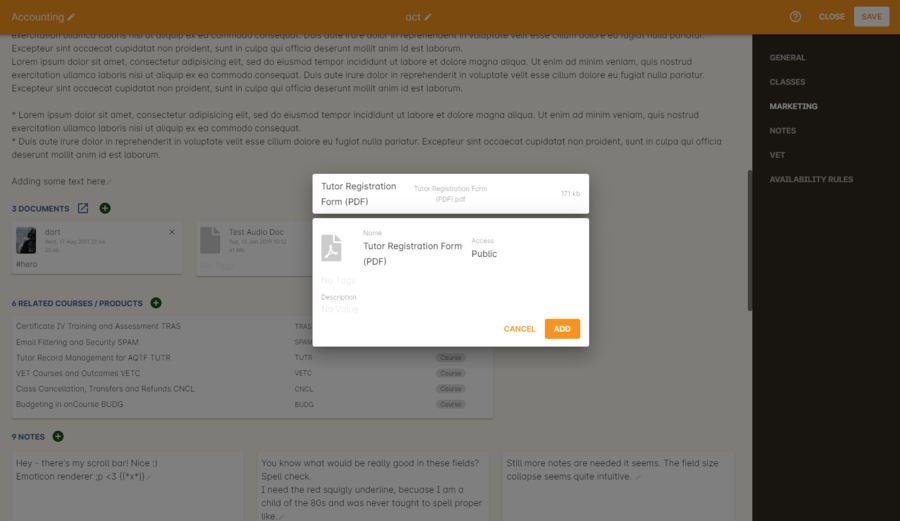
Attaching a PDF to the course can be useful for specific files such as a pre-enrolment questionnaire, additional information about course requirements, software exercise files, and so on. Including these files is achieved exactly the same way as including an image on your page…open the Course, click the Web tab and then the Plus sign to browse the files. We recommend documents are uploaded as PDF as they can be universally accessed no matter what computer the student is running.
- Open the Course to which you wish to add the document to and scroll to the Documents section.
- Now simply click on the + button next to the Documents heading and type the name of the existing image or upload a new one by clicking the Browse button.
- Once the data updates online, the course detail page ( /course/ABC ) will now have your new document at the bottom.

Upload a document to your course via the web page of the given course
- In onCourse open the Tutor record you wish to attach the image of.
- In the tutor record, click the blank head image in the top left of the window and select the image from your computer. Click Save. The image will now appear where the blank head image used to be.
- Provided there is text in the Resume field on their tutor record, the image will display on their tutor profile.
Updated over 1 year ago
