Creating Classes
Before you try to create a class, you need to have already created a course that it can be attatched to.
Many colleges develop special codes to assist in identifying classes in groups like categories or regions to make them easier to remember and search on. A simple method is to number or alphabetise the classes. For example if your course is Dancing For Beginners and the course code is DFB, you may wish to create the class code for the first class of this course as "01". This will then allow future classes in this same course to be listed in order i.e.. 01, 02, 03. When you duplicate the class the final number will automatically increment.
How to create new classes
- Open the class list window, click on the + button in the bottom right-hand corner of the screen. A new record will open to the general section.
- All classes must be linked to a course you have already created. Begin setting up your class by typing the course name in the top-left field and select it from the drop down list. Once you have entered the course name you will see that the course code is automatically displayed in the 'Course code' field.
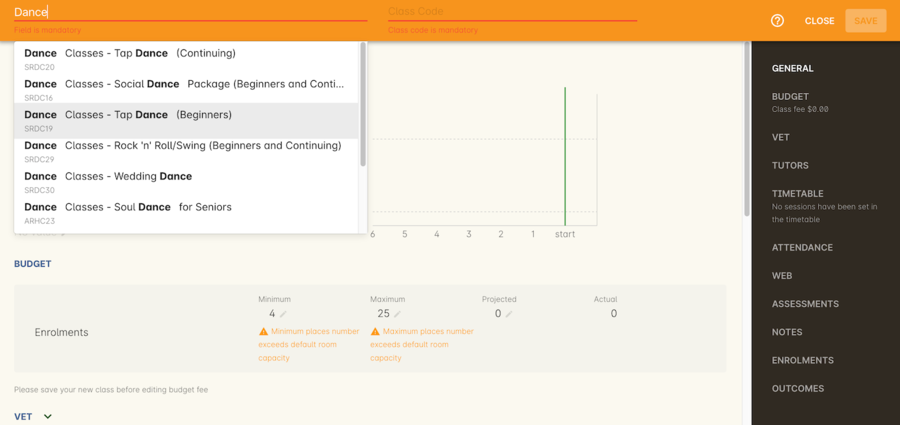
Figure 125. The first part of creating a new class is selecting the right course
- The next available class code—the number that appears after the dash next to the course code—will be automatically assigned, however you can change it to a code of your choice. Your class code must be unique; that is a code not used by any other class already created for that course. Please note that the class code must not have any spaces or hyphens between characters. If you must separate parts of the code, use a full stop with no spaces. The pink coloured field will change from invalid (pink) to valid (white) once you have entered your information correctly.
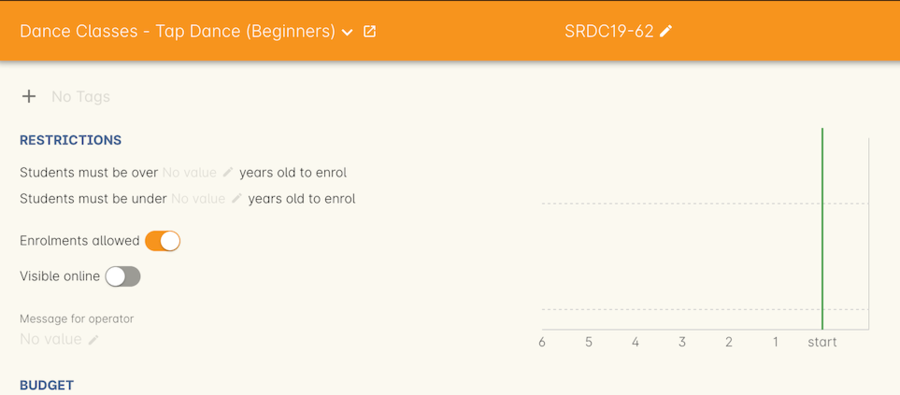
Figure 126. Once the course is selected,a new class code is automatically added.
- Complete any relevant fields on the General section, such as if the class has an aged based enrolment restriction or requires a message alert. By default, your class will be set to a status of 'Enrolment allowed'. If needed, change it to another status.
- Save your class by clicking the Save button in the top right of the window. You must save your new class before you can begin to edit any of the budgets or any other part of your new class.
- Your class will automatically have the default minimum and maximum enrolment numbers as per your general preferences. Update these numbers as applicable for this class, and enter the number of your predicted enrolment numbers in the 'Projected' field.
- Go to the Budget section to set the class fee by expanding the Budget section, then clicking 'Income', then selecting the edit icon next to 'Student Fee'. It is important if your college has multiple income accounts to select the correct account for the class during the setup phase. To add new items to the budget, click the + button next to Budget and select whether you want to add an Expense (any associated cost), Income (enrolment fees or extra fees), or Tutor Pay. Details can be found in budgets-addingAndEditing.
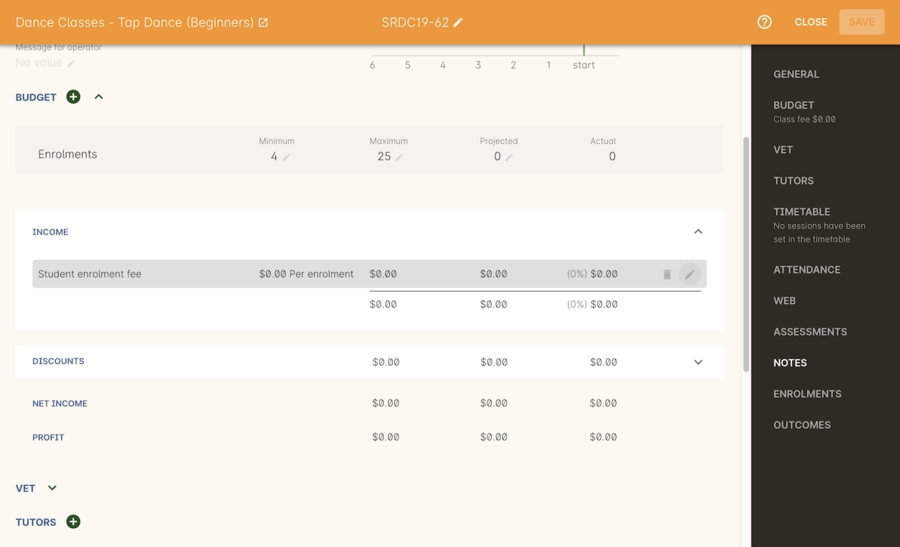
Figure 127. Where you add a new Student enrolment fee. Click the edit icon to change the fee or set a payment plan
- To set a student fee for the class firstly, select whether to charge GST for the class or N for no GST. Make your selection then either enter your student fee exclusive of tax in the field 'Amount' or enter the total fee including tax in the 'Amount inc tax' field. Which ever field you enter, the value of the other field will be automatically calculated.
if you’re setting a payment plan instead of an upfront fee, ensure you have set your Timetable first. Follow the steps listed in 'How to create sessions' below.
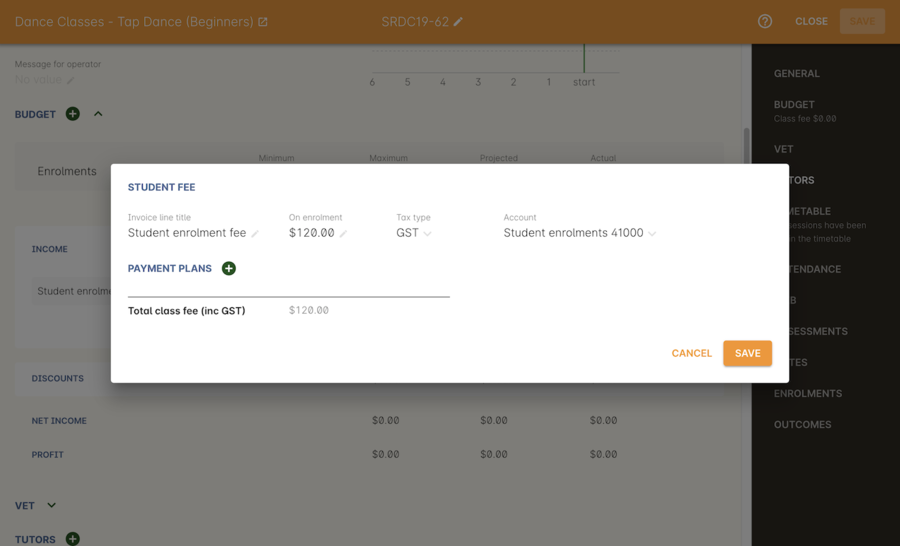
Figure 128. Setting the Student enrolment fee. This example has set it at $120 inclusive of GST
- Now go to the tutor section. This is where you can assign tutors to classes. Click on the + sign next to the 'Tutors' heading and type the tutor’s name in the contact field. This is an auto complete field so once you start typing, a selection of tutor’s names you have previously entered will be listed. Select the tutor you want from the list and then select a role. Finally, select 'Add Pay' and confirm the tutors pay-rate. This can be edited later by clicking 'Edit Pay'. Repeat these steps to enter an additional tutor or course supervisor.
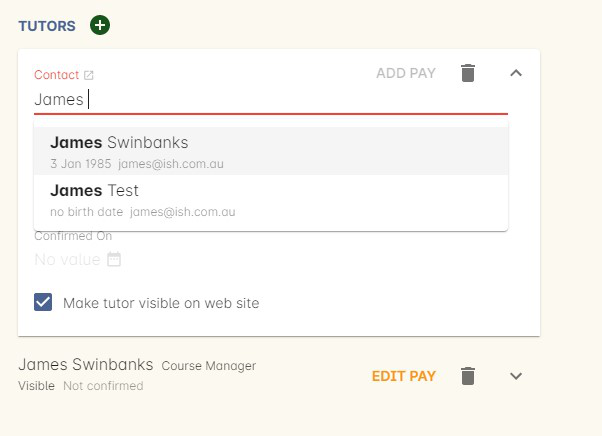
Figure 129. Just type the name of your tutor to pull up a list to choose from
- Add any class specific information that is required to the web section or notes section.
Updated over 1 year ago
