Editing data collection forms
You may wish to start by changing some fields from optional to mandatory. When a field is deemed mandatory, this means the student cannot progress further through the form without adding data. It also means if a student returns to your website to make another application, enrolment or purchase, they will only be asked to complete data for mandatory fields they haven’t previously completed. This assists in making return visits and purchases faster for your customers.
Changing field labels and help text
You can change the field label and helper text. By default, the field label will be the name of the field, but you can change it to make more sense in the context of the form.
For example, you may wish to change the label of the field 'street' to 'address', and the helper text from 'Enter your street address' to 'Enter your mailing address' if this is the data you would prefer to collect (keep in mind, if you are an Australian RTO obliged to report AVETMISS data for your students, you need to collect the student’s current residential address for reporting purposes).
The AVETMISS field labels are often phrased as questions, so 'Year School Completed' might be better labelled as 'What year did you complete school?'
In some website designs, the 'Help text' appears within the field before the student supplies their answer.
In other designs, it appears when the field is hovered over. Consider your help text wording in the context of your website design choices.
You can also set some conditional logic on each question, which is explained later in the chapter
Some questions within the form are attached to certain types of fields, so try not to edit existing fields to accept different data. E.G. don’t change the address field to a marketing field. These fields map to specific areas in onCourse and changing them will result in unexpected data flowing to those areas than what the system expects. Create custom fields instead.
Ordering and grouping fields under headings
You can adjust the order the fields appear in the form by clicking on the six dot icon next to the field name and dragging and dropping the field in the form.
Fields are grouped under headings. To edit the heading name or description, click the Edit button to the right of the heading name. Make your changes to the heading and click done when complete.
Heading descriptions are often used to provide instructions text to students or explain why the data is being collected.

Figure 277. Editing the heading and description that appears before a group of data fields.
Adding and deleting fields on the form
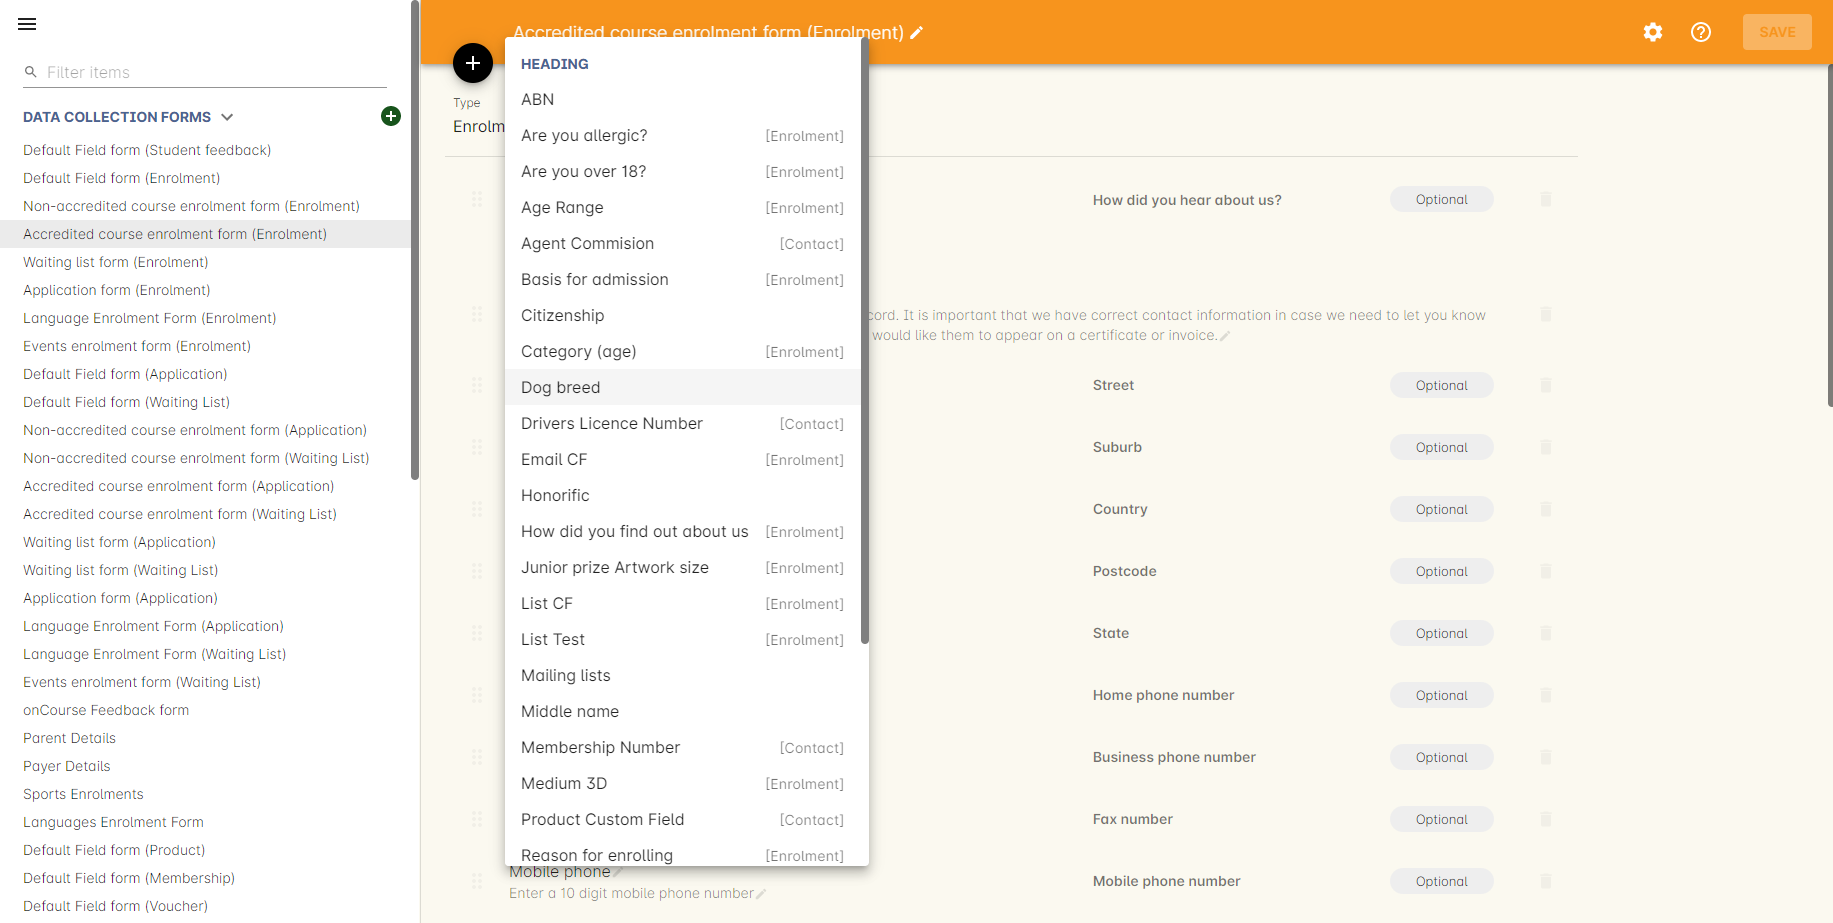
You can add additional onCourse standard contact fields, or your own custom fields to the form by clicking the + button under the form name. Select the field from the drop down list available. Fields you have already added to this form will not be available to select from the list again.
Your newly added field will be added to the bottom of the form you are editing. You will need to drag the field to the placement you want in the list.
Your custom fields are also available to add to forms. You should be careful to only add custom fields that make sense for the type of form you are creating, however they are labelled to help with this. For example, custom fields for contact records can be added to any type of form, but only custom enrolment fields should be added to enrolment forms.

Figure 278. Adding a custom field to a data collection form
You can delete fields from data collection forms by clicking on the garbage icon on the right of the field.
New headings and descriptions can also be added to your form, and dragged to the appropriate location, like fields.
Updated over 1 year ago
