Creating sessions
In the timetable section of the class record, hit the + button to create a new session. First enter the start date and time, then the session’s duration in hours; this will fill in the session end time.
Next, set the location of the session by setting the site and the room that the session will take place in.
If the Tutor Time and Attendance section appears empty, then you haven’t added any tutors to the class. Add your tutors to the class by clicking the + button next to the Tutors heading and filling in the fields. Once added, come back to this section.
Click + next to Tutor Time and Attendance and select one of your class tutors from the drop-down list. By default, any tutor added to the session will be assigned a roster exactly the same as the session. E.G. if the session starts at 9am and ends at 3pm, any assigned tutor will by default have the same roster; 9am to 3pm, unless explicitly changed.
To set a custom roster, click the chevron next to the tutor’s name reveal the roster start, roster end and payable time fields, as well as the attendance notes field. Add your times and ensure the payable duration is correct. If the roster is different from the session, this will appear next to the tutor’s name in the session card.
Lastly, set any public or private notes for the session. These are covered later in this chapter.
How to easily create multiple sessions for different days
The following is a detailed example of how you would add sessions for a class on different days of the week. This example will use the scenario of a user wanting to add a total of 10 sessions over consecutive Saturdays and Sundays.
The idea here is to create the first session for each different day of the week the sessions are being held on, and then we’ll duplicate those sessions as many times as we need. First we’ll create the first Saturday session, then we’ll create the first Sunday session. Lastly, we’ll duplicate those sessions four more times each so that they take place each subsequent week from the first session, making it a 10 session class.
Here’s how:
In the timetable section of the class record, hit the + button to create a new session. First enter the start date and time, then the session’s duration in hours; this will fill in the session end time.
Next, set the location of the session by setting the site and the room that the session will take place in. Lastly, add tutors to your session.
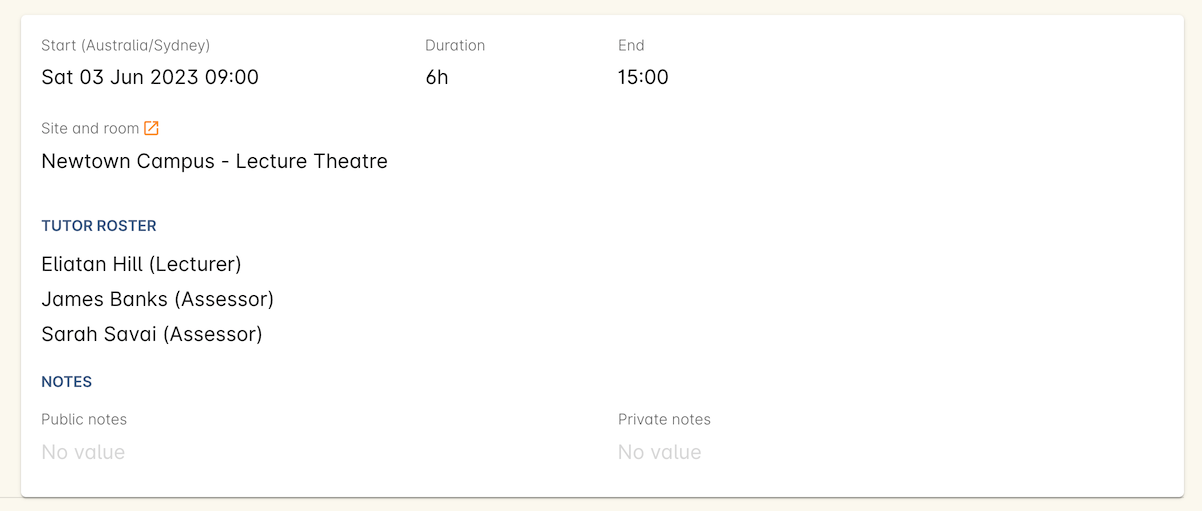
Below is an example of how your first class will look once filled out. This one starts on the Saturday 03rd June 2023 at 9am. The class goes for 6 hours, and each tutor has the same roster as the session timetable. If any tutor is given a different roster, this will be clearly indicated next to their name.

Figure 349. This session has three tutors assigned, all of them with the same tutor roster as the session
Next, repeat the steps above but for the Sunday session. When you’re done, you should have two sessions, one for Saturday and one for Sunday.
Now we need to create the other sessions. Rather than going through all of that again, we’ll simply duplicate both sessions four times each, giving us five sessions on Saturday, five sessions on Sunday, and a total of ten sessions altogether. In the session you wish to duplicate first, click the repeat button, it’s directly to the left of the delete icon inside the session view.

Figure 350. The Repeat Session icon
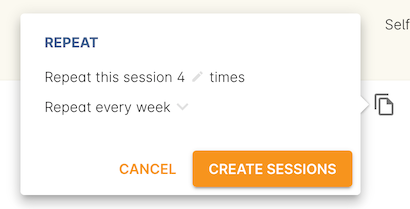
Set the number of times you want the session to repeat, and then how regularly you want it repeated. You can select between Hours, Days (including weekends), Days (excluding weekends), Weeks, Months and Years. For this example we’ll set this to repeating 4 times and to repeat every week.

Figure 351. You can have a different value for the session duration and for the sessions payable hours
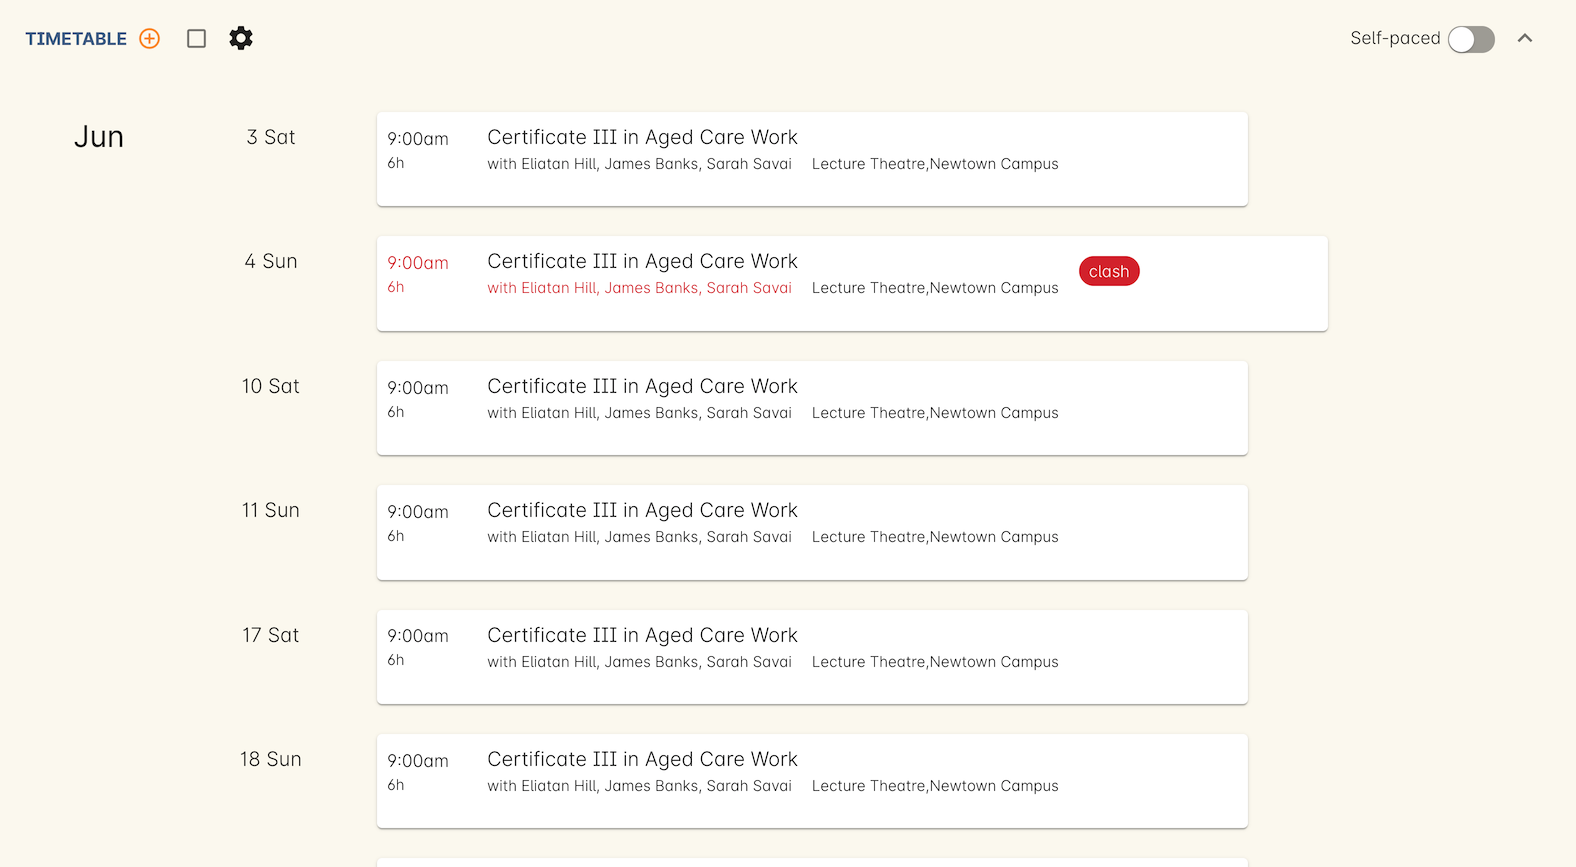
Press the button 'create sessions'. You should now see the sessions for Saturday appearing like so:
Now you need to do all of this again for the Sunday sessions. Once completed, your timetable should appear as the example below.

Figure 352. Newly repeated sessions appear like this until you save the class
If you create any sessions in error, simply hit the delete button on that session and it will be removed.

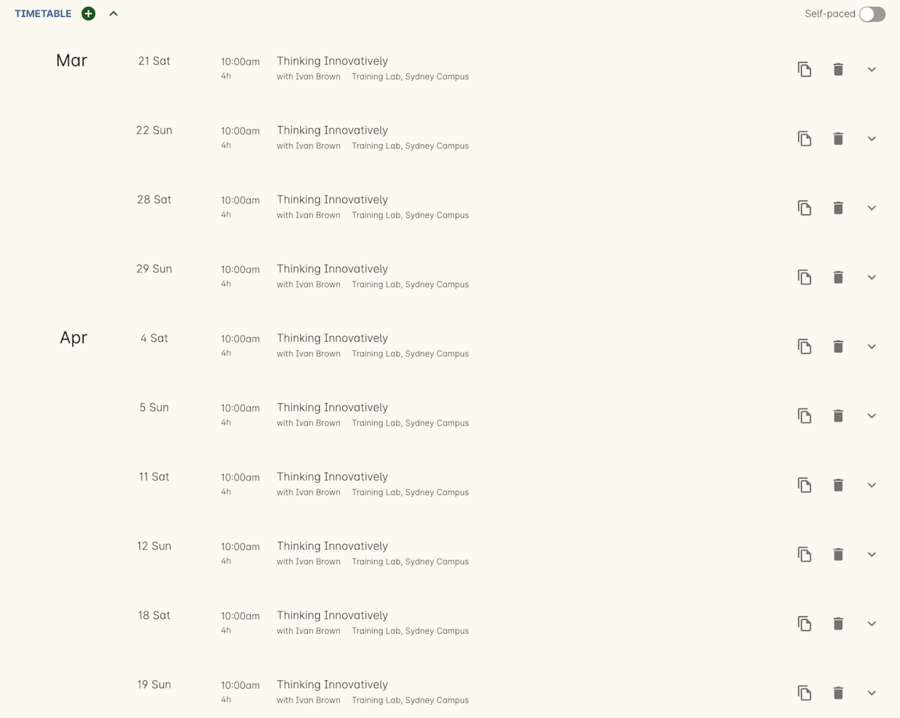
Figure 353. The ten class sessions for the scenario described above.
Updated over 1 year ago
