Setting up your Corporate Pass within onCourse
This section will outline how you can set up your Corporate Pass:
-
To create a new Corporate Pass, first you need to go to the Corporate Pass window by searching for Corporate Pass on the Dashboard. You can then create a new Corporate Pass by clicking on the + symbol in the bottom right-hand corner of the new window.
-
The minimum required information to create a new Corporate Pass is a contact or company name and a password.
The Company or Contact must already exist as a record within onCourse prior to creating the Corporate Pass.
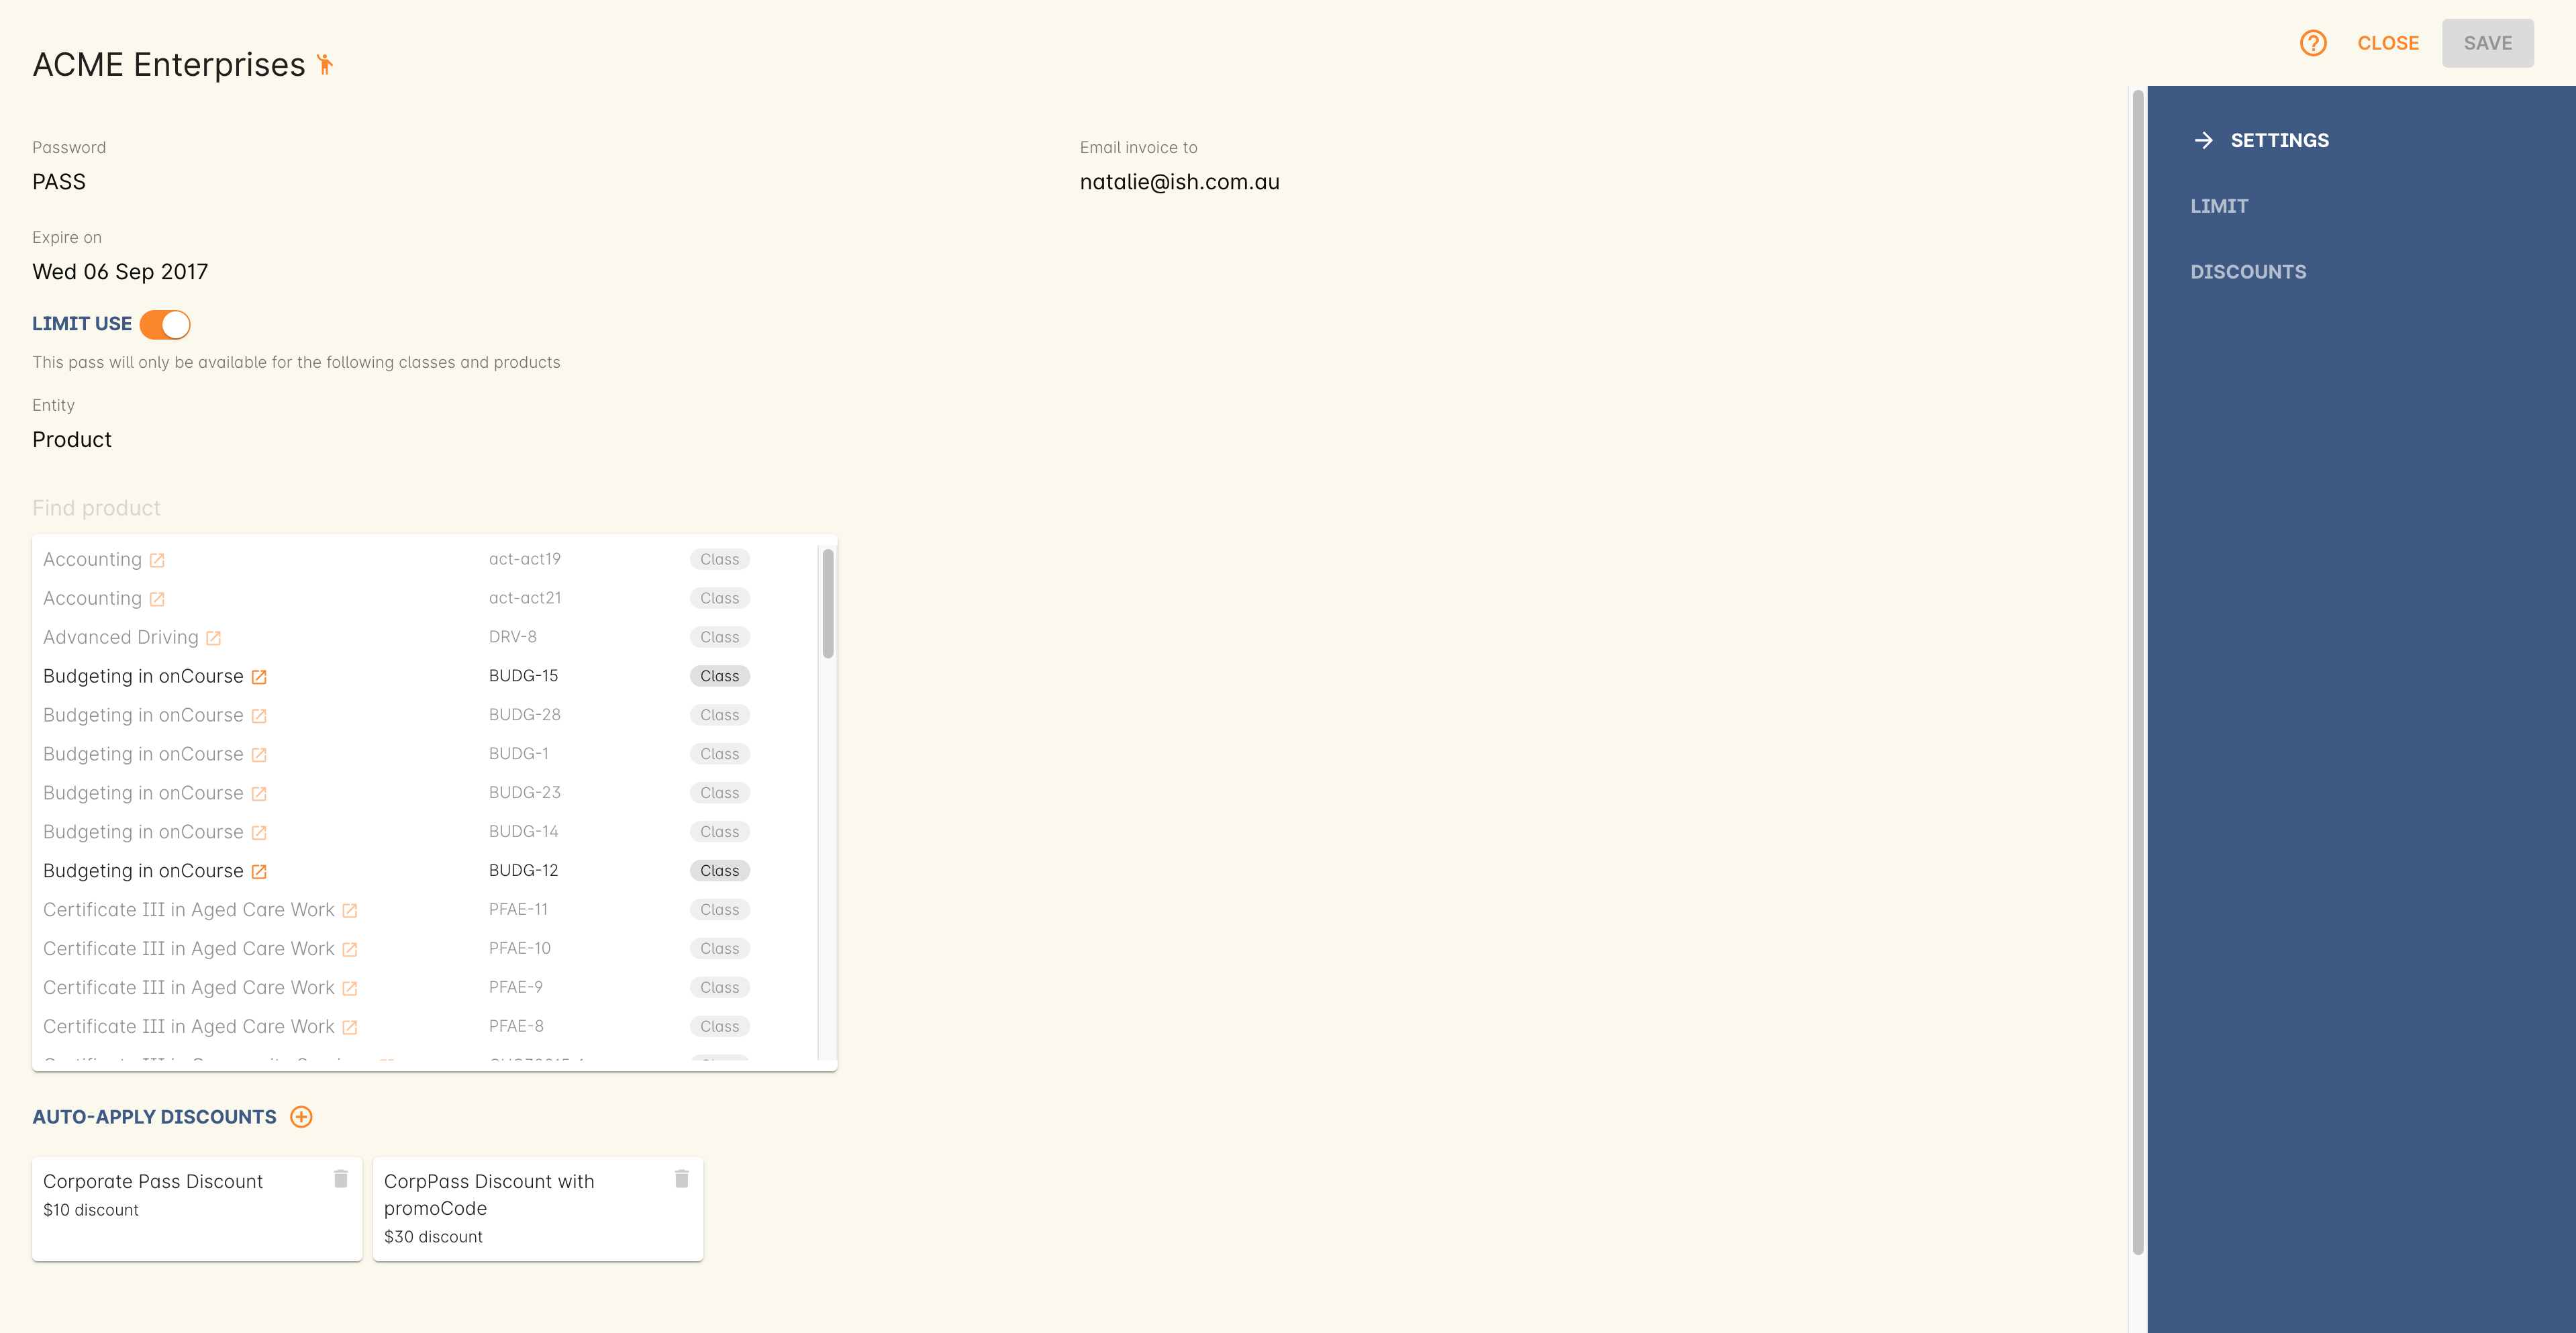
If you create a Corporate Pass with these bare minimum requirements, it will be available to use for any class or product.You can also specify as to which email address the invoices will be sent to, the default is usually the email address of the contact. An expiry date can also be set for a given Corporate Pass, but this is not a required field. If you wish to set invoicing terms for a specific Corporate Pass, you can set this on the Financial tab of the Contact you have set as the company/person to invoice.

Figure 167. Corporate Pass Edit View
-
If you want to restrict the Corporate Pass to certain classes or products, you can add these in the Limit section by activating the switch, then typing out the name or code of the class you want to add. You can also leave its use unrestricted by leaving the Limit switch inactive. You can:
- Add a single class, will only be valid for the specified class.
- Add all classes for a given course.
- Add a selection of classes from any course.
- Add a single, or selection, of products.
Updated over 1 year ago
