Users
In user records you can add to or edit existing users details such as their name, email address, access level or send a password reset request. Only users with admin rights will be able to see, edit, and add users. Everyone else can only edit their own user settings. There are no limits to the number of users you can create in onCourse. Users should be deactivated if they leave your organisation.
Every person in the organisation who uses onCourse should have their own user account. We do not recommend users 'share' a login as various user layout preferences are saved against each user account. Important records created in onCourse like invoices, payments and enrolments are linked to the user who created them. If you need to follow up any discrepancies, this is made much easier when your staff each have their own user.
- Name - A name for the user record. This isn’t used to login with, this is just an identifier.
- First Name - The user’s first name
- Last Name - The user’s last name
- Email - the users primary email address, also used for login (this email address will be used for the CMS login process).
- Bank cash/cheques to site - This should be the physical site where your staff are working. Select the site from the drop down menu. This is important if you take physical cash, cheque or EFTPOS payments at these venues and you need the site banking process to correctly tally the location balances.
- Active - selecting this allows the user to login to onCourse. If active is not selected, the user will receive an "authentication failed" message at the onCourse login screen.
- Admin - Checking this will allow the user to be an admin, they will have full access rights and can assign roles and rights to other users.
- Last logged in - not editable, just tells you when that user last logged into onCourse.
- Can edit CMS - this is a special permission that allows this user to login to your website via the CMS URL and make changes to the website pages directly. You do not need this permission to edit website content like courses, classes and products via onCourse.
- 2FA status - displays whether this user has two-factor authentication enabled or not.
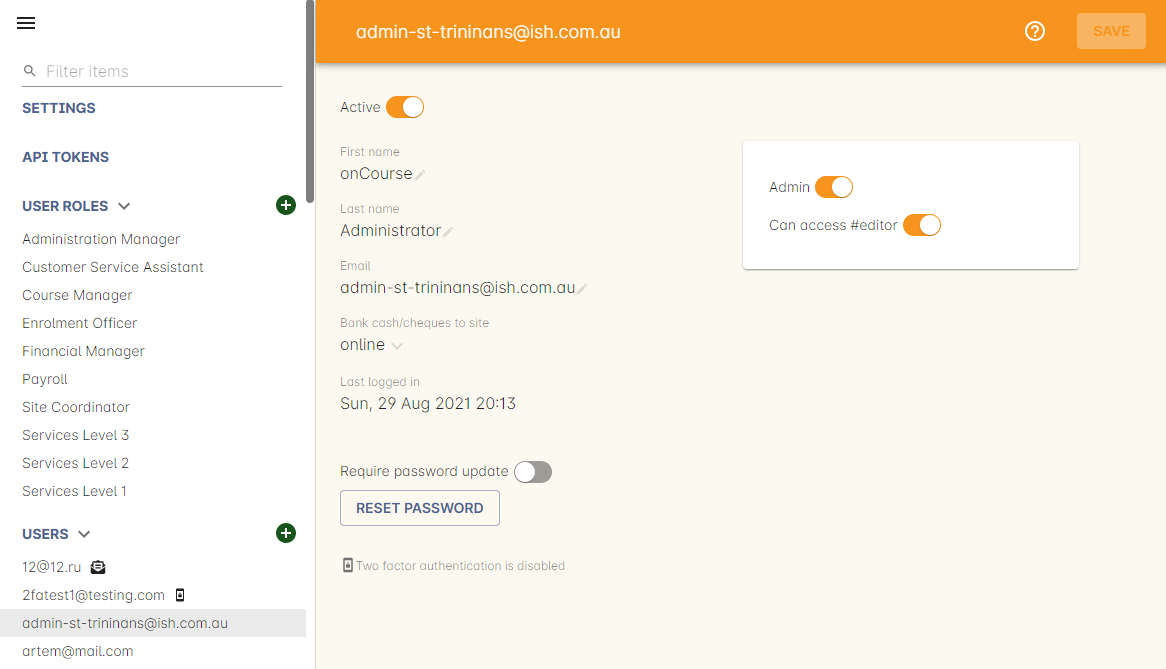
Figure 32. Viewing a user account
Creating new users
In the left-hand column in the Security window, click the + button next to the Users heading to create a new user.
When creating a new user, the 'Save' button will read as 'Invite' and, when clicked, will send out an email to the new user asking them to click the link to accept the invitation to become an onCourse user. The user record will appear in the user list with a 'Invited' pill icon next to their name.
The new user will not be able to login until they have accepted the invitation. If there are issues with the invitation not being received, the 'Save' button will appear as a 'Resend Invite' allowing you to resend the invitation as many times as required.
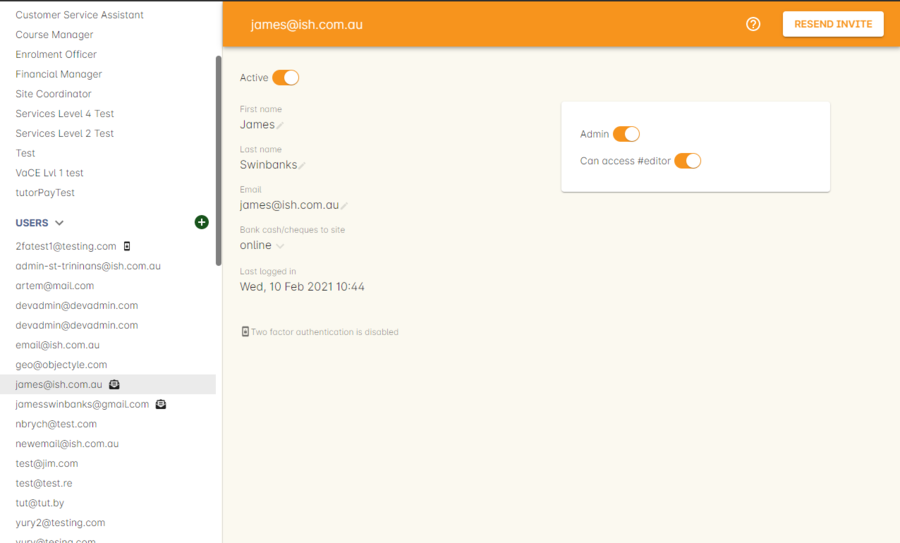
Figure 33. Click "Resend Invite" in order to resend an invite to a user
Resetting passwords
if a user requires their password to be reset, an admin user can 'reset' a user’s password by clicking the 'Reset Password' button inside the user record. The user will be sent an invite to change their password. This invite is only active for 24 hours and will need to be resent if it expires.
If a user has this sent to them, then their current password will be immediately reset and they will not be able to log in until they have set a new password.
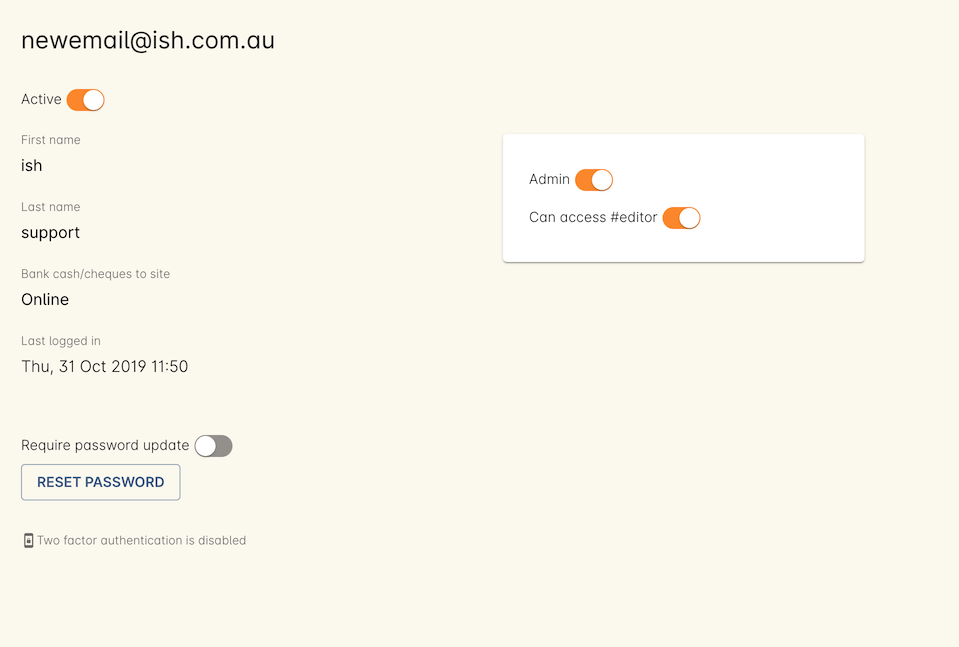
Figure 34. 'Click "Reset Password" to reset a password for a user.
The Save button changes to Resend Invite and the user gets a small invite icon appearing next to their name in the user list.
If your College has more than one Administration Centre, it is possible to switch between these centres whilst a user is logged in via the Users section on the Security window. Simply select the user from the list on the left, and select a choice from under the 'bank cash/cheques to site' heading.
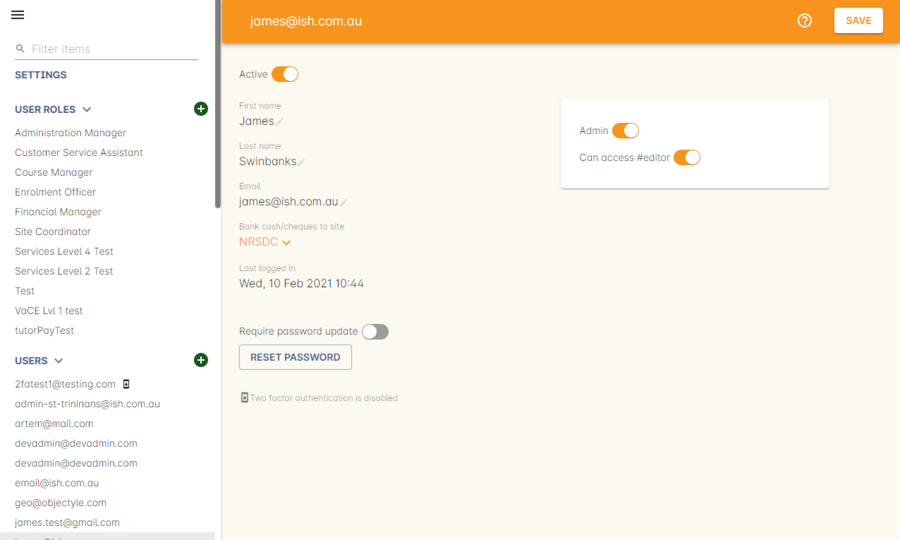
Figure 35. Switching the administration centre
Require password change every days
An administrator can request a user change their password at their next login by hitting the 'require password change' button under 'Users'.
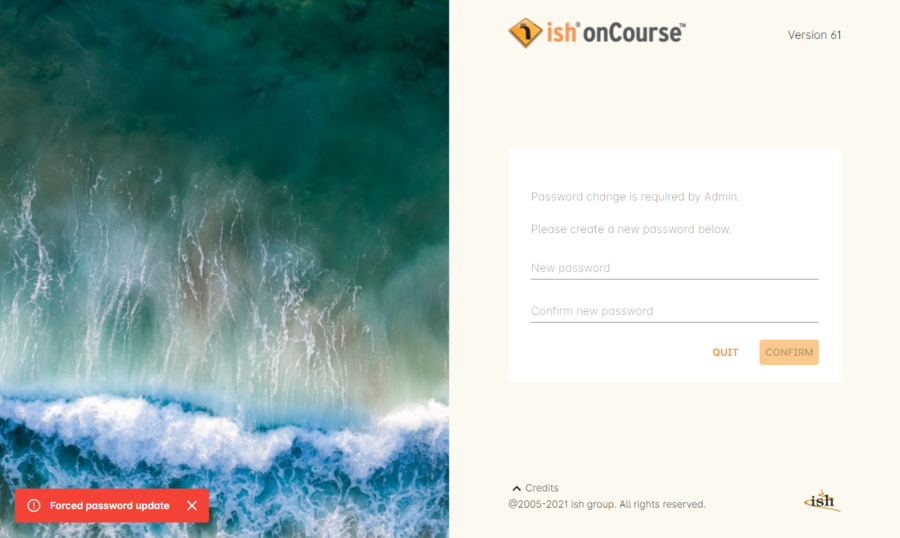
Figure 36. When your administrator requests you set a new password, you will see this screen
Require better passwords
If you have this setting enabled, the application will demand a better quality of password from your users, rejecting simple passwords e.g. a sequence of numbers or anything containing the word 'password'. If a user logs in and their password is deemed insecure, they will see a pop up prompting them to create a new one.
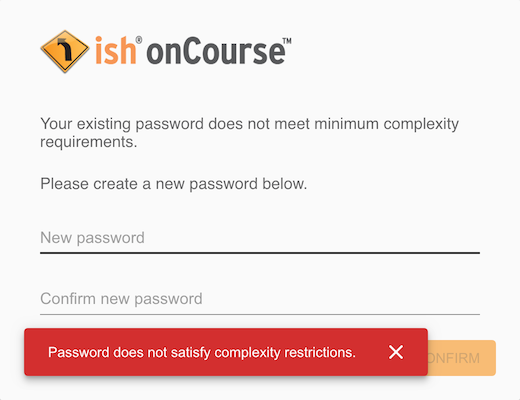
Figure 37. The prompt asking for a more secure password
Preventing users from logging in twice concurrently
If you try to log into onCourse with the same login credentials as a user that is already logged in, then a window will pop up asking you what you want to do. You will then have the option to quit your login attempt, or log in and kick the other user using the same log in details out. So to prevent this from happening it’s best to always have your own user account.
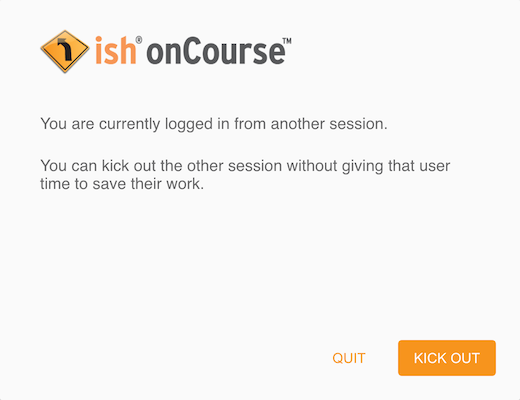
Figure 38. Users who try and log in twice concurrently will see this screen
Updated almost 2 years ago
