Student self-service
On enrolment through the office or the web, onCourse will send an email enrolment confirmation to the student. If the course is VET flagged, the confirmation template will include some text directing the student to obtain and supply you with their USI.
Another default script in onCourse can be enabled to send a reminder email to students every Monday at 9am until the class is complete or the USI is entered. You can modify these templates or alter the script which determines when and how often to send these emails.
Note that students are only sent this email if they are enrolled in a VET flagged class, to avoid bothering your students engaging in non-VET training, however by default VET flagged courses without qualifications or units will also trigger this email as they are usually reported via AVETMISS for funding arrangements. You may wish to alter the scripts to only send the email when the course has a qualification record attached.
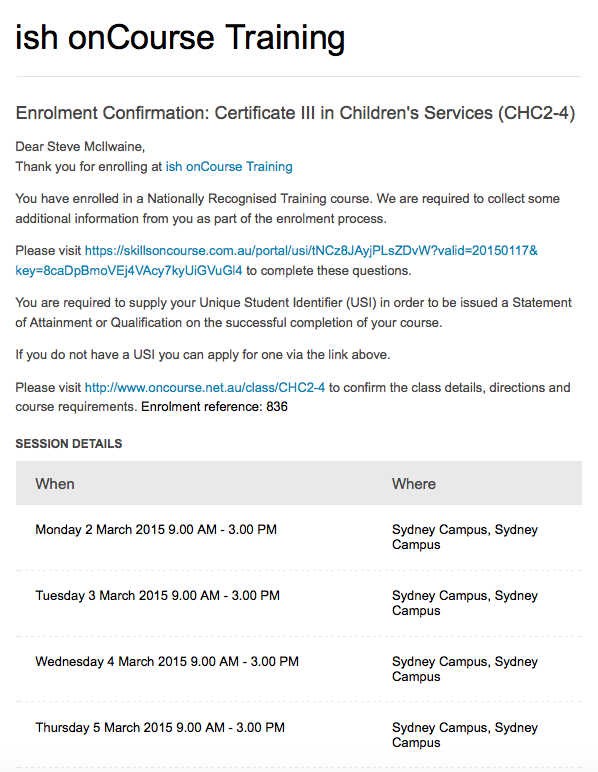
Figure 450. An example of a confirmation email with USI information
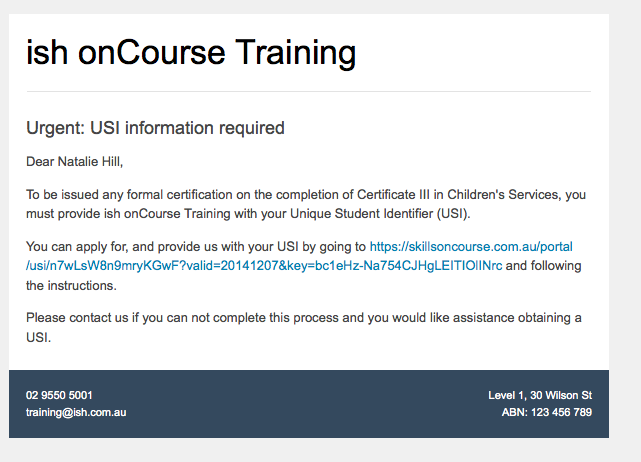
Figure 451. An example of a USI reminder email.
Once the student gets the email requesting their USI, they will be able to click on a link which takes them directly to a page within the skillsOnCourse portal. They will not require a password and the link will be valid for 7 days from the email being sent. The URL is cryptographically signed so that they will not work after the expiry date and they will not be transferable between students.
You can change the default 7 days expiry to any number of your choosing by editing your enrolment confirmation and USI reminder email templates.
The skillsOnCourse portal page will explain the USI to the student and give them a convenient link to create or recover a USI if they don’t have one or have forgotten it.
This has been optimised so that it can be used on mobile and tablet devices.
The student will be able to enter the USI and onCourse will handle the verification process automatically.
The student will be asked to complete three steps
Step 1: Personal Details
The first step requests additional contact data not already captured on enrolment, that is mandatory for AVETMISS reporting or USI validation.
No information they have previously supplied will be visible, only fields that are currently blank.
This allows you, if desired, to collect minimal information during the online enrolment process and request the additional data be supplied post enrolment.
In the example below, the student is required to complete some mandatory fields such as their street address and country of birth, plus some options contact details such as home phone numbers.
Previously supplied contact details like email address and mobile phone number are not displayed.
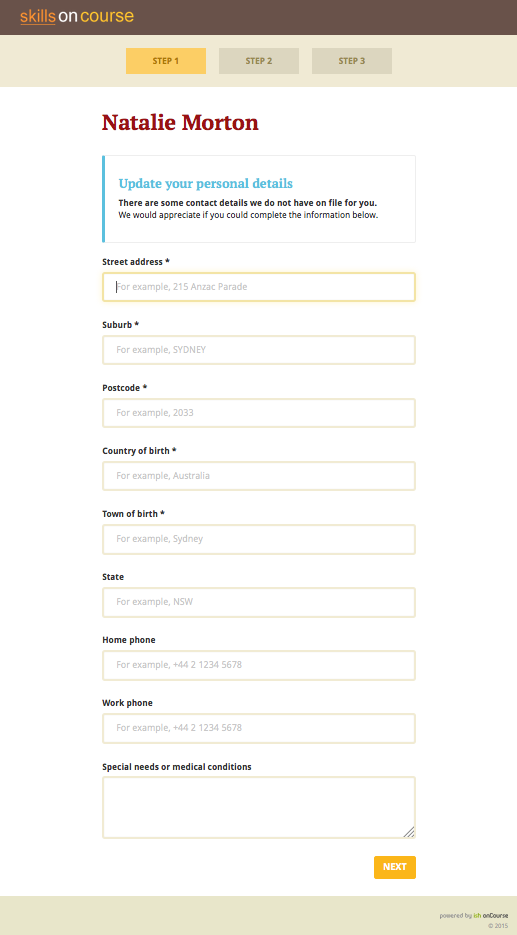
Figure 452. Step 1: This is the screen the students will arrive at. Fields will only be shown if data isn
Step 2: AVETMISS questions
The second step requests the student complete the AVETMISS questions.
Responses to these questions are not mandatory but may be important for verification of student access to various types of government funding, for example, accessing lower student fees for Smart & Skilled funded programs.
For each VET enrolment the student has in progress, they will be asked to complete a 'reason for study' question.
Some students may have this question once, for a single enrolment, where other students enrolled in multiple programs.
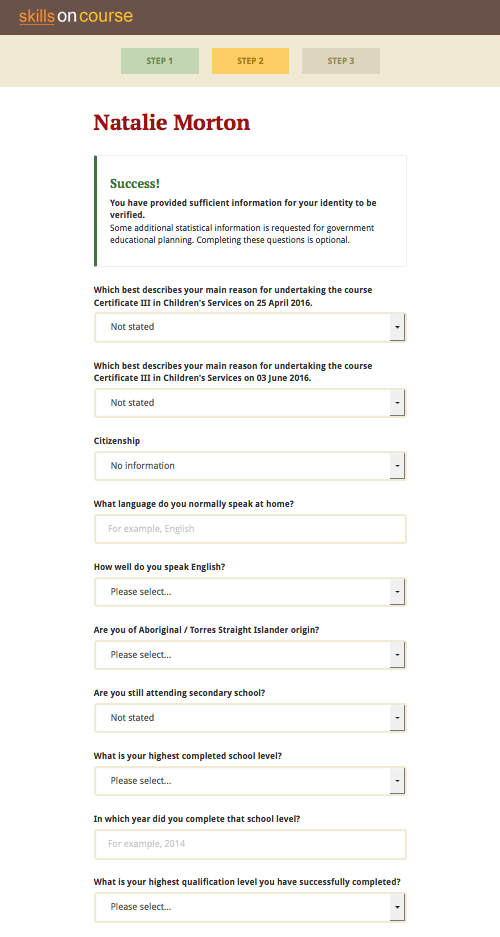
Figure 453. Step 2: The student completes the AVETMISS questions.
Step 3: USI
The third and last step requests the student supply their USI. If their date of birth was not supplied on enrolment, they will be asked to enter this also.
If the student doesn’t have, or know, their USI, they can click on the link to visit the USI Agency website to obtain or retrieve it.
On clicking next, the student’s USI and contact details will be verified with the USI Agency.
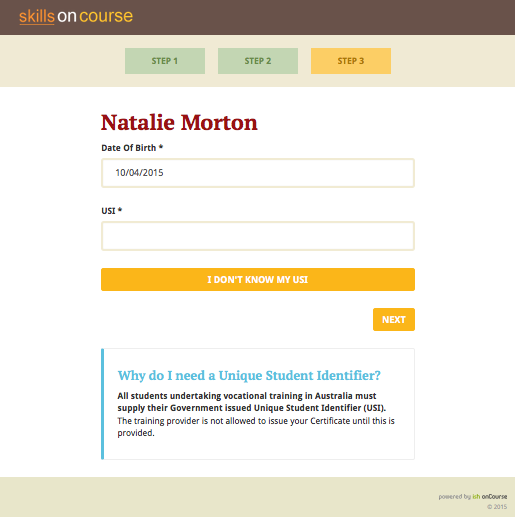
Figure 454. Step 3: Provide your USI
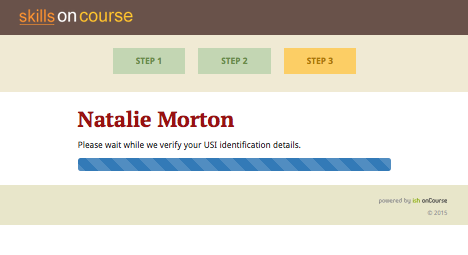
Figure 455. Step 3 in progress: While the USI is being verified they will see this window.
If the USI agency reports back that the student’s name is wrong (for example, they enrolled in onCourse with their maiden name but their USI is issued in their married name) then onCourse will give them the opportunity to fix this.
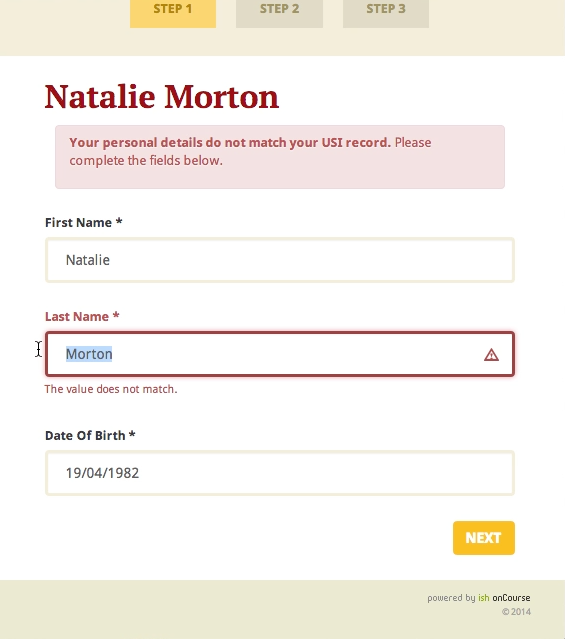
Figure 456. Step 3 failed: The students name doesnt match the USI Registry data. They have the opportunity to correct the data in onCourse.
Updated over 1 year ago
