Export Templates
onCourse Export files
The list of exports available to you will include those supplied as part of the default onCourse application configuration and any additional custom exports you have created or have commissioned ish to create on your behalf.
Generally, export files that end with CSV (comma separated files) are designed to be opened, viewed and edited in a plain text editor or spreadsheet application. These are flat files containing columns and rows of data. Export files that end with XML (eXtensible Markup Language) are designed to be imported into other software applications and represent a relational data structure.
Each export displayed in this list has a Name, Type, Output, Key Code, Variables, Options, and an Available From section.
The Name is a descriptor of the export and usually includes information about the export format type.
The Type (formerly Entity) is the object in the database that the export is joined to, and will indicate which list view you will be able to find this export.
The Output is the requested file extension of the export and the types of Variables that become available to you.
The Key Code is a unique identifier for the export and when supplied by ish as part of the default onCourse application will begin with 'ish'. When the export is custom, the key should begin with an identifying acronym for the organisation.
Variables are values that are set when you run an automation (a script, import, print report or export). This value is then used to change the behavior of an automation without directly editing the code itself. A variable can be a date, a word or checkbox. For example; perhaps you would like to write a script to check what classes will start between now and a specific date. You can add a date variable to this script so you can change specified date when the script is executed.
Like variables, Options are values that are used to change the behavior of an automation. However, an option’s value is set while editing/creating a script. For example; imagine you’d like to change the message template that is sent to students by a script. An option could be created and inserted into the script so that user can set the template without having to go into the code to change anything themselves.
You can double-click on the export record in the list to see the structure of the export file, what fields are included and what formatting is applied.
The Filters search panel in the left-hand column can help you find specific exports you’re looking for by simply typing the name of the export.
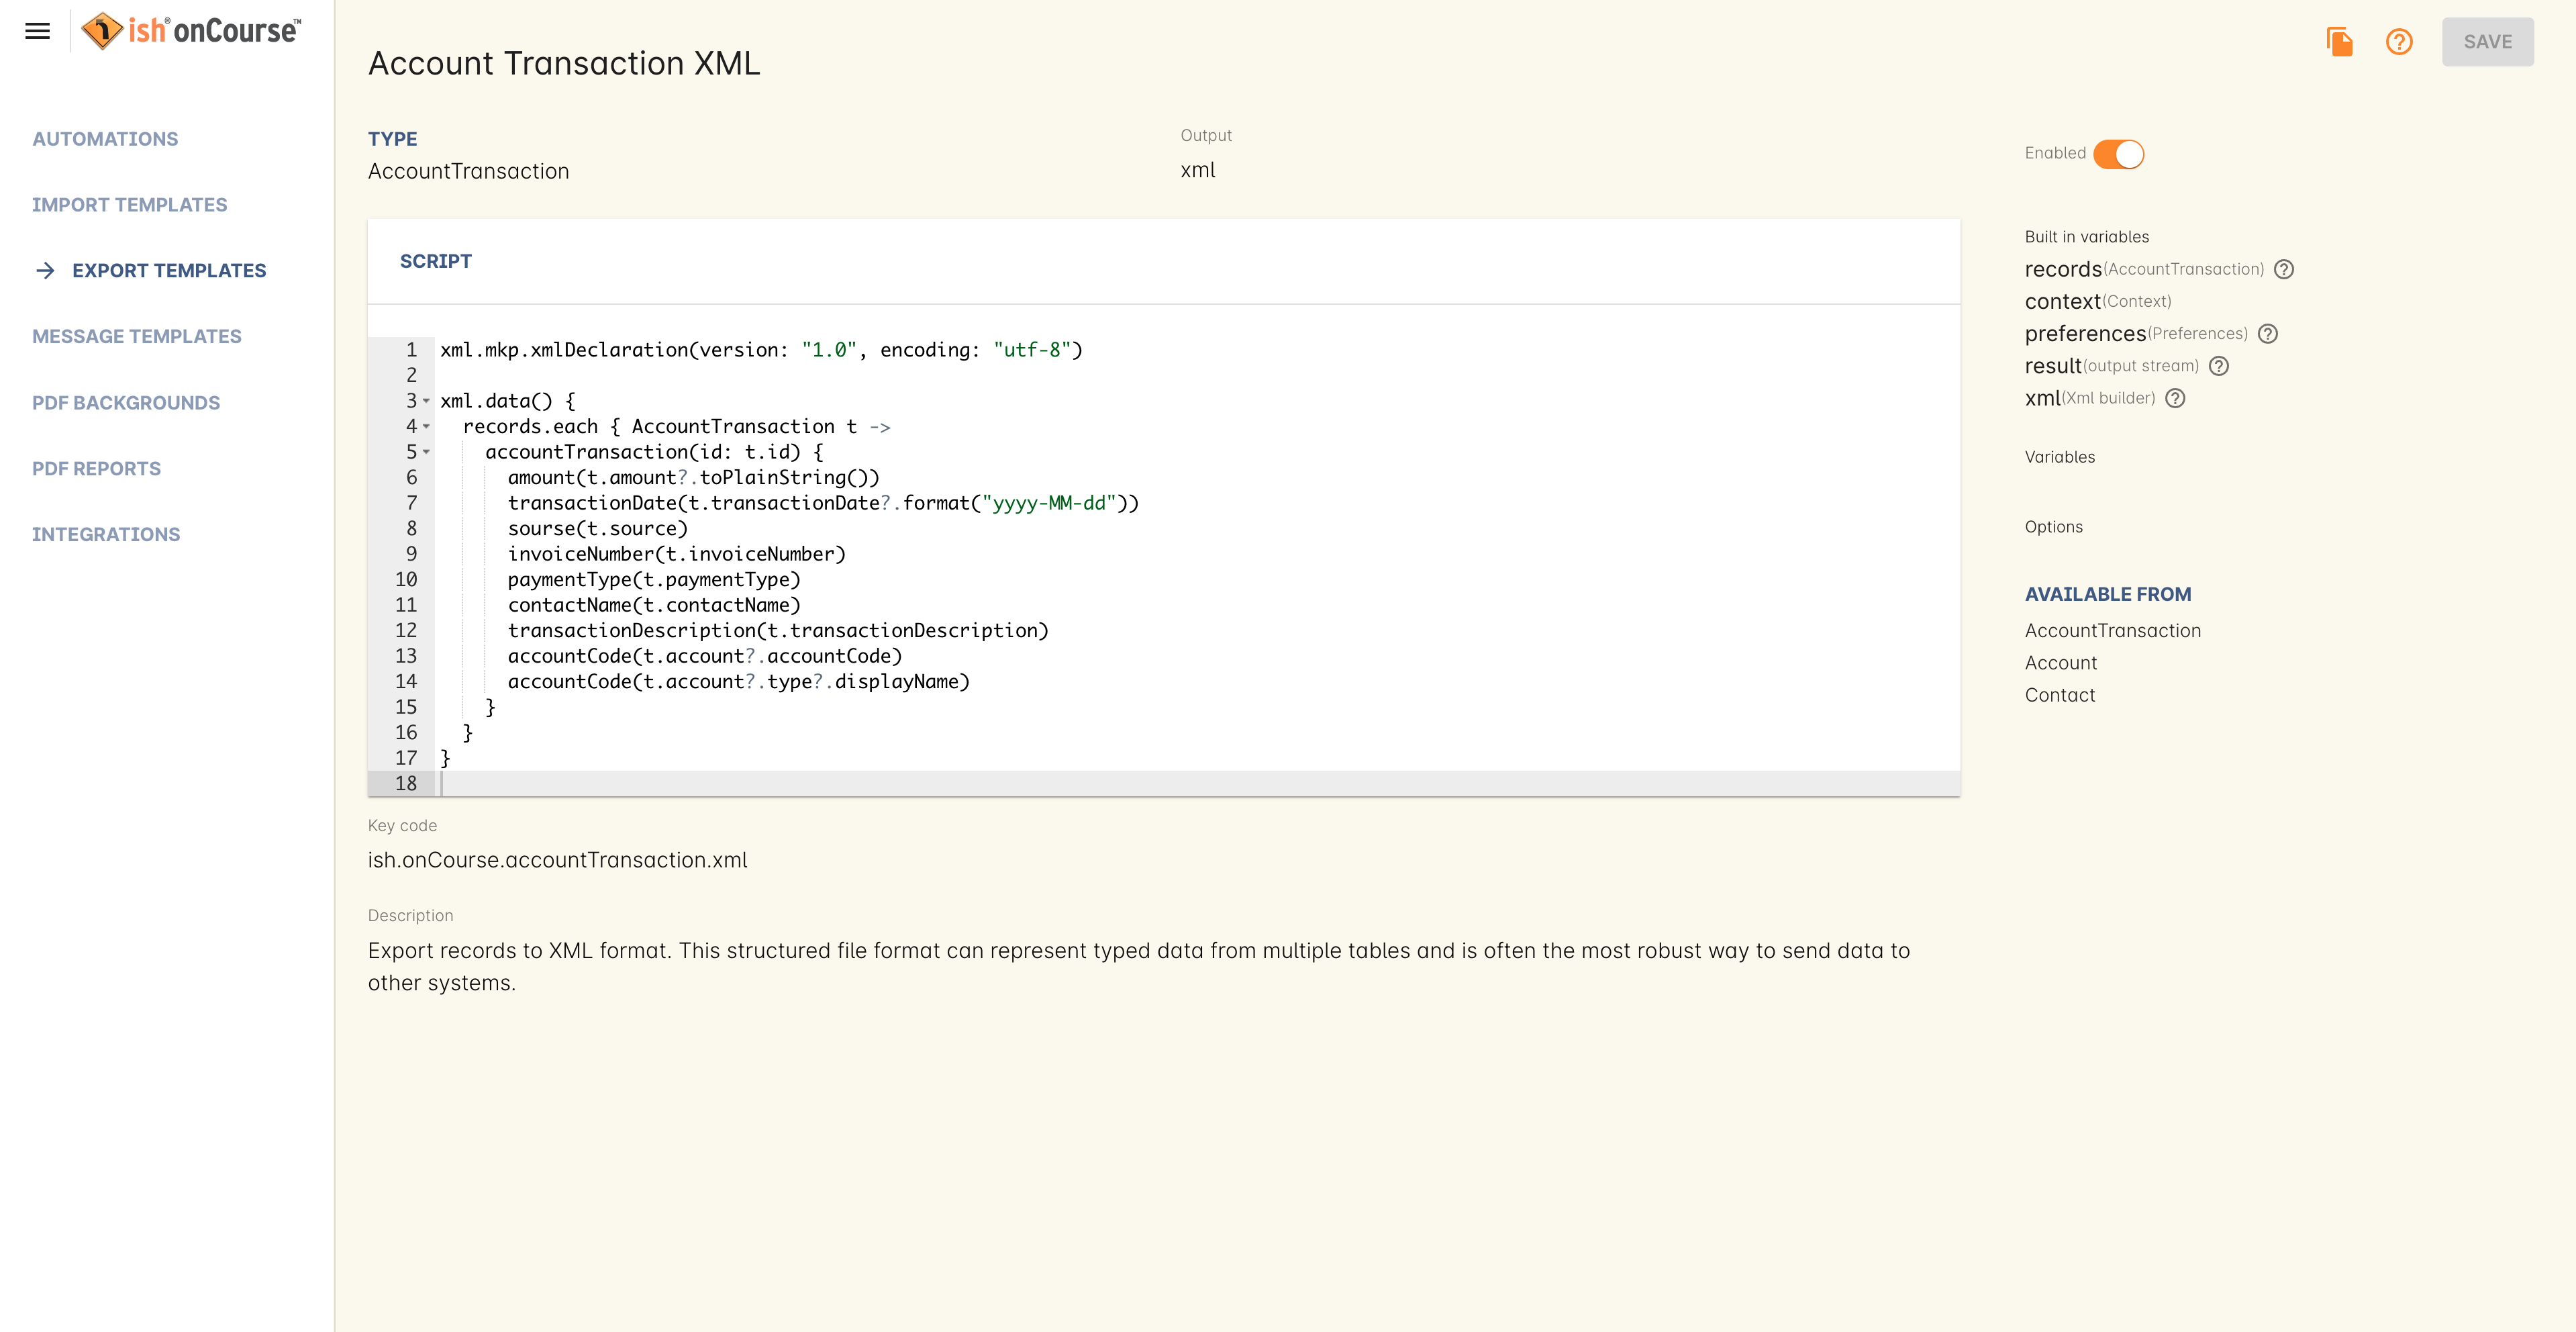
Figure 330. Export templates in the Automation view
How to Export
Like print reports, the list of available exports in the list view are those exports linked to the entity, or list view, you are viewing.
Each list view in onCourse has the ability to export data in a variety of formats. To export, you can either highlight the records you wish to export and click on the Share icon, or just click the Share icon without selecting records. In the Share menu, select 'Excel'.
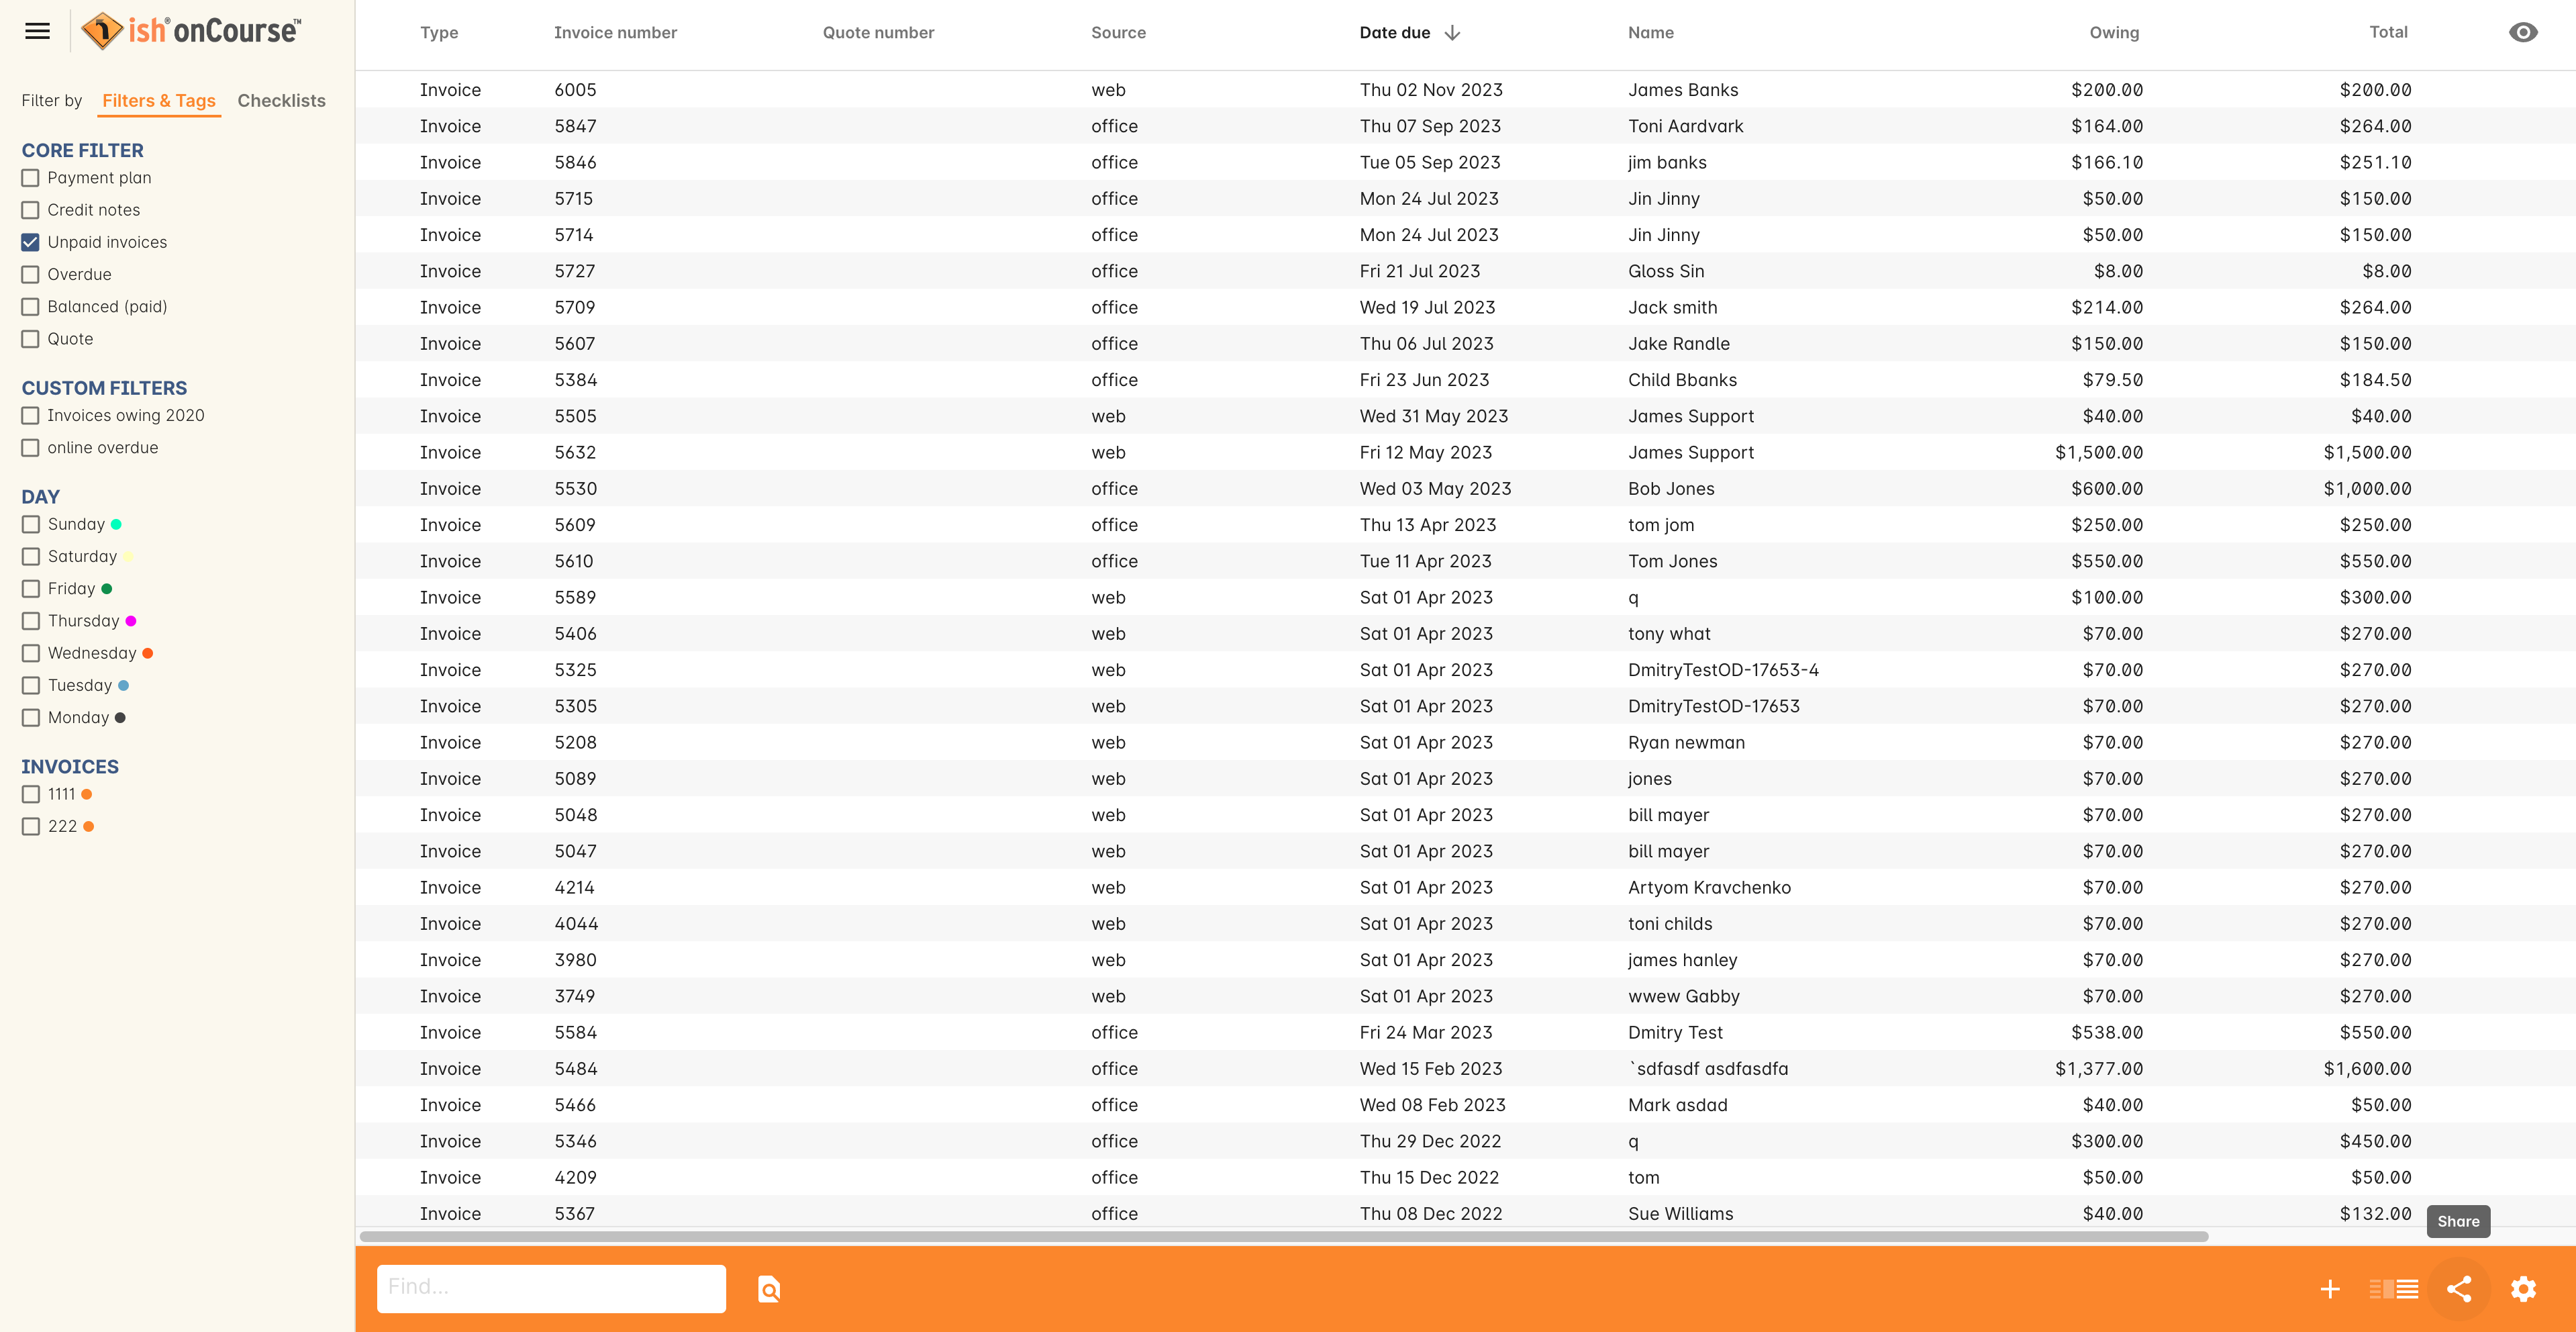
Figure 331. Share Icon in the bottom-right of the Invoices list view
Next select the export name. Finally, you can choose whether to include only your selected records, or all records. Lastly, hit Share.
Copy to Clipboard export
You can copy selected rows of data to your computer’s clipboard in the format of one of your system’s CSV exports. This is useful for when you’re compiling spreadsheets in excel, creating an email or word processing document. Copy items to the clipboard by doing the following:
- Highlight the records you want to copy to the clipboard
- Click the Share button
- Select 'Excel' then click 'Copy to Clipboard'
- You can then change focus to the program you want to copy the data to, and use the paste function to paste the data.
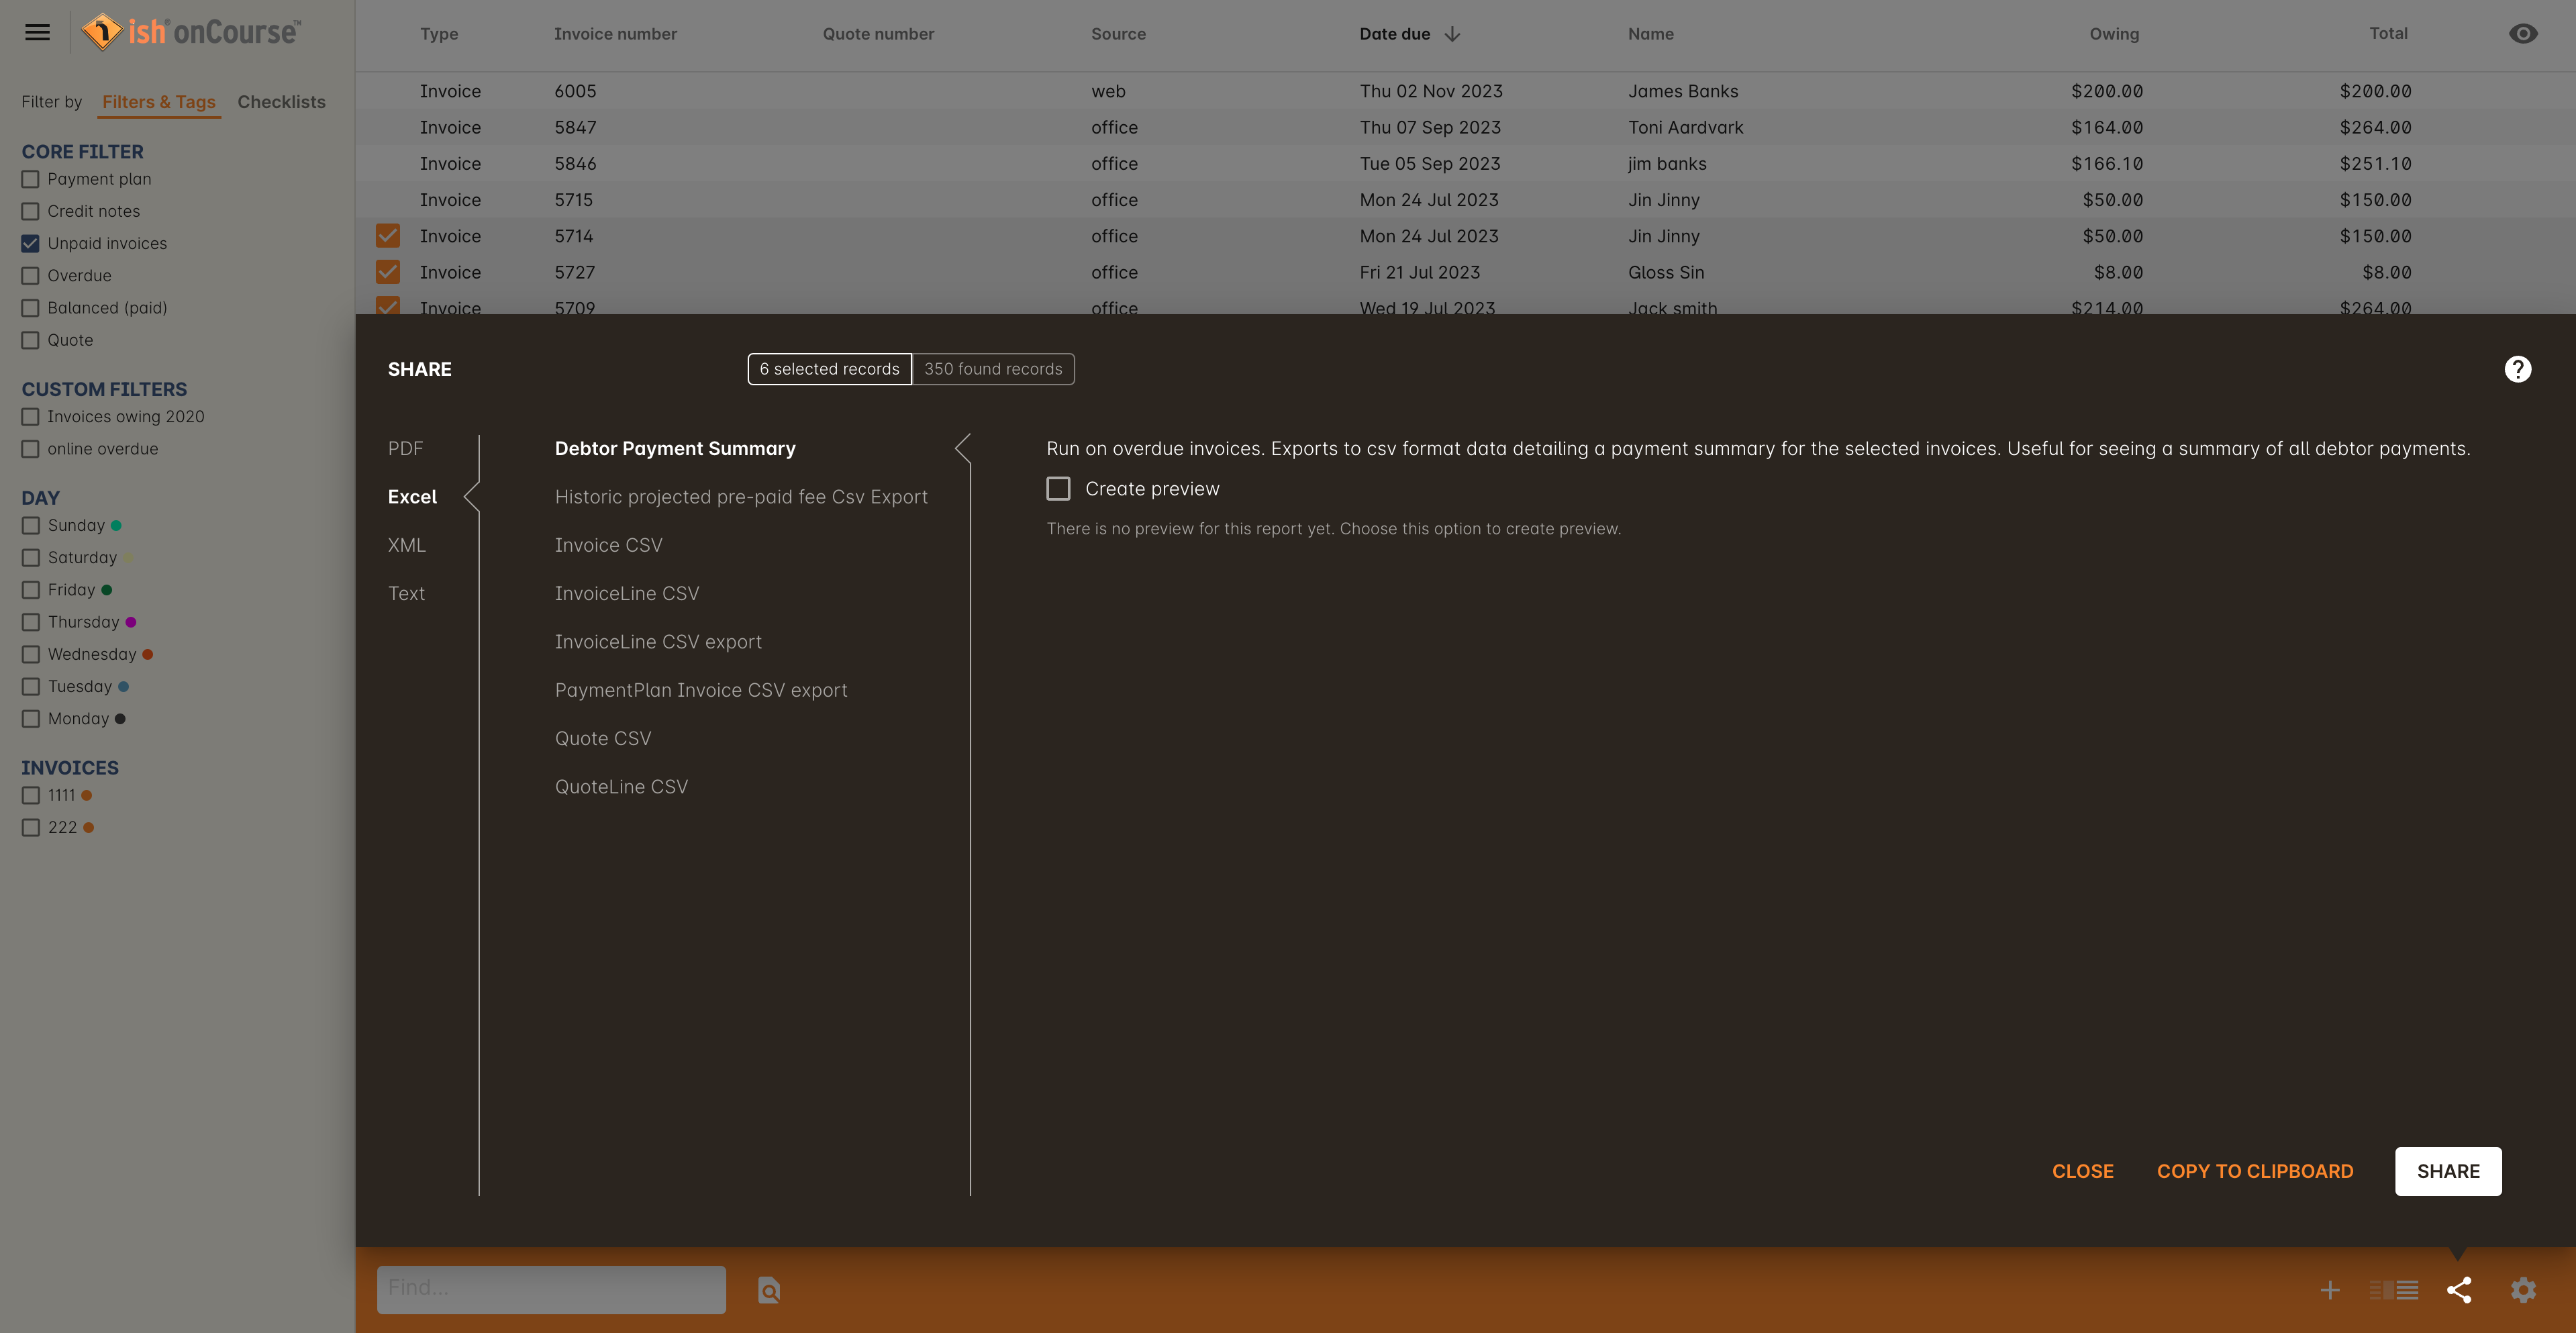
Figure 332. The selected rows of data will be copied to the clipboard for pasting into other documents
Examples of default exports and their uses
Begin by opening the Classes window and running a query or otherwise selecting the range of classes you wish to export for the brochure.
From the share options, select 'InDesign Brochure XML export' and save the resulting file to a location on your computer. This default layout includes the information from the course general section 'Print brochure description' and combines it with the class summary information including location, cost, start date and time and tutor. The information is grouped by the Subject tag hierarchy.
The XML file is designed to be imported into a publishing product such as Adobe InDesign and then customised however you wish with the addition of styles and images. The XML tags in the onCourse export can be mapped to styles in InDesign, allowing the data to be imported and dropped into a brochure layout as many times as needed during the production cycle process. The XML file created by onCourse is not designed to be opened or edited in a product like Word - it is designed for import into a specialist layout and design software tools. If you do not have software that can work with these files installed on your machine, you should be able to email the file to your design staff for them to work with directly.
The class list includes a number of CSV exports, some with specific purposes. The 'CourseClass CSV export' is a generic export that includes most of the class fields.
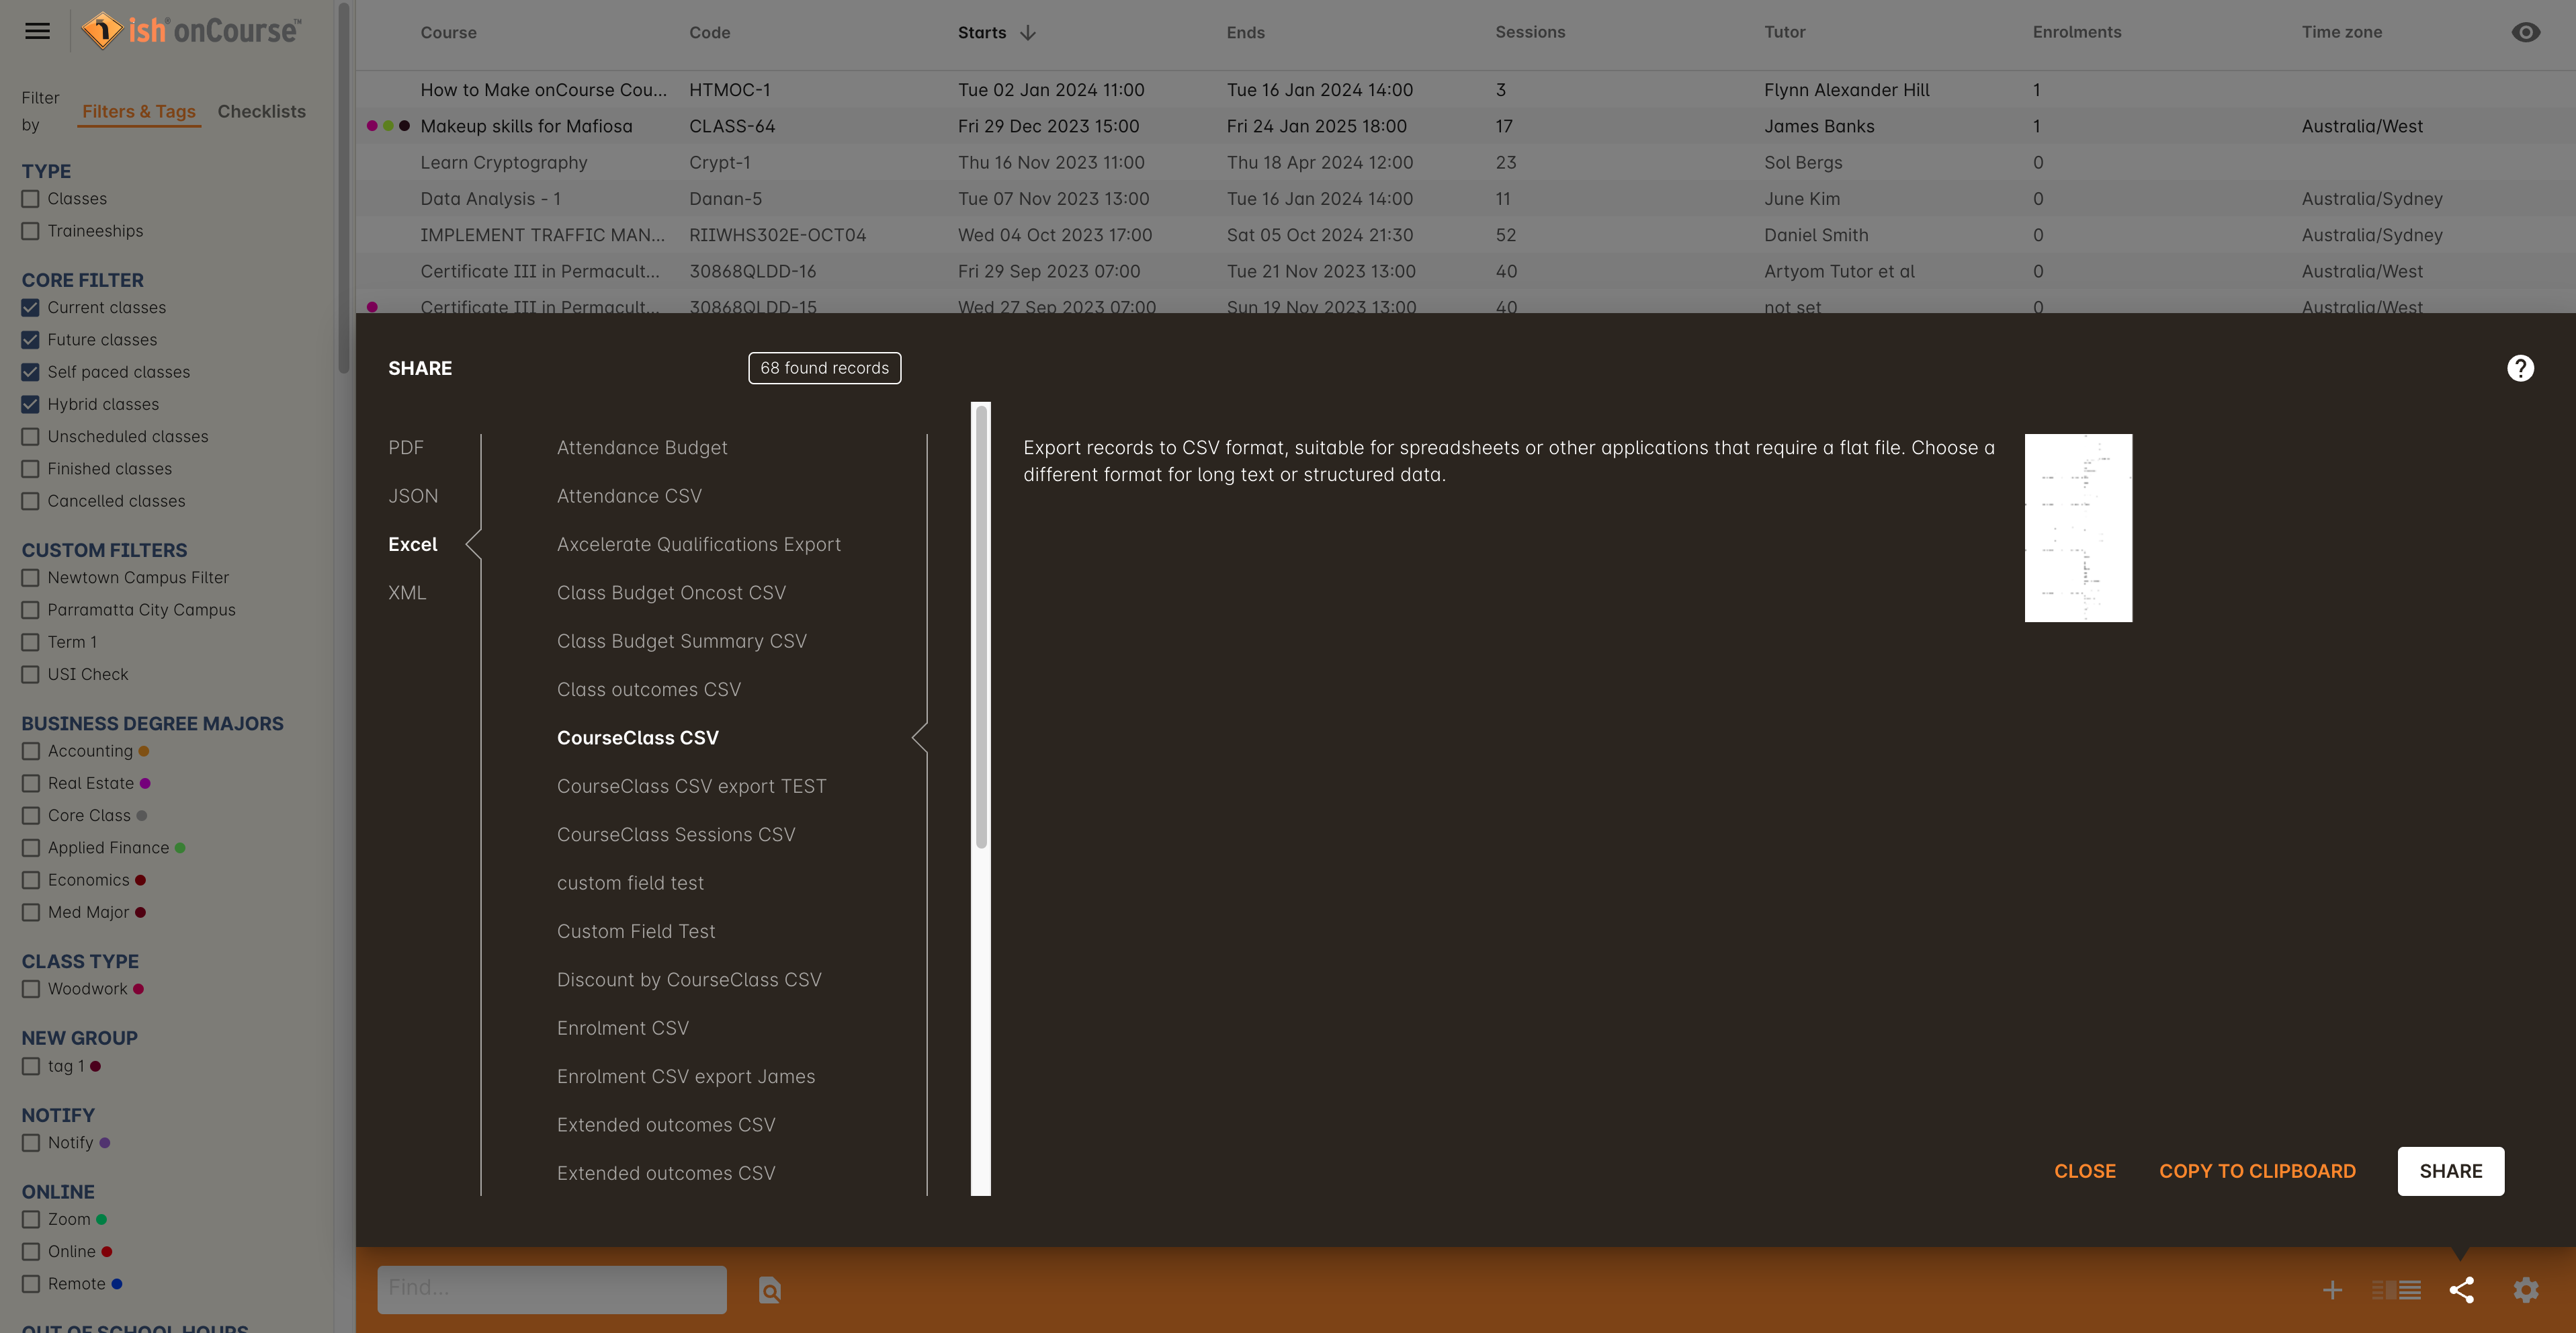
Figure 333. Available exports accessed via Site List
-
Highlight the Class records you wish to export within the Class window.
-
Click the share icon in the bottom right-hand corner of the list window
-
You then have the following export options to select from the drop down menu:
CourseClass CSV export
Standard export of Class information
Figure 334. Excerpt of standard Class export viewed via excel
Class Budget Summary CSV export
Provides a Class per line summary of budgeted income and expenses against projected and actual costs.
Figure 335. Excerpt of Class budget summary export viewed via excel
Class Outcomes CSV export
Report for student outcome results for date range so Colleges can conduct their own reporting and easily identify students with outcomes that are not set.
Figure 336. Excerpt of student outcomes export viewed via excel
Extended Outcomes CSV
A report to show data like the AVETMISS NAT00120, but in a human readable format
Figure 337. Excerpt of extended outcomes export viewed via numbers
CourseClass Sessions CSV
Export for class session information including enrolments, room allocation, seats available and tutors assigned
Figure 338. Excerpt of Class sessions export viewed via numbers
Attendance CSV
Export for class session attendance showing who marked the roll (online or via the office) and when the attendance was last modified information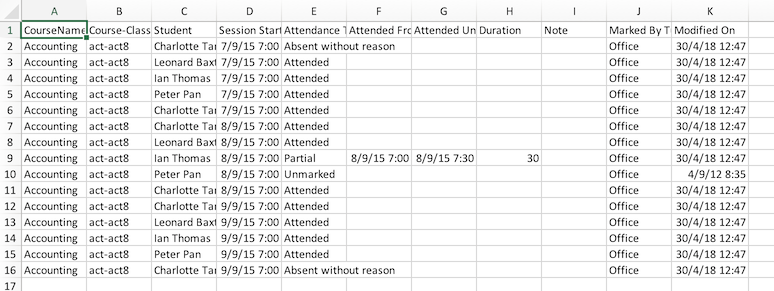
Figure 339. Excerpt of Class attendance export viewed via Excel
When exporting the above class exports, the resulting CSV output file will have the same name in all instances: it will be labelled as 'CourseClassExport.csv', with the date and time of the export being appended to the end of the file name. You can then re-label these export files to whatever you need.
onCourse enables users to export not only the invoice information, with each invoice reflected as one line within the resulting output file, but also export the invoice line detail.
- Highlight the invoice records you wish to export information for from within the Invoice window.
- Select the share icon
- You can then export either the invoices as a standard Invoice CSV (one line per invoice) or alternatively you can export the invoice line detail.
The following excerpts of the exported information as shown within excel, provides a comparison between the kind of information that each export generates within the resulting output file.

Figure 340. Excerpt of invoice export viewed via excel

Figure 341. Excerpt of invoice line export viewed via excel
When exporting the above two invoice exports, the resulting CSV output file will have the same name in all instances, it will be labelled as 'Invoice CSV export.csv', with the date and time of the export being appended to the end of the file name. You can then re-label these export files to whatever you need.
Updated over 1 year ago
