Using reports
onCourse comes prepackaged with a large range of reports. You can use them as is, or copy and modify any of them to suit your needs. Advanced users can also create brand new reports from scratch.
Printing Reports in onCourse
The first thing to be aware of when attempting to print a report is that you must be in the right onCourse list view to print the expected report. For example, Class roll is a report available from the class list. You cannot print this report from inside the class record, only the class list view.
From each list window, click on the Share icon, the select 'PDF' to see the list of available reports,

Figure 294. Share icon in the Sites list view
All reports are printed to a PDF file which you can save to your computer, email, or print to a printer on your network. Your computer will need to have a PDF reader installed to create and view the report.
For exports to excel, XML or other formats, look at our exports chapter.
Before you print a report, you will usually need to collate your data by running a query on it first.
For example, if you wish to print the class rolls for all the classes starting this week, you will need to do an advanced query for classes starting from today, to the last day of the week. For more information on search queries, check our search chapter.
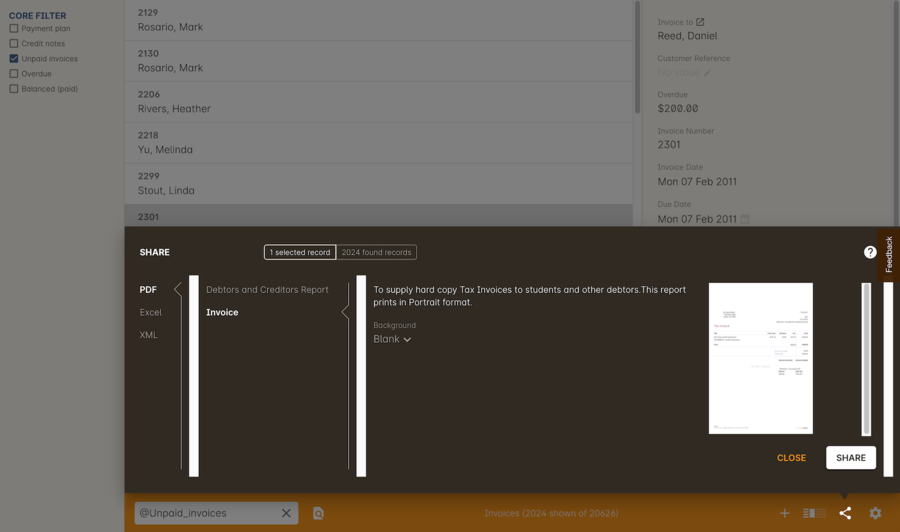
The share window provides an alphabetized list of all reports available via the given window. Select the relevant report and a summary description and print preview (if it has been printed before) is provided of the highlighted report. This description will also clarify whether the report prints in Portrait or Landscape format.
In the print dialogue, you will be asked if you want to print selected or all records. A record count will be given for each option. Choosing 'selected' will print the results you have highlighted manually, while choosing 'all' will print the report for the one or more records you have selected in the list.
Updated over 1 year ago
